The Innamincka Affair: Love. Lies. Mortal Danger. A lot can happen with an affair at Innamincka. Rebecca Boucher is a respected junior partner in a London law firm. When she’s sent to Australia to meet with the owner of a vast cattle property, she’s expecting a straightforward legal matter. But what she finds is Cooper Read More ...
Marriage in a Cold Climate View it on the UK Amazon Store The stark beauty of the frozen wastes of Siberia, where the cold can snap steel rails, and the empty sweep of the tundra, alternately a snow-muffled wasteland and an unexpectedly safe trackside haven, are vividly evoked. Against this backdrop, Robert Chalmers weaves an Read More ...
The Dragons of Sara Sara Innocence and terror meet in a fast-paced evocation of a time far in the future. Set among momentous happenings, Robert Chalmers catches a society on the brink of a new age. View it on the UK Amazon Store In an age far ahead in time, two young people from very Read More ...
This is the start for the Hardcover Dust Jacket. But we need to start the whole process again because a Hardcover book is usually somewhat larger physically than a paperback. It also has a front fold, a back fold, and a much thinker spine with additional considerations for the spine fold. That’s the part of the cover that wraps around the corners. You don’t want a book that has the image and back matter printed directly onto the card stock of the front and back. Except for the Spine, and the Printer of your book will usually take care of that. For example. The basic innner book cover, follwed by the jacket.
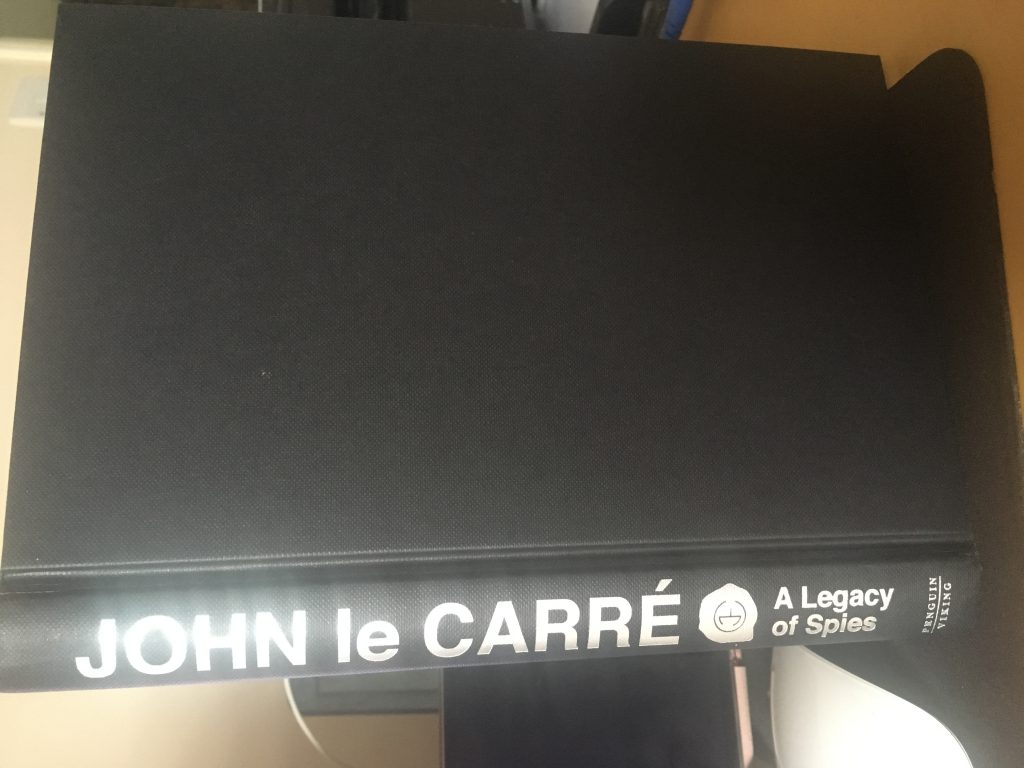
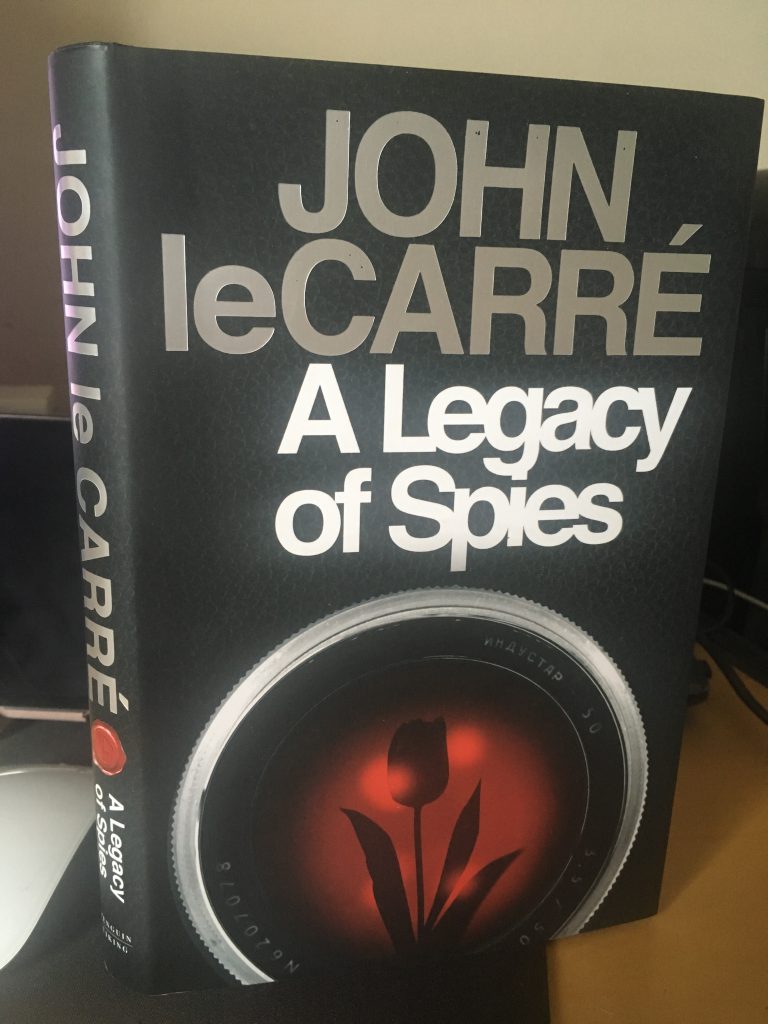
John le CarréThe Cover and Spine
Now down to work. A look at a live example.
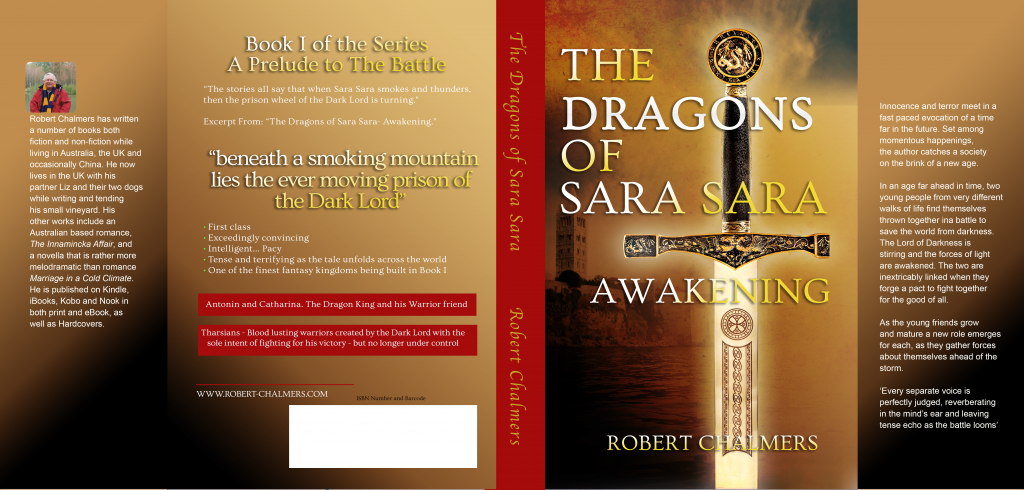
The full hardcover for my own book.
So where will I start? I took a look at a very famous author, John le Carré. His book that is on my shelf, “A Legacy of Spies” is in Hardback. And it’s 9″x6″ – or if you like, 6″x9″, 6 inches wide and 9 inches high. Which seems to be pretty standard for a good quality hardcover. So I figure that’s good enough for me. My book is at least as good as his even though I am perhaps not as famous. Yet.
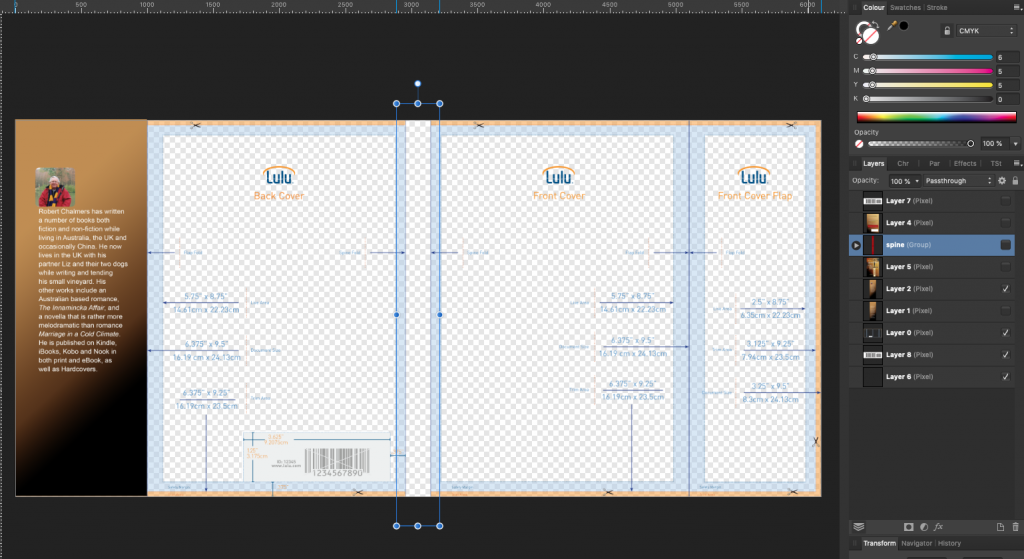
So the above book cover is the one I built in Photoshop originally and it’s built directly from a Lulu Template. Templates are your friend. If you have to take the time to register with a site like Lulu, or KDP, do so now. If nothing else it gives you access to some truly Great Resources. Especially Templates. I love capitalizing words to emphasize them you notice.
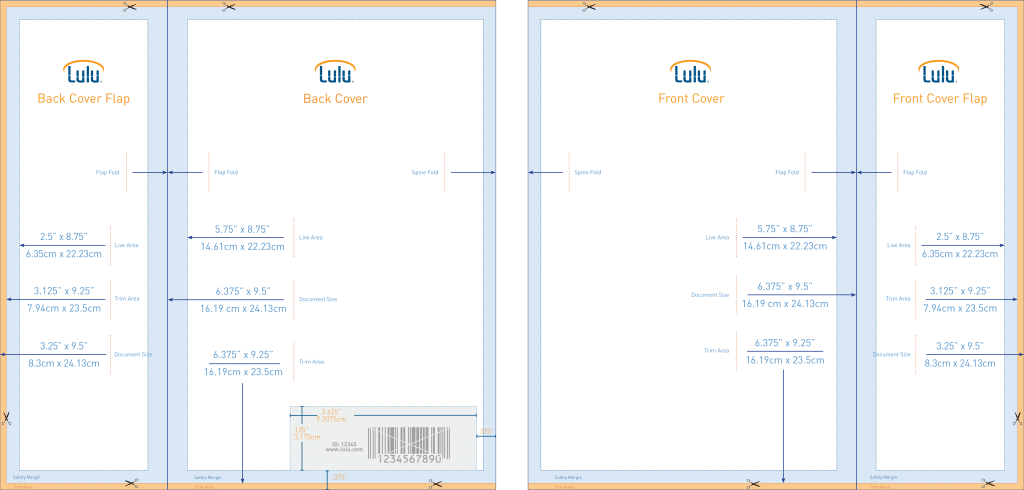
This is a Lulu Template. It’s the one I used to create the Dragons of Sara Sara above. So what do you notice? There is no spine template is there?
Almost, but no spine.
It doesn’t have a spine, because, at this point, I hadn’t given Lulu a page count and a few other factors, like blank pages, paper weight, word count and so on. So – no spine calculation. But you get the idea.
For this exercise, I’m going to assume a few things. Like the Paperback book of the last exercise, I’m going to assume a spine width of the book I already have and plug that in.
The purpose of this tutorial is to show you how to put together the elements of your book cover for your hardback.The graphics. Not the actual construction of your book. The printing house does that. They won’t do your cover image material nor blurb – unless you mortgage your house to them.
So lets have a look at this template. What happens is. You tell Lulu for example, what sort of book you want, in this case Hardcover. They have templates to suit that have all the component parts. Flaps, front and back and all the detail. they don’t put it together for you.
So in order to get the artwork into a PNG or PDF file to send them you need the dimensions of your book. Including the spine. Easy. So say my spine calculates at 23mm. Just saying. So you set out a document that is this wide.
The template images for the Back flap + the Back cover + 23mm spine + Front cover + Front flap. Now you can build your images and text and place them accurately. You know the total width of your cover. So that’s where we shall begin. Creating a working page that is based on that template.
Like this.
I want to point out here that the list of independent publishing houses is long. But the ones that you might consider for your book if you want the whole range of options, and don’t mind the learning curve needed to follow the steps are these.