The Innamincka Affair: Love. Lies. Mortal Danger. A lot can happen with an affair at Innamincka. Rebecca Boucher is a respected junior partner in a London law firm. When she’s sent to Australia to meet with the owner of a vast cattle property, she’s expecting a straightforward legal matter. But what she finds is Cooper Read More ...
Marriage in a Cold Climate View it on the UK Amazon Store The stark beauty of the frozen wastes of Siberia, where the cold can snap steel rails, and the empty sweep of the tundra, alternately a snow-muffled wasteland and an unexpectedly safe trackside haven, are vividly evoked. Against this backdrop, Robert Chalmers weaves an Read More ...
The Dragons of Sara Sara Innocence and terror meet in a fast-paced evocation of a time far in the future. Set among momentous happenings, Robert Chalmers catches a society on the brink of a new age. View it on the UK Amazon Store In an age far ahead in time, two young people from very Read More ...
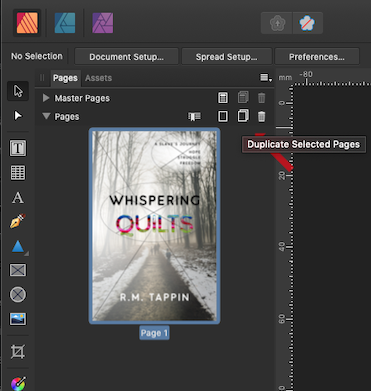
It might be a good idea to duplicate Page 1 of your document in order to keep a copy of the front cover alone.
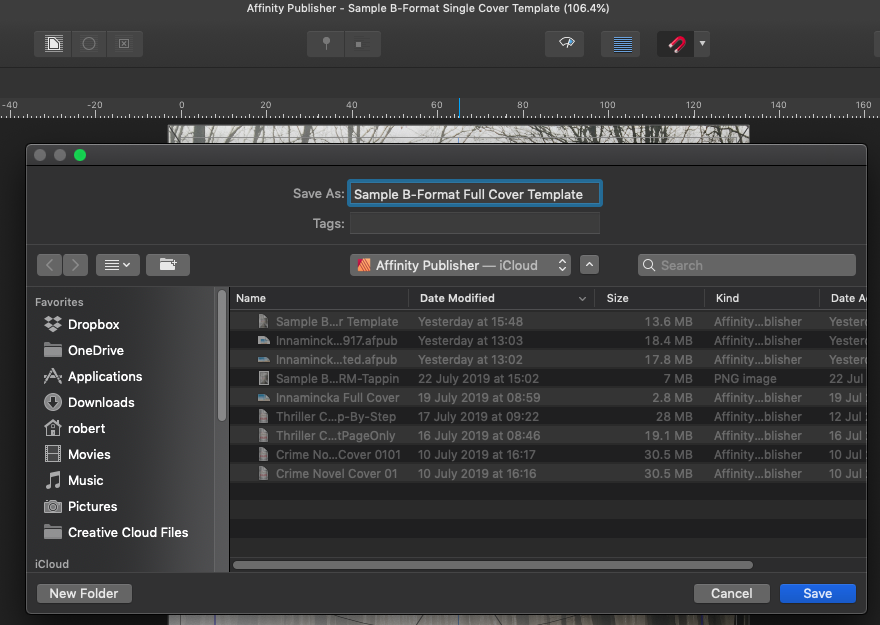
In fact, it’s a good idea to actually save your work at this point, and then go to File -> Save As and save the entire document as a file with a different name. ie; FrontPageOnly. Come back to this document that will contain both pages. I had the file already saved, so saved the new file as Sample B-Format Full Cover Template
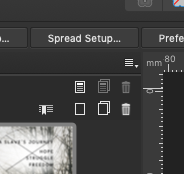
To make a duplicate of your existing Page 1 click on Page 1, then click on Duplicate Page
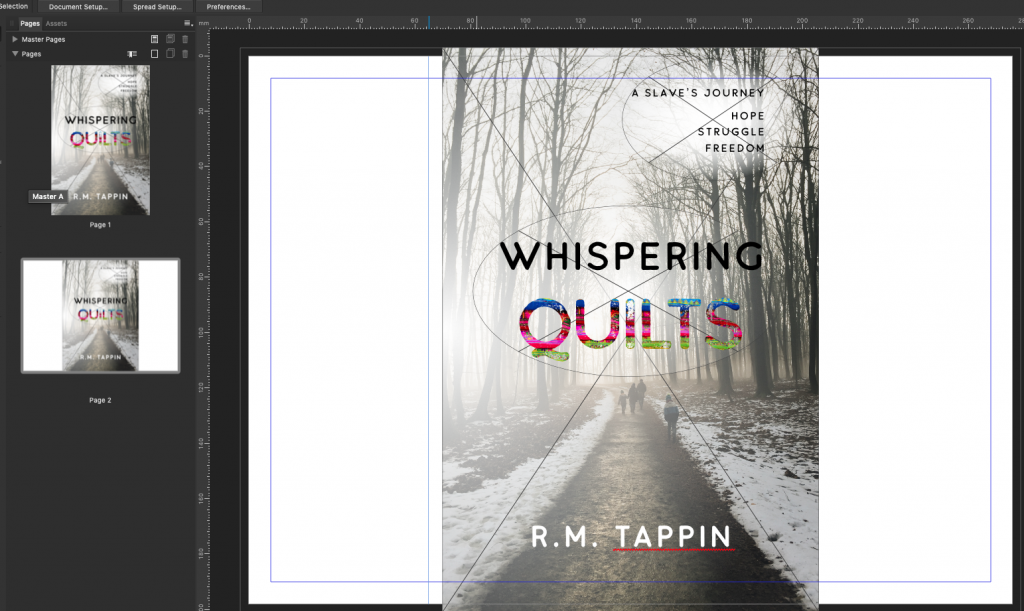
Click Page 2 of the document to bring it up on screen. Select the Document Setup from the Selection panel and click once on Page 2 of the document to select it.
In Spread Setup you will see two Spreads. Spread 1 and Spread 2. Check Selected Spreads and it should highlight Spread 2 (page 2)
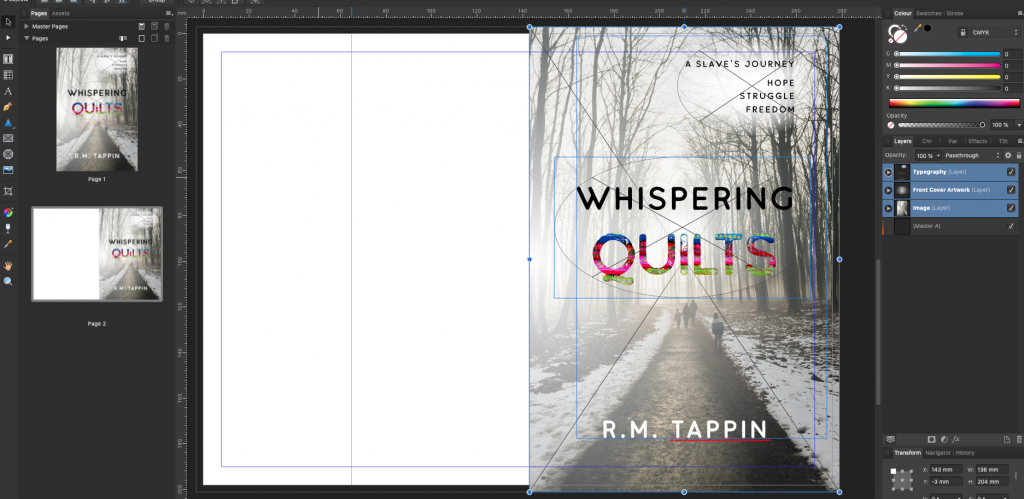
Now, navigate to the control panel and adjust the Width of the page to 276 mm. This will allow for a back cover at the same width as the front cover (130 mm) plus a 16 mm-width spine. NOTE: Make sure you unlock the Lock, or your page will resize.
Note Page 2 shows new widthDouble Click the Page 2 icon in the left panel
After you have double-clicked on Page 2 in the left pane. It will expand the visible page to the correct width,
Unlock all the layers in the Layers panel. Select all the elements on the page by Selecting all the Layers. Shuffle them along to the right until the image frames meet the edge of the right-hand bleed. Re-lock your Layers.
Step 2
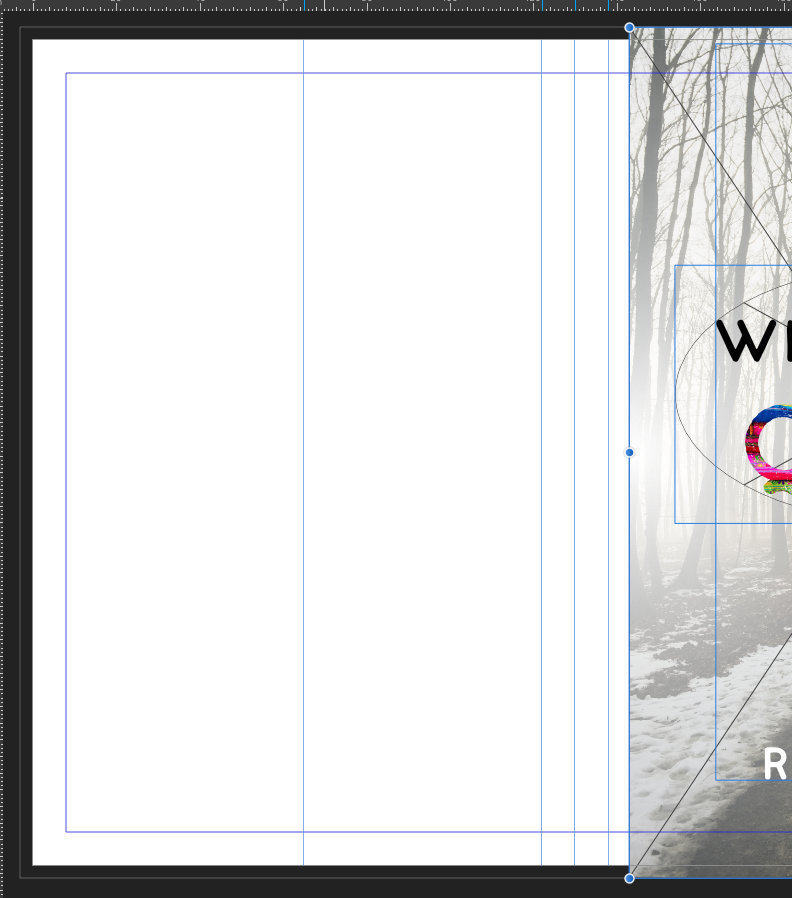
From the left-hand Ruler, pull out a vertical Guide to 130 mm, to mark the left edge of the spine. Pull out a second Guide to 65 mm, marking out the centre point of the back cover.
You can also pull out Guides to 138 mm and 122 mm, to mark out the centre point of the spine, and the right-hand margin of the back cover. You can see the markers as you drag the bar. Place you cursor on the left hand ruler and hold and drag to the right.
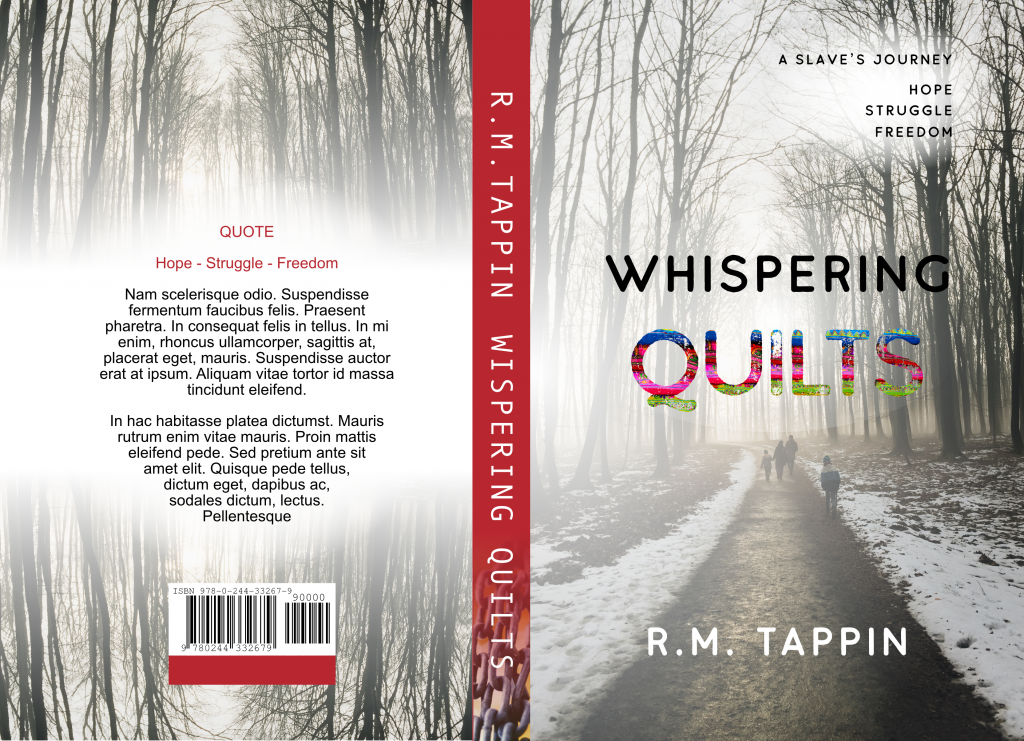
5. Design the Spine
Note: In this tutorial, we will be creating a spine with a contrasting colour to the rest of the cover. Therefore, it is very important that the spine’s dimensions on the artwork match the dimensions of the printed and bound spine exactly. When creating your own artwork for print, be sure to ask your printer to give you an accurate width for your spine before creating your cover artwork, or do the exact calculation yourself. Calculators are available on KDP, Lulu and others.
Step 1
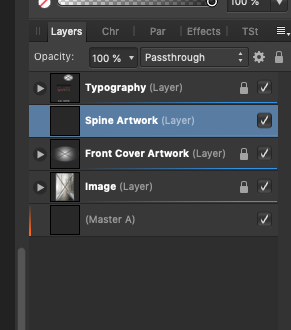
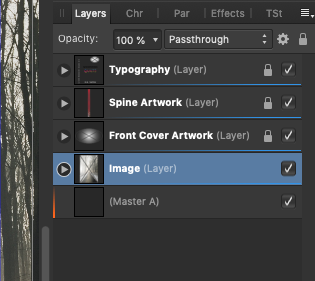
Return to the Layers panel and Lock all the existing layers. Create a New Layer, renaming it as Spine Artwork. Move this layer to sit below the Typography layer and above the Front Cover Artwork layer. Make sure you move it by having the mouse pointer to the LEFT of the list of layers slightly – or it will try and stack the new layer within an existing layer. OR… positing your cursor on the Front Cover Artwork layer, and highlight it, then go down and select new layer. It should place the new layer in the right position.
Select the Rectangle Tool (M) and drag to create a frame 16 mm in Width that sits between the Guides marking out the edges of the spine. Extend the Length of the frame so that it extends to the top and bottom bleeds.
Set the Stroke Color to [None] and Fill Color to C=32 M=0 Y=15 K=0. Select a colour to reflect your genre/title/cover colours.
Select the Rectangle Frame Tool (F) and drag to create an image frame 16 mm in Width, as before, and 58 mm in Height. Position the frame at the bottom of the spine, resting the bottom edge on the edge of the bleed.
Set the box colour to Transparent if not already the default.
Select the box you have just placed.
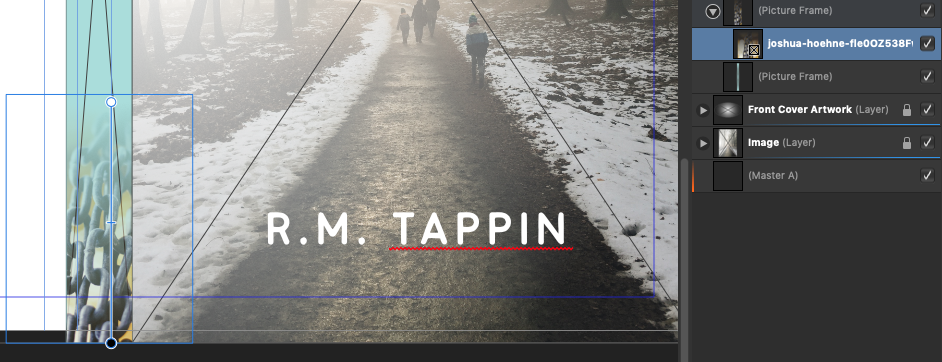
Go to File > Place and select the skulls image, as we used earlier for the front cover. The image should fill the rectangle.
Select the Transparency Tool. That’s the Wine Glass on the left side.
Select the image in its Layer Panel.
You will notice the blue outline of the image over the spine marker box you just created. With the blue frame showing, place the pointer exactly on the bottom of the rectangle at the center point, and you will see a Dot and a Green vertical line appear with a dot on the bottom intersection of the vertical and horizontal line. carefully click and drag the marker toward the top of the rectangle. The blue background will appear, and you will slowly move it toward the top of that frame.
Observer Chains, and the highlighted image in the layer panel
Step 3
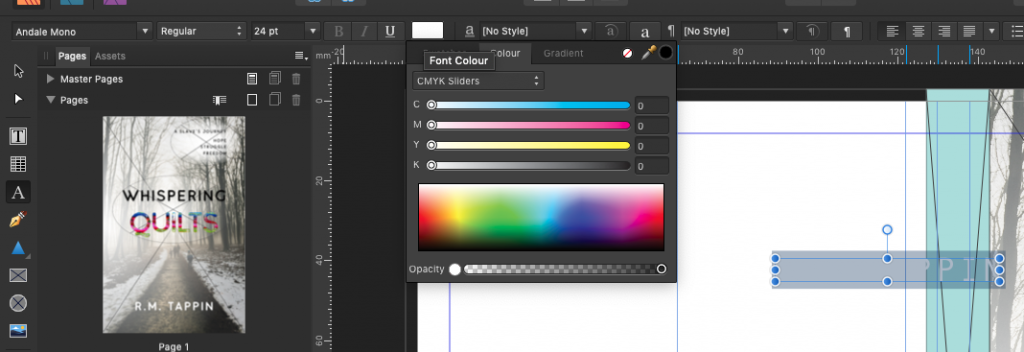
In the Layers panel, Lock the Spine Artwork layer and Unlock the Typography layer. Select the Type Tool (T) and create a text frame at 20 pt of the Author Name
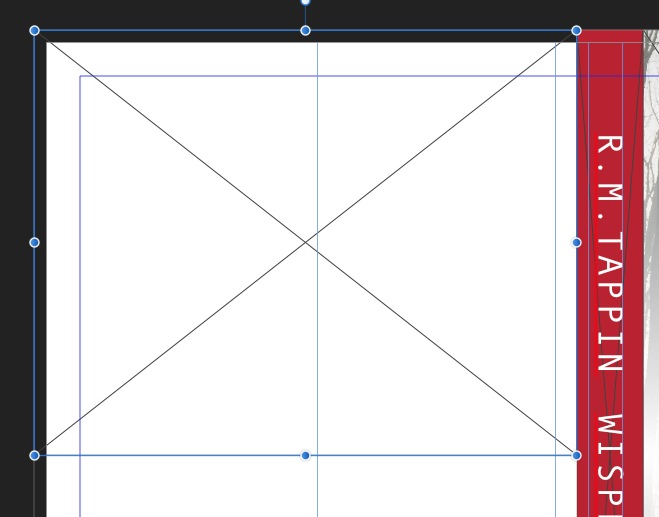
Type ‘(Author Name)’ and highlight the name, set the Font to Andale Mono, Regular, Size 24 pt, in Character set Tracking to 90, All Caps and Font Color to [White]. Select the text frame and Layer > Transform > Rotate 90 degrees CW. Position the text frame centrally on the spine
Select the text frame and Edit > Copy, Edit > Paste. Alter the text to ‘The Whispering Quilts’, the Font Weight to Light and Tracking to 0. You may need to extend the Length of the text frame to accommodate the text. Position the frame centrally on the spine, just below the author’s name. I’ve changed the spine colour to a red, to compliment the colour in the word QUILTS on the cover.
6. Create a Back Cover
Your cover’s starting to look more complete. Now, all that’s left to do for a Paperback is to put together the design for the back of the cover.
Step 1
Return to the Layers panel and Lock the Typography layer. Unlock the Image layer. Select the Rectangle Frame Tool (F) and drag to create a frame 130 mm in Width and 102 mm in Height. Position the frame so that it covers the top half of the back cover, meeting the edges of the bleed to the top and the left.
Ensure you highlight the Image Layer
Next…
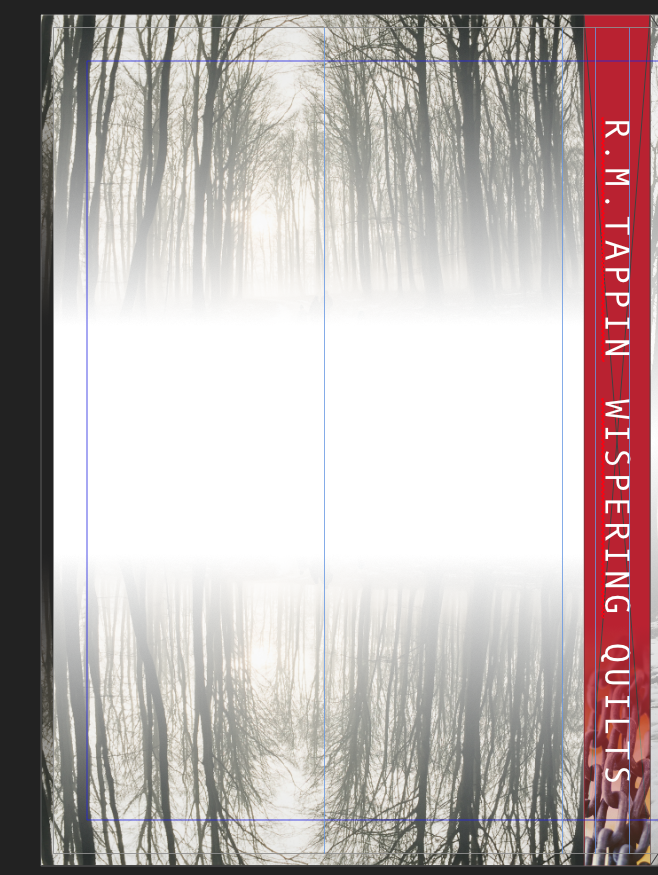
Go to File > Place and select the image we used earlier, for the front cover. Arrange the image proportionally in the frame.
Now… Go to Transparency. Position the marker dot on the TOP Bleed line. The image rectangle will fill with white as soon as you touch it. No image will be visible. Now, click and drag the Position Dot downward and slowly expose the image until you are satisfied.
Select the image frame – by selecting the Layer. Remember you have the actual image layer still selectedandCmd-C (copy), Cmd-V (paste) to create a duplicate of the image and frame.
Click and Drag the frame to the lower half of the page and right-click > Transform > Flip Vertical.
If the image is slightly misplaced, Manoeuvre this second image frame to the bottom of the back cover, allowing the top edge to meet the bottom edge of the first image frame.
Step 2
In the Layers panel, Lock the Image layer. Create a New Layer, naming it as Back Cover Artwork. Position this below the Typography layer and above the Spine Artwork layer.
Step 3
This is a little complex, so take your time.
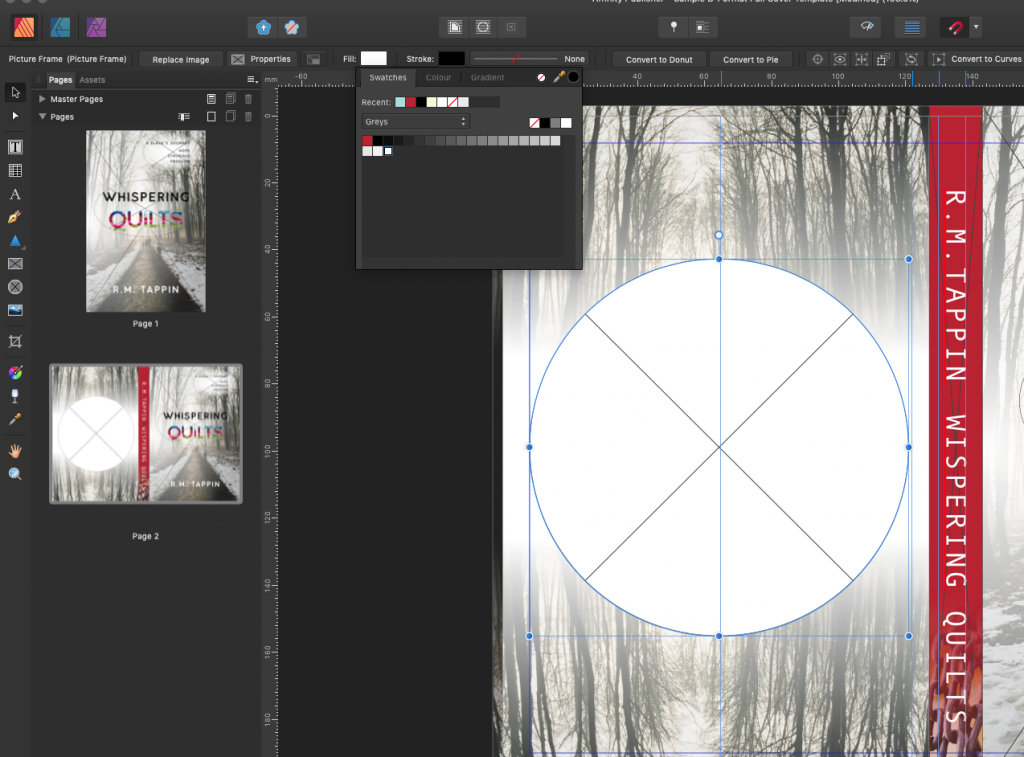
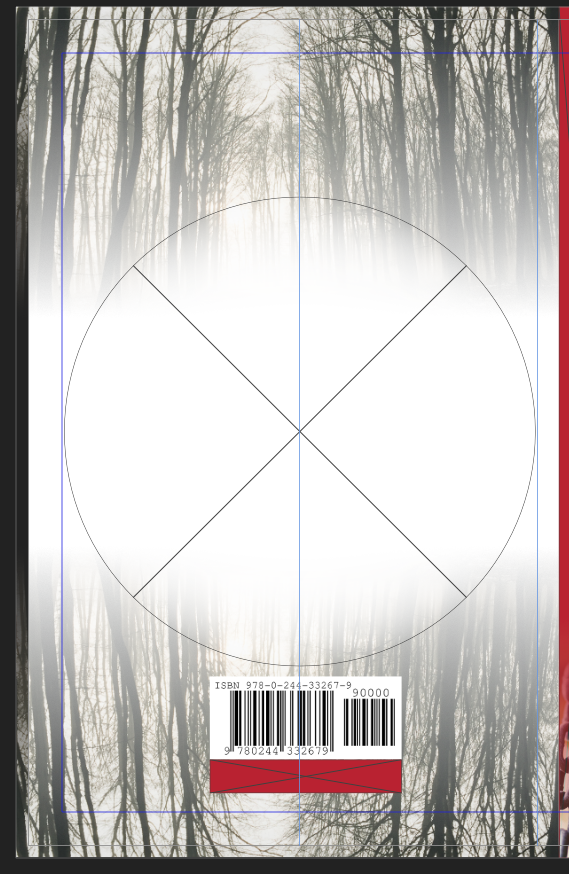
Remaining on the Back Cover Artwork layer, select the Ellipse Tool (L) and, holding Shift, drag to create a perfect circle 113 mm in diameter. Set the Stroke Color to [None] and the Fill Color to [Paper].
With the shape selected, click Transparency Tool (wine glass)> Click centre dot in shape.. Go to Top Left nav bar. Set the Type to Radial. Click on the oval shape just to the right of Type Radial. It displays a selection interface. Now, if you haven’t already set the circle fill to white, go to the top right of the display and set the colour to White.
Go back to the Type -> Oval Settings interface and drag the slider all the way to the right.
Your circle will look like this
Center the circle shape on the back cover, resting the left edge against the left-hand margin and the right edge against the 122 mm Guide.
Step 4
You will need to place a barcode on the page if you are intending to sell the book in shops.
Create a white frame using the Rectangle Frame Tool (F) and File > Place a generated barcode image. Ensure the barcode image is large enough to be scanned with ease, and don’t crop the code too closely around the edges in case any of the code’s data becomes illegible. I made this one 20mm by 45mm. It’s a genuine barcode from one of my books. Look it up if you like! Hey. buy a copy…
I also created a second frame just below the barcode, set in C=19 M=98 Y=89 K=10. This is a suitable place to insert pricing for the book using the Type Tool (T). Your back cover should lool something like this.
Step 5
Lock the Back Cover Artwork layer and Unlock the Typography layer.
Select the Ellipse Tool (L) and, holding Shift, drag to create a circle shape 88 mm in diameter. Set the Stroke and Fill Color to [None], and position the circle centrally on the back cover, right over the white circle. If you want your text on the back page to conform to the Circle you draw, do the following. Draw your circle of 88 mm, then go to Layers -> Convert to Text Frame, then enter your text.
OR – in Square format. Select the Type Tool (T) and click once inside the circle shape and pull out a text frame to fill the circle. Type the book’s blurb, setting the Font to Futura Std, Medium, Size 12 pt, Leading 14.4 pt (Auto), Align Center, and Font Color to [Black]. You can highlight the first few lines of the blurb and make them slightly bigger, around 13 pt, and pull out the first line in Bold and a red swatch (C=19 M=98 Y=89 K=10).
If you find your text is being subjected to the Transparency setup below, then select the Hourglass while you have the text circle selected, and adjust the transparency to display the full circle.
This can happen because Publisher “remembers” previously set options. It’s bit of a nuisance, but you have to watch out for it. For example, if you used 64 pt text, all caps on a precious layer – those settings will still be in place when you try entering a new text layer. Very Annoying.
7. Export Your Book Cover for Print
Great work—your cover artwork is complete, and it looks awesome!
Now all that’s left to do is to export the artwork to PDF, ready for printing.
Step 1
Go to File > Export… to open the Export window. Select PDF (Print) from the Format drop-down menu.
Name the file and click Save.
In the Export PDF window select PDF (for print). In the Area section, select Current Page – you must have the double spread page highlighted, as it’s the one you want if you’ve kept a copy of only your front cover on Page One
Maybe you saved the Front Page Alone in a separate file. That’s ok. You just want this double spread page.
Include bleed. Tick the box.
All Finished Paper Back cover. Sounds like a song title doesn’t it.
So, all that’s left on this exploration of Publishers capabilities, is to do a Hardcover … cover. And that’s just a matter of making the whole page wider. For that, we will create a duplicate of this page, and select it, and make the ad;justments. That’s for Part 3.
Feel free to ask questions, leave feedback, positive of course if you would. Like the page or site. Follow me on Twitter and probably Instagram.
The book “Whispering Quilts” will be released about Mid-Winter I believe, by a new author, R.M. Tappin. Watch for the book on Amazon and others.
Feel free to look for my books on Amazon, iBooks, Kobo, LuLu in eBook, Paperback and Hardcover formats.
Criticisms should be accompanied by a case of good wine.
These articles (Part 1 and Part 2) are the most useful and usable I’ve read in a long time. I can’t wait to check out your website to see what else you’re up to.


These articles (Part 1 and Part 2) are the most useful and usable I’ve read in a long time. I can’t wait to check out your website to see what else you’re up to.