The Innamincka Affair: Love. Lies. Mortal Danger. A lot can happen with an affair at Innamincka. Rebecca Boucher is a respected junior partner in a London law firm. When she’s sent to Australia to meet with the owner of a vast cattle property, she’s expecting a straightforward legal matter. But what she finds is Cooper Read More ...
Marriage in a Cold Climate View it on the UK Amazon Store The stark beauty of the frozen wastes of Siberia, where the cold can snap steel rails, and the empty sweep of the tundra, alternately a snow-muffled wasteland and an unexpectedly safe trackside haven, are vividly evoked. Against this backdrop, Robert Chalmers weaves an Read More ...
The Dragons of Sara Sara Innocence and terror meet in a fast-paced evocation of a time far in the future. Set among momentous happenings, Robert Chalmers catches a society on the brink of a new age. View it on the UK Amazon Store In an age far ahead in time, two young people from very Read More ...
Affinity Photo makes working with images and photographs quite enjoyable and straight forward. There are many Tutorials and Guides on the Internet, but I wanted to make one for my classes that is really easy to follow for those looking at Affinity for the first time. In this set of guidelines, I will show you how to get started, right from opening the program to saving your work when finished. You can even download a Trial Copy of Affinity Photo from their website, and use that for the trial period to see if it really is for you. You can also find many useful videos on my YouTube channel. My YouTube Channel URL
So let’s get right to it, shall we?
Open Your First Images
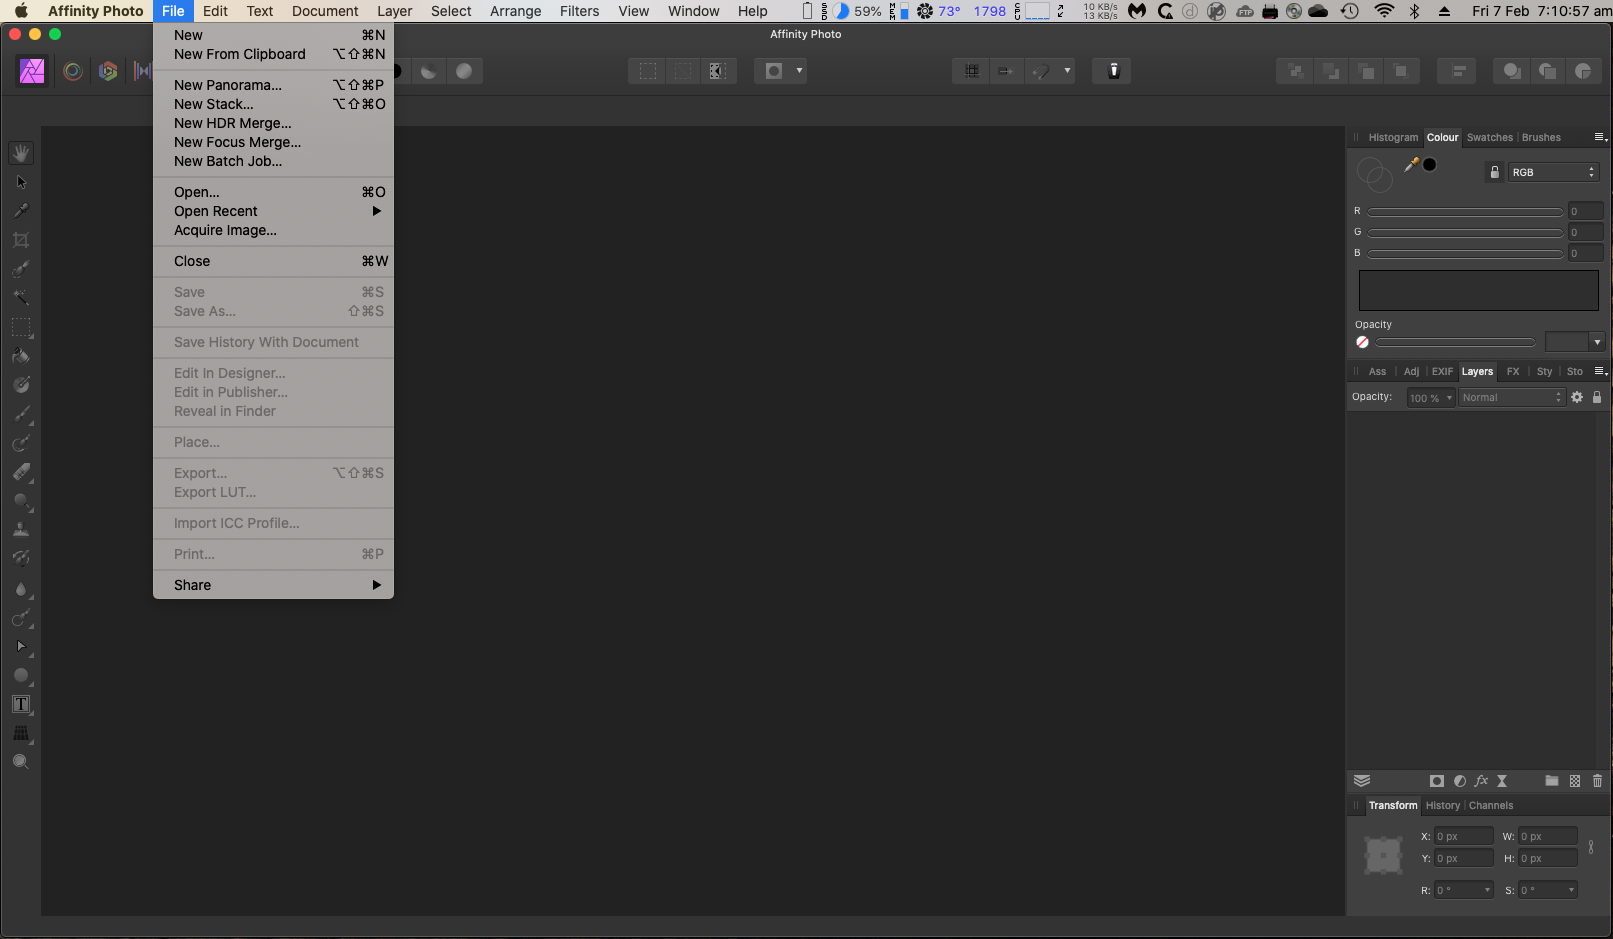
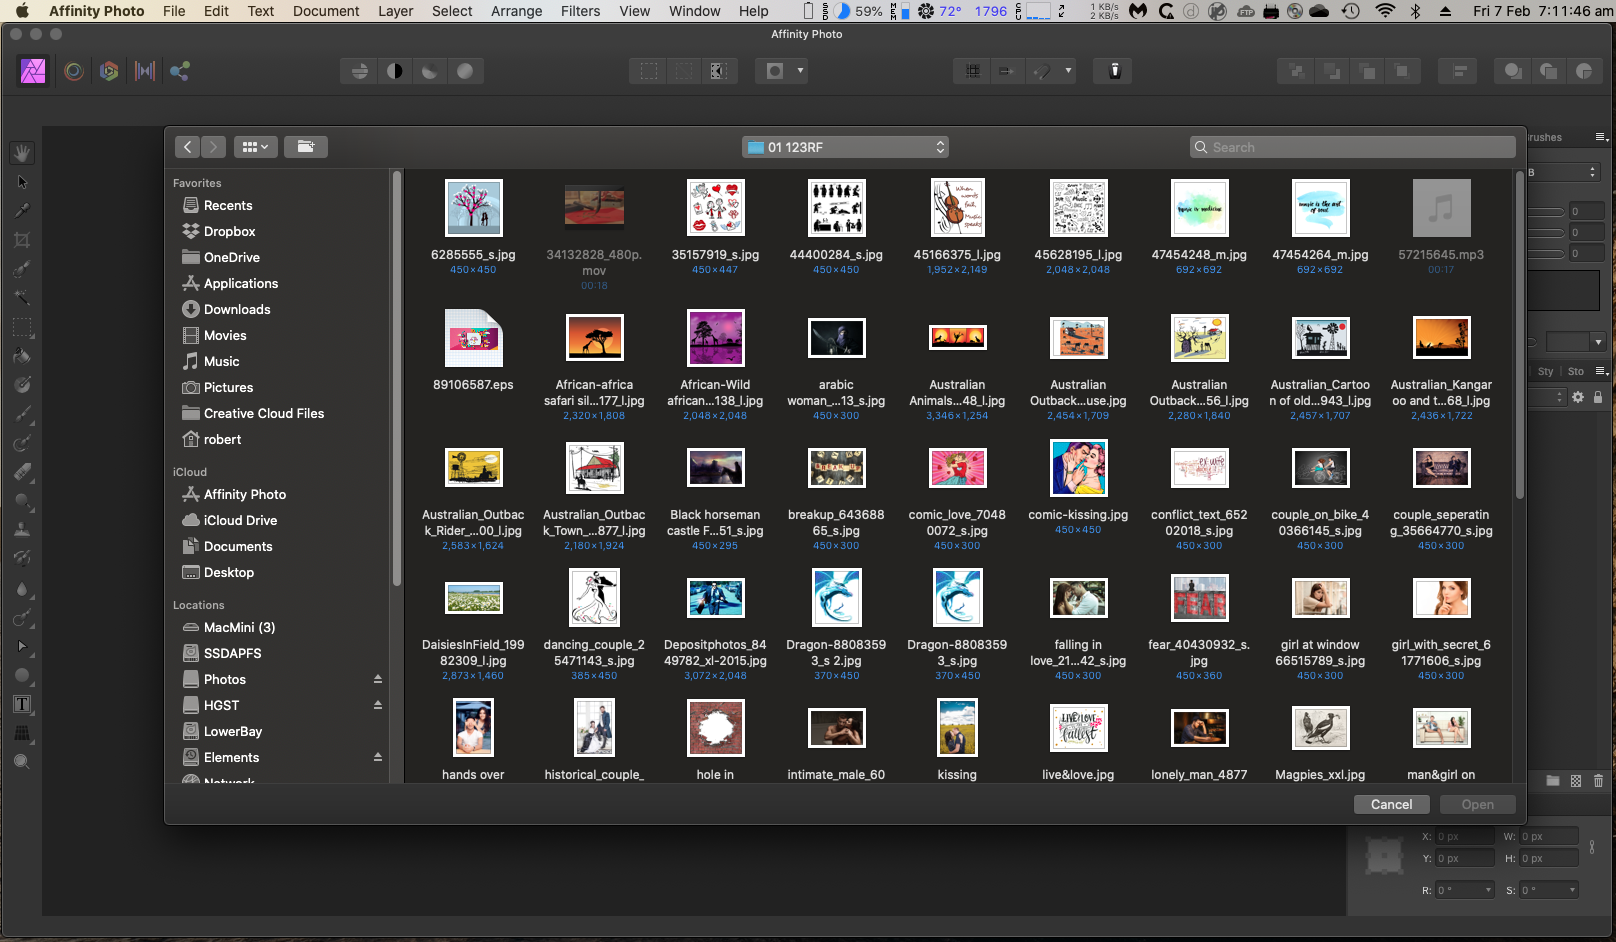
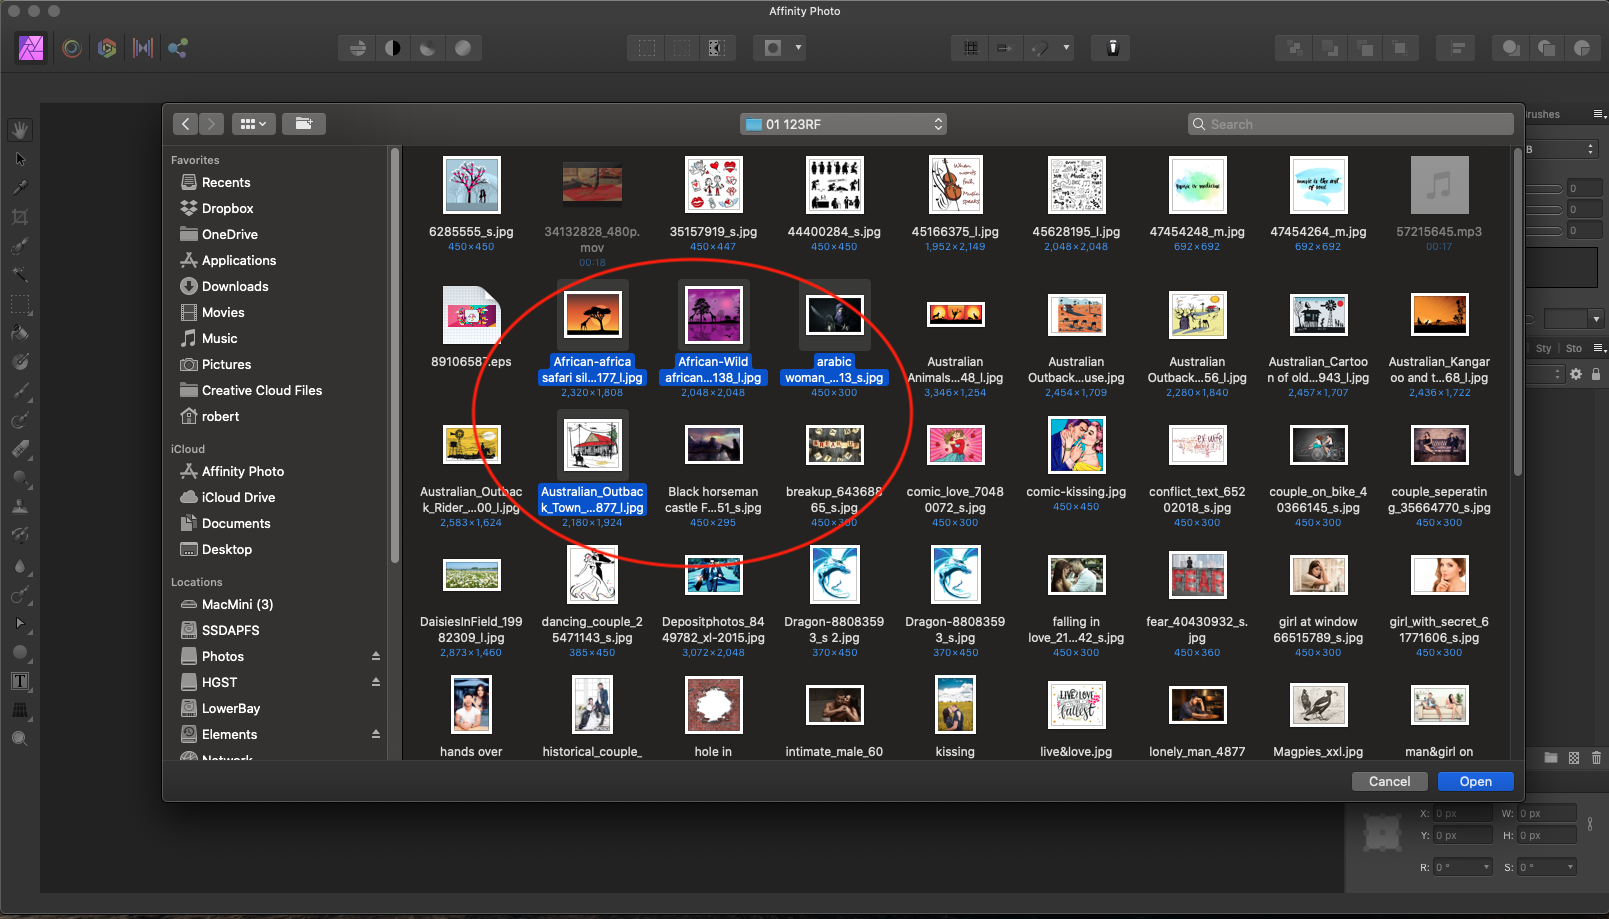
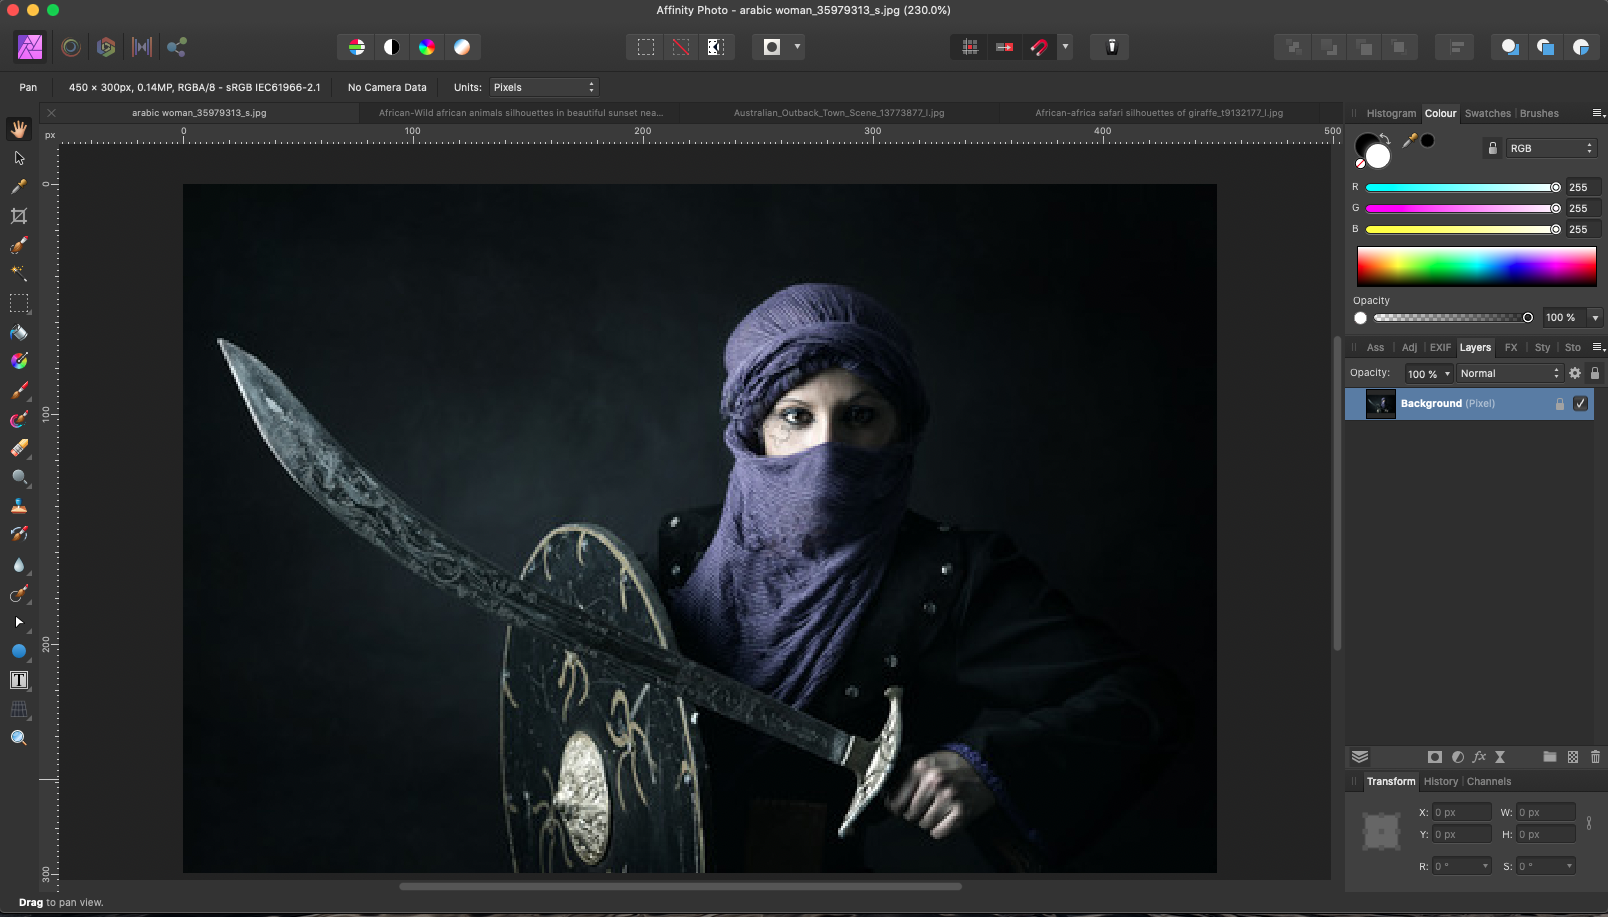
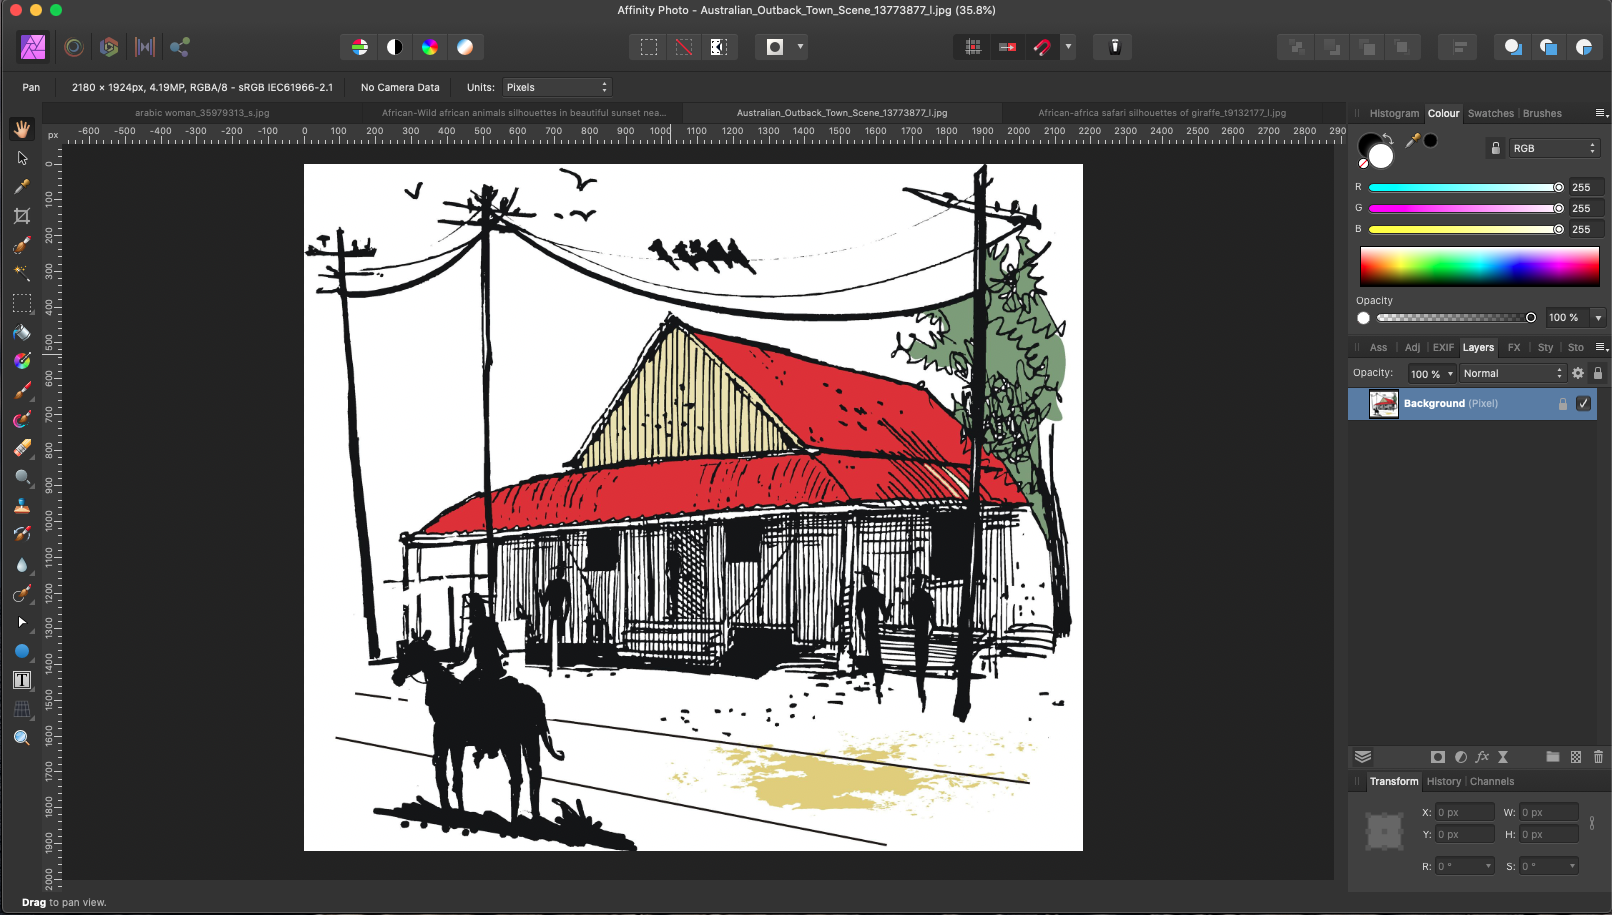
So firstly, you can download the images we will use in this exercise from the download area. Beginning Affinity Photo Tutorial Images. You can see the links in the Description and Resource area. Place them in an easy to find folder on your computer. Now, with Affinity Photo opened and ready, go to File, and then Open. Click on the picture you want, or you can select multiple images by holding down the Shift key and clicking on each image you want to open. If you open multiple images, each one will open in its own tab within the program.
All of the following images can be enlarged by clicking on them.
Section 1
Begin by opening Affinity PhotoOpening your first imagesAll ImagesSelection Highlighted
You can move between the images by simply selecting the tab. If you want to close an image completely, simply click on the little X in the corner of the tab.
The Tab on the Right is the Active tabImage 6Image 7
By hovering over the image tab, you can highlight the name of the image clearly.
So at the end of this first section, you have Affinity Photo opened, and your first images open in their own tabs in the Interface. You can move between them by simply clicking on their individual tabs.
Section 2
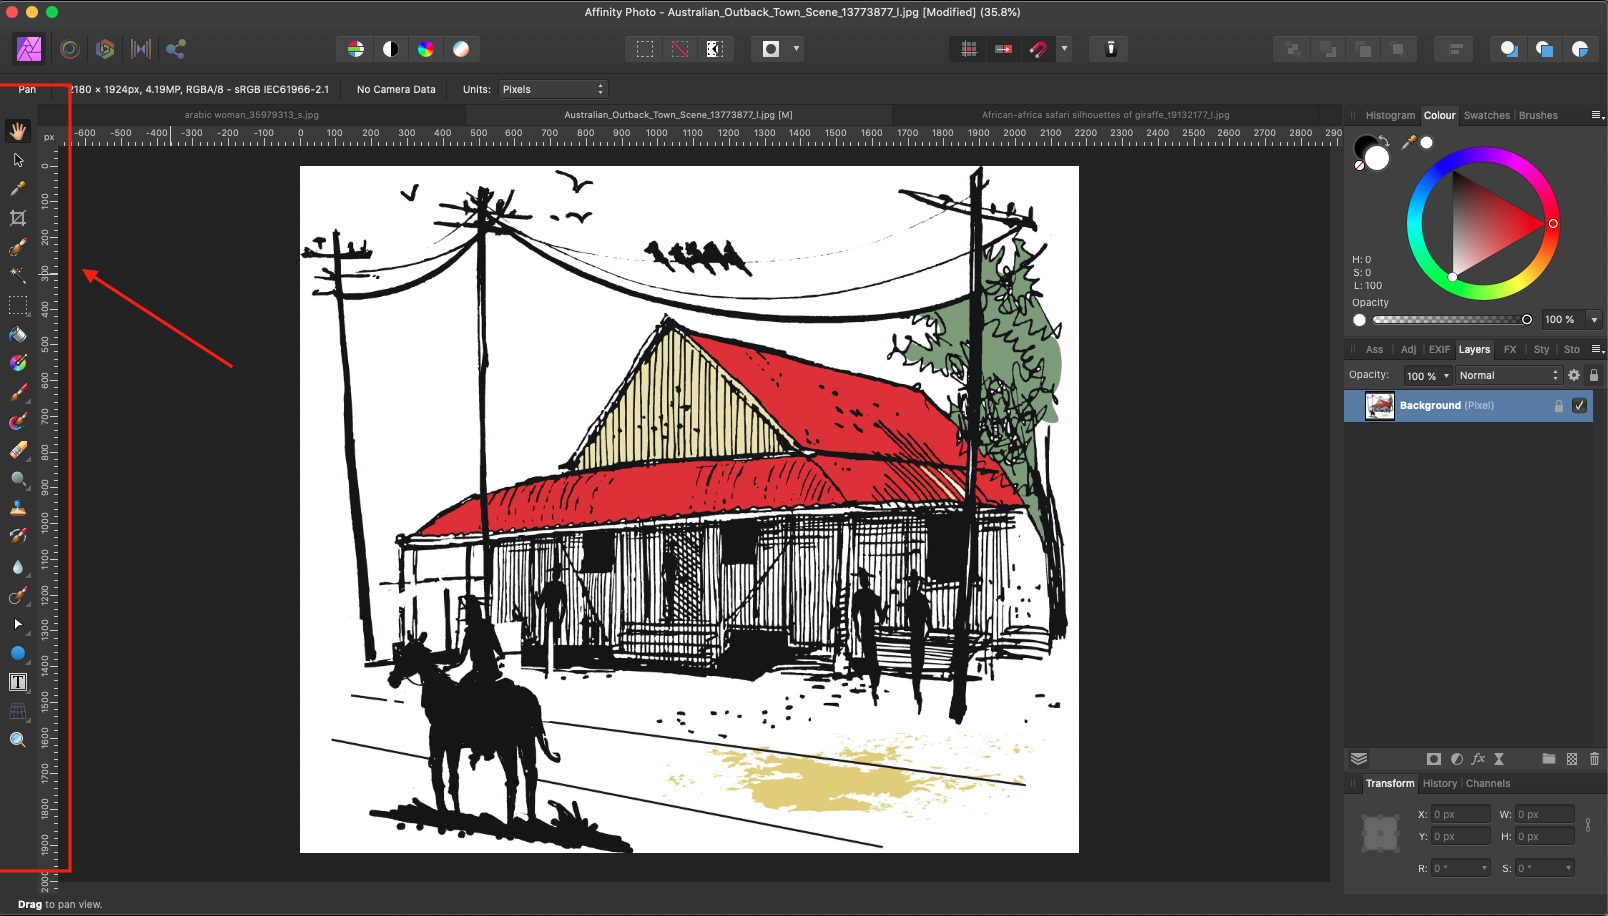
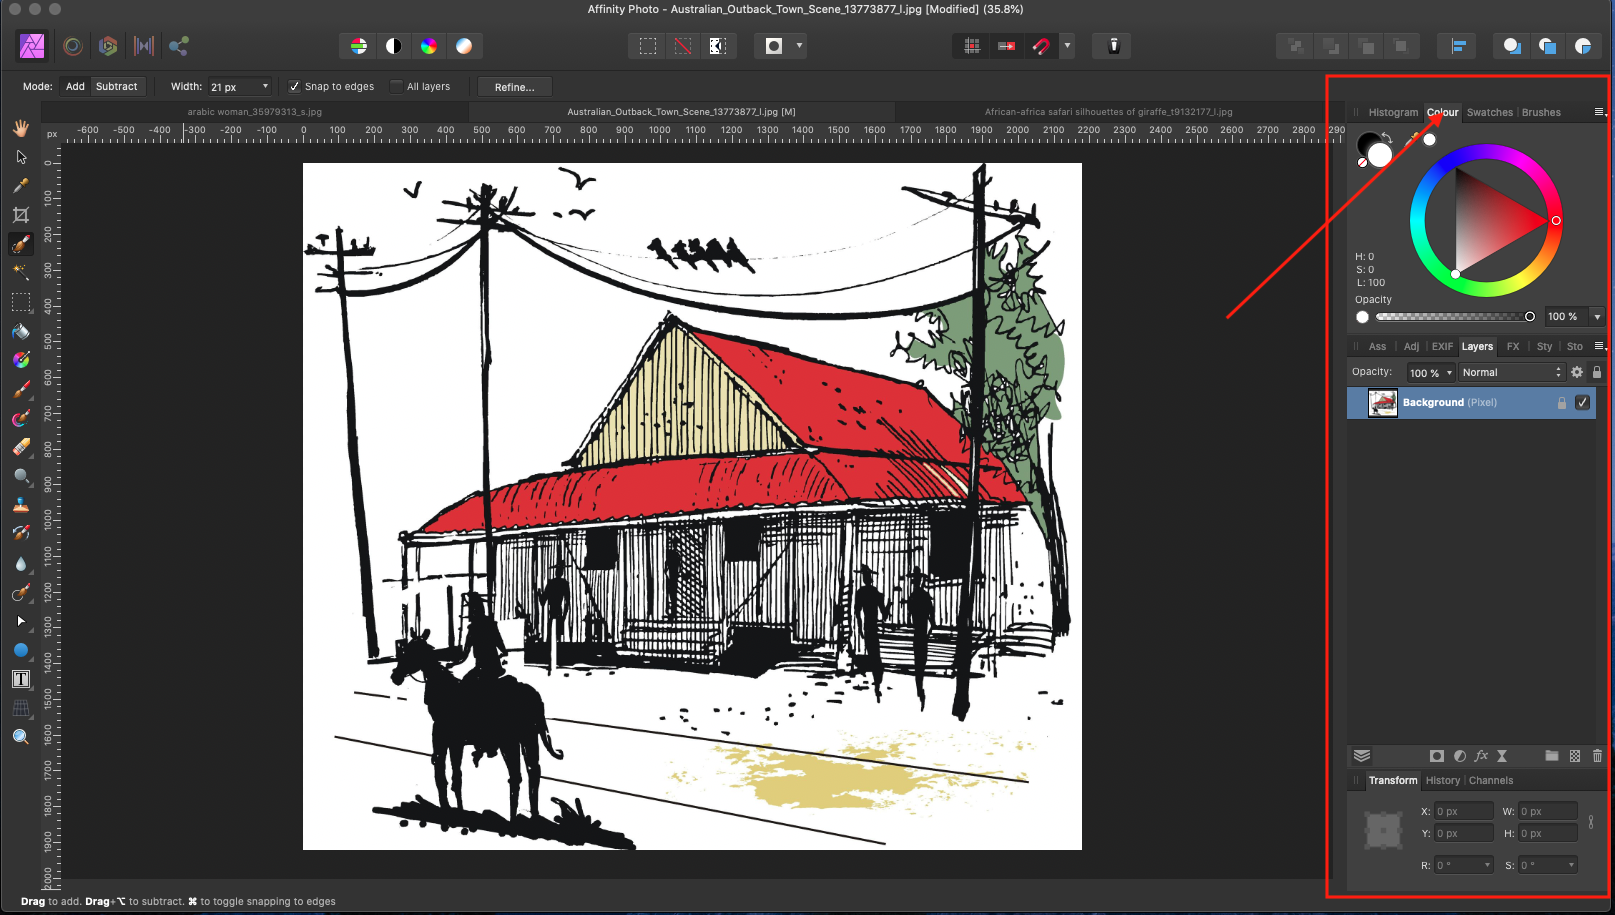
All of the tools you need to edit your photographs with are grouped on the left-hand side in the convenient toolbar. Depending on which tool you have open, you will have different Context Toolbars open, usually across the top of the screen, and on the right-hand side, there will be different Panels open for Adjustments and Layers and so on.
Toolbars on the left-hand sideContext Toolbar related to the selected ToolColour Panels, Layers Panel and others
Depending on which tool you have open you’ll have different options inside the Context toolbar and the Panels on the right-hand side will relate to a lot of the options available to you.
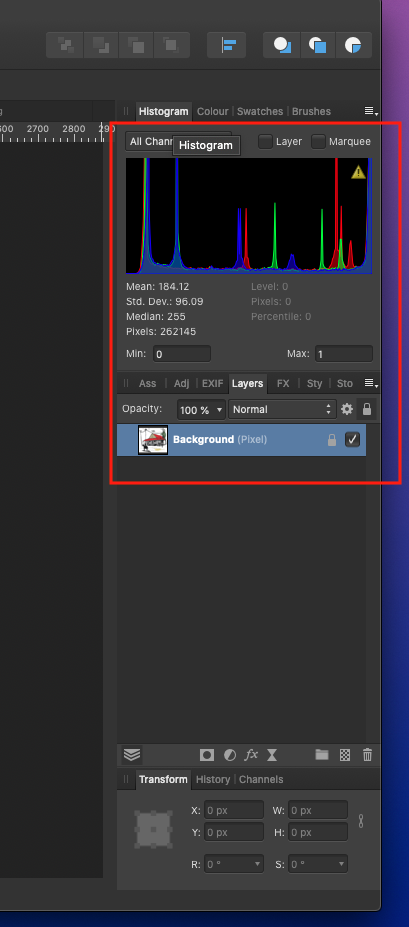
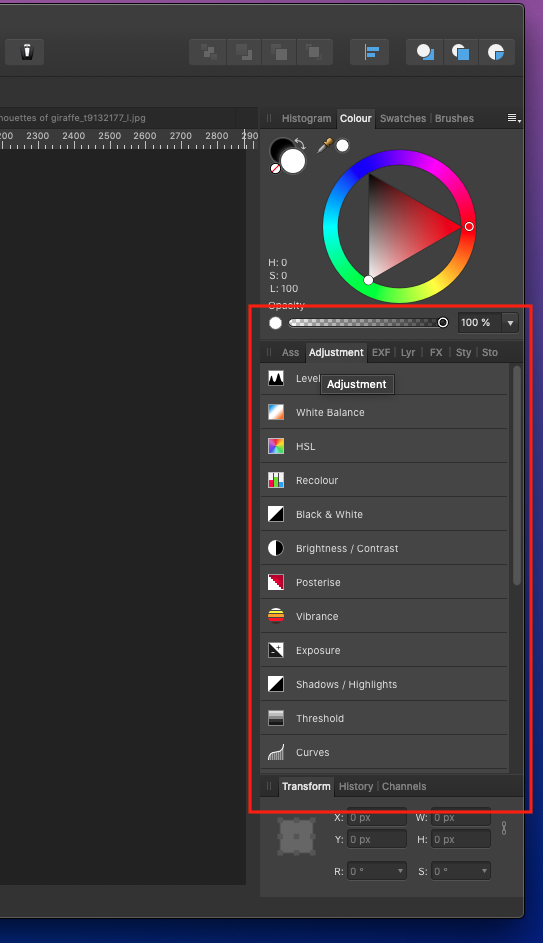
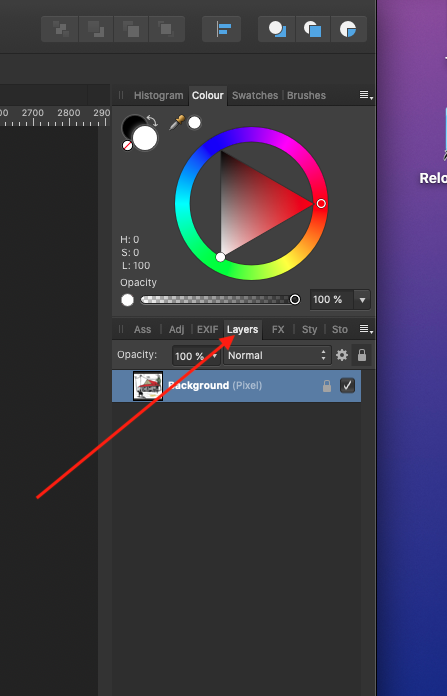
Each panel also has a number of options available to you.
Histogram display with Layers selectedAdjustments Options selectedLayers option selected showing your working layers
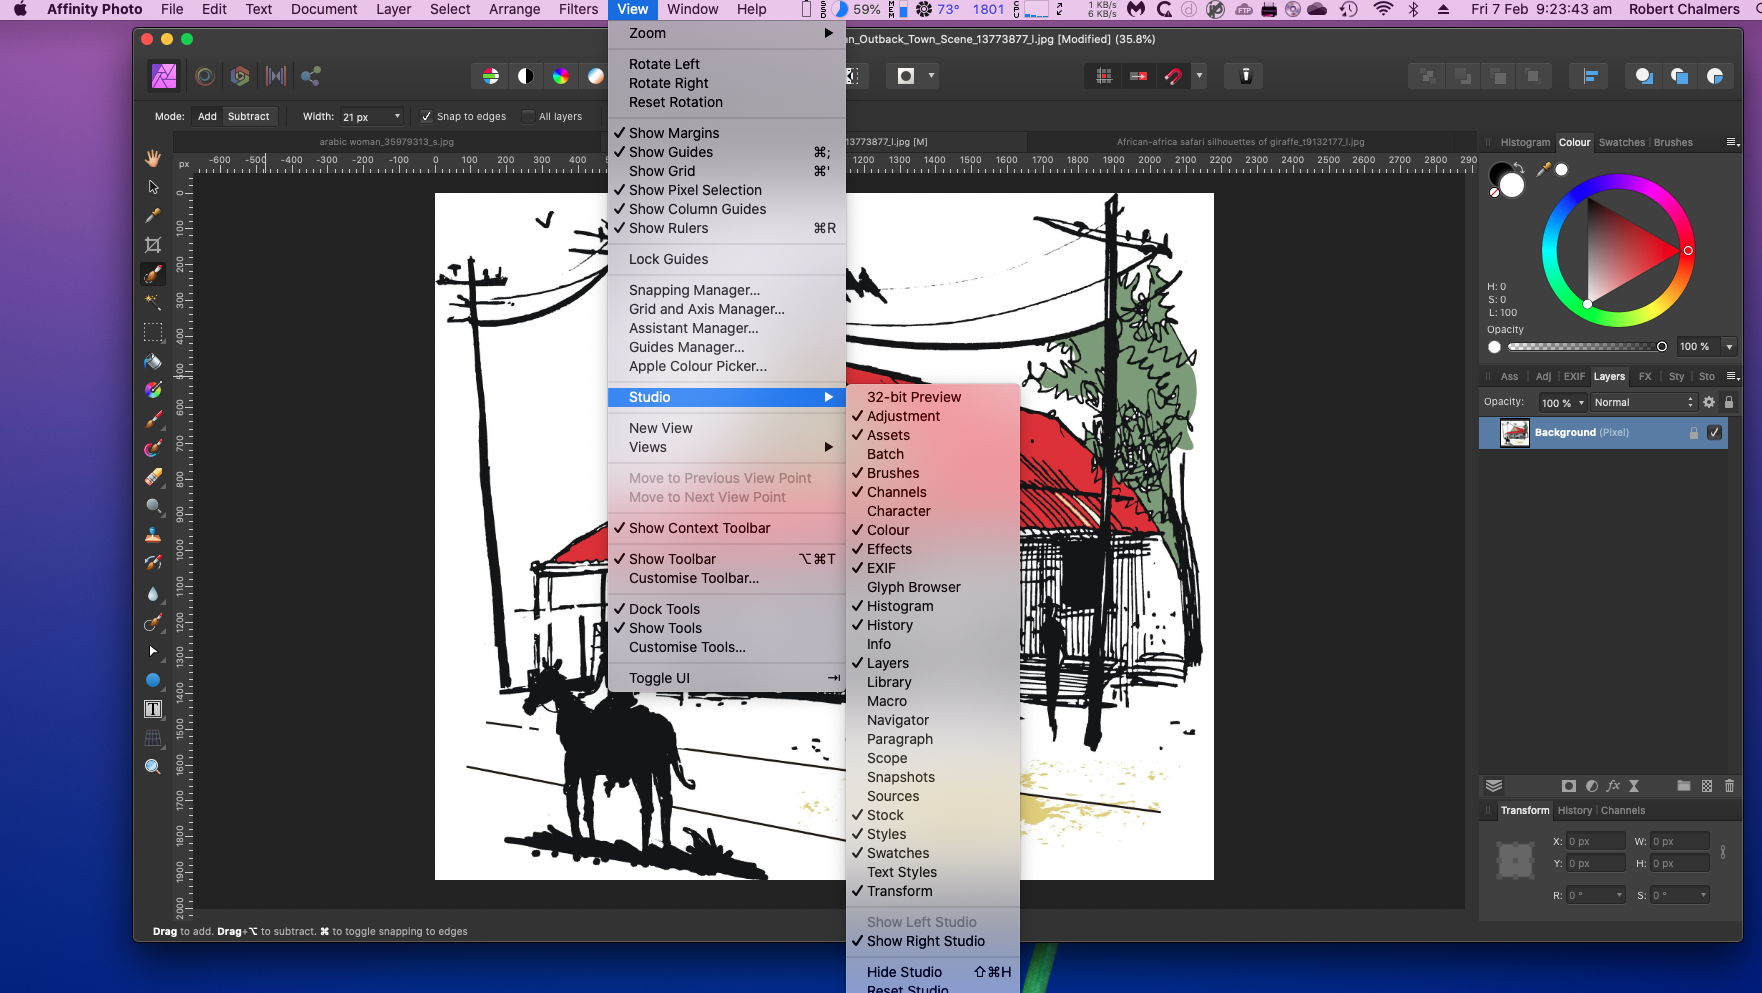
You can turn these panels on and off as you need them by going the top bar and to View, then to Studio, and scroll down the list to select, or de-select the panels you want.
If you ever want to reset all of the panels to the way they were when you first opened Affinity Photo you can scroll down to the very last option and select Reset Studio.
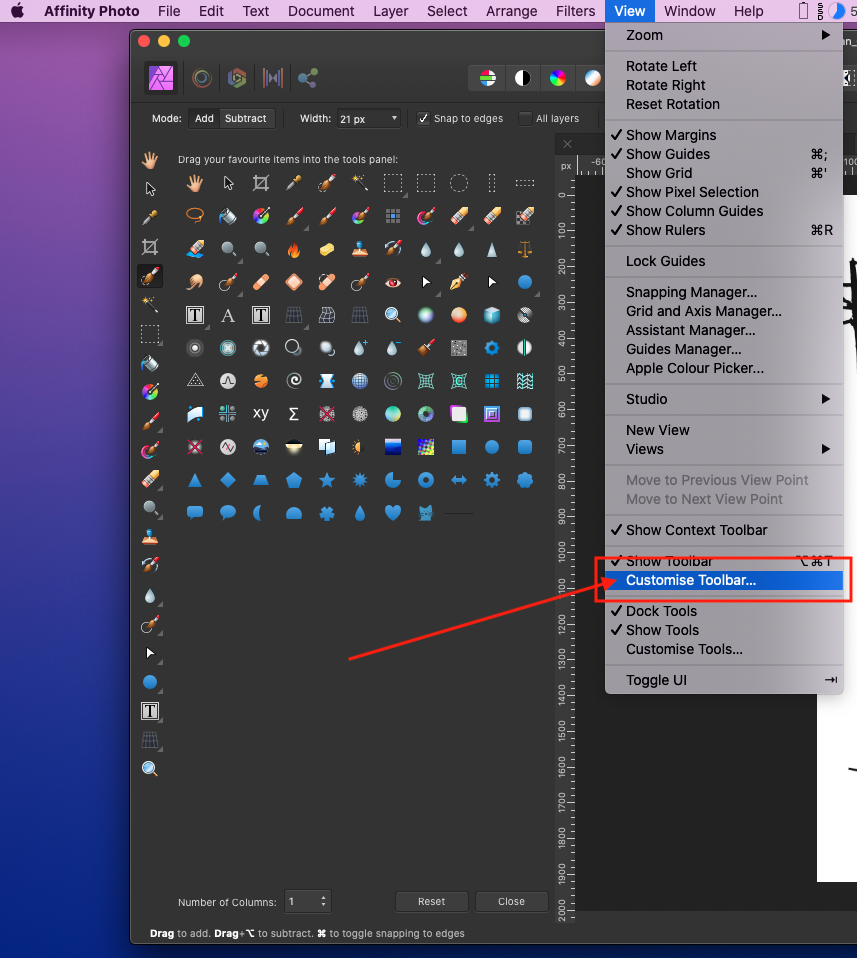
Affinity photo also gives you the option to customize the toolbar over on the left side. You can do this by selecting the View menu and then scrolling down near the bottom and selecting customize tools. Now you can click and drag on any of the tools to remove them from the tools are.
If I wanted to add any new tools to the toolbar all I need to do is click and drag them into place with the other tools.
You can also change the number of columns but if you ever want to reset it back to normal just press on the RESET button on the bottom of the Tools display then close.
Finally for this section, up at the very top left are the different personas of Affinity Photo. Right now you are working inside the Photo persona which is where you’ll do most of your work when editing photos. You also have the Liquify persona, the Develop persona, the Tone mapping persona and the export Persona. Persona actually is just another word for Different Workspace.
You will over time learn all about the other personas, but for now, in this exercise, we will move on having had a look at the interface that you will use most.
Section 3
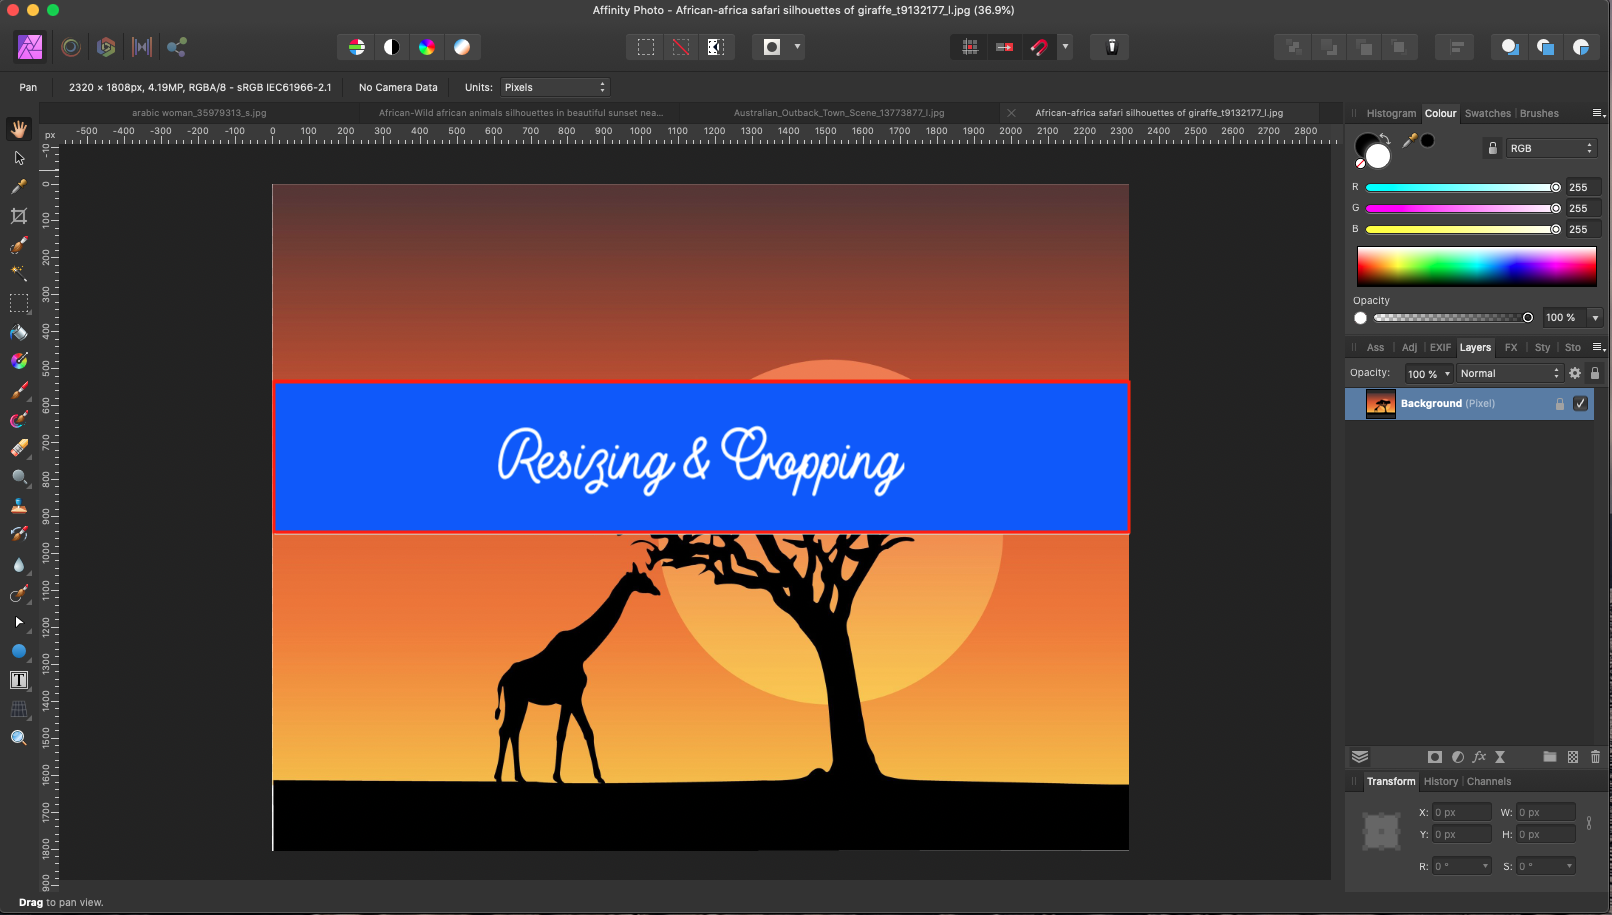
Cropping pictures is probably one of the most common things you will want to do, which of course includes resizing. So Cropping and Resizing are important tools to master.
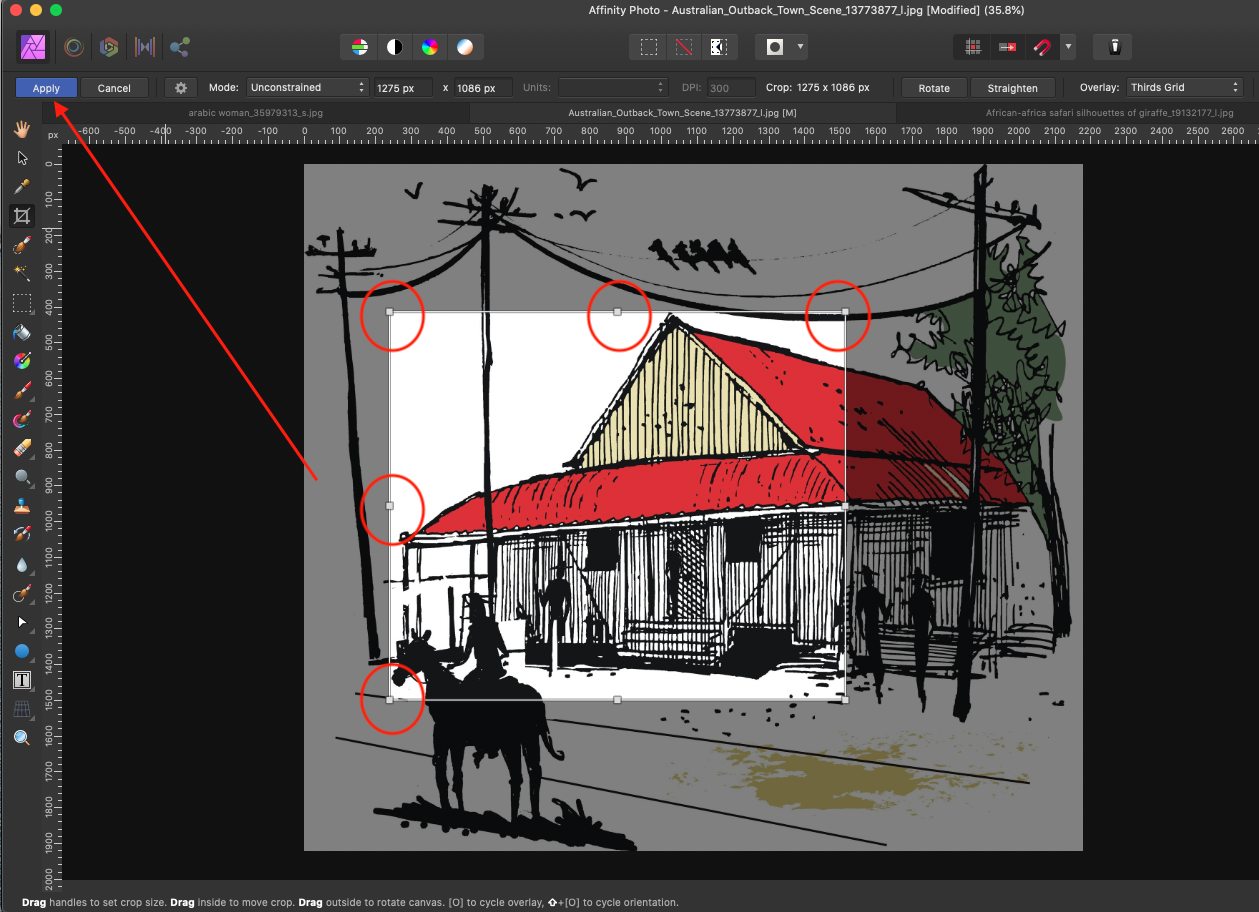
To activate the crop tool you can either click on it, the fourth tool down, or you can press the letter C on your keyboard. Pressing C again will toggle the cropping tool OFF. So pressing it once turns it on. Pressing it again turns it off.
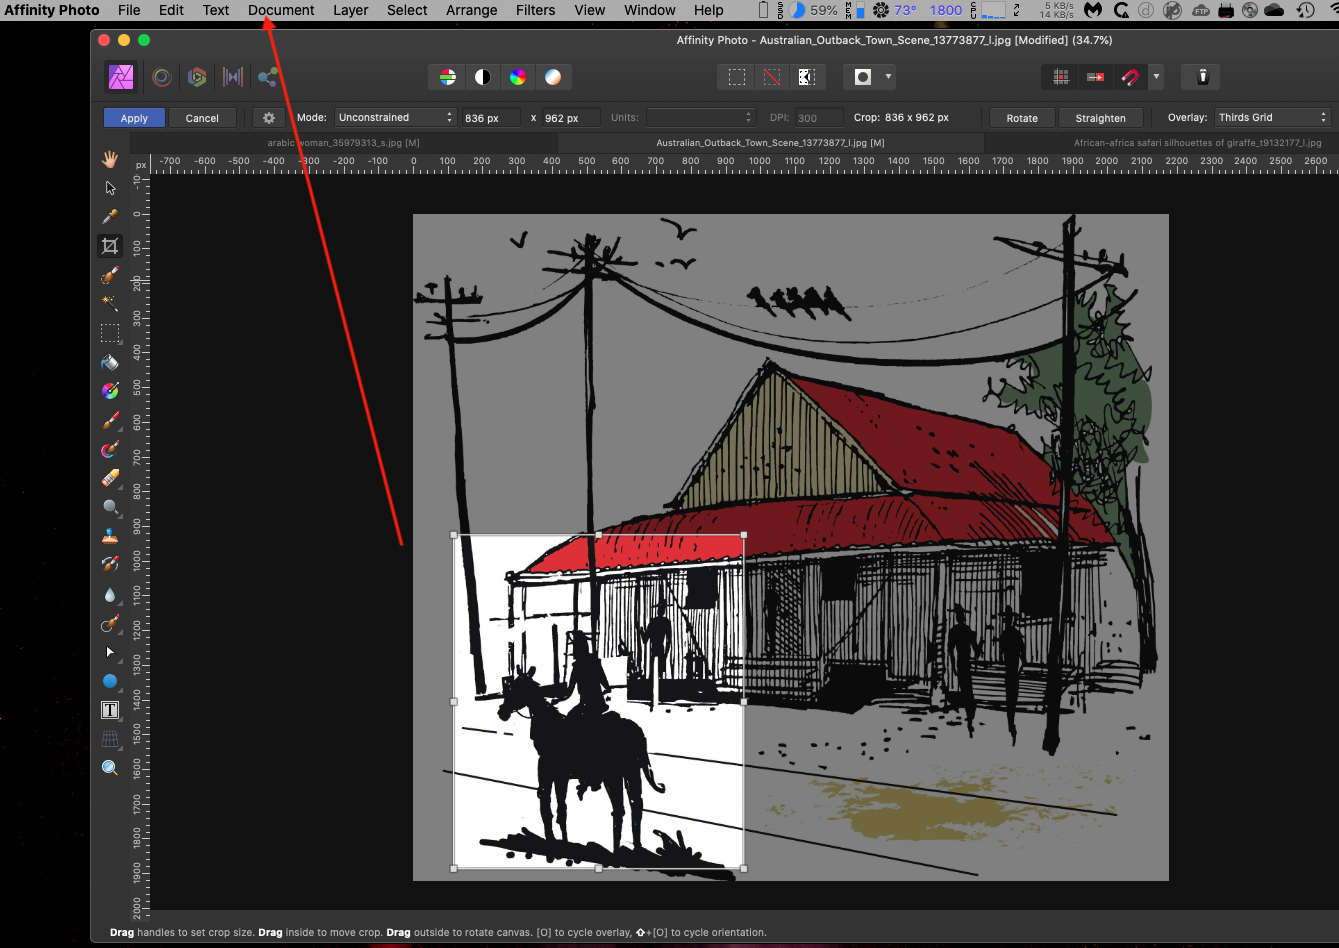
Then you simply need to drag on any of the handles to bring in the crop, altering the size of the crop grid.
When you’re satisfied with your crop you can either press apply up at the top left or press simply press ENTER on the keyboard.
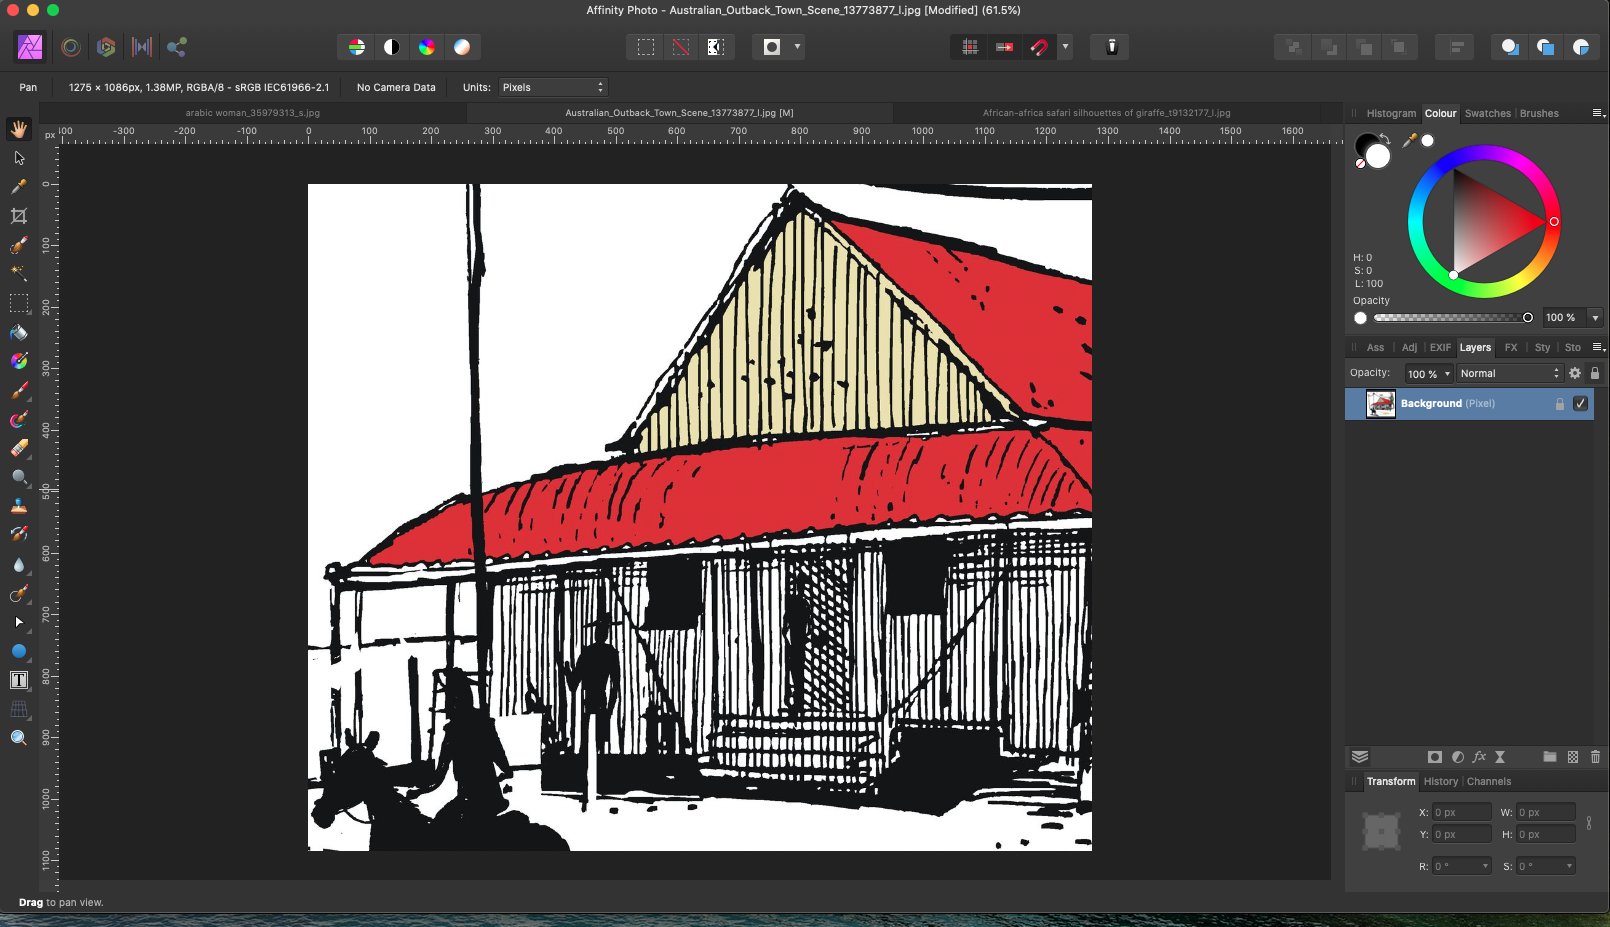
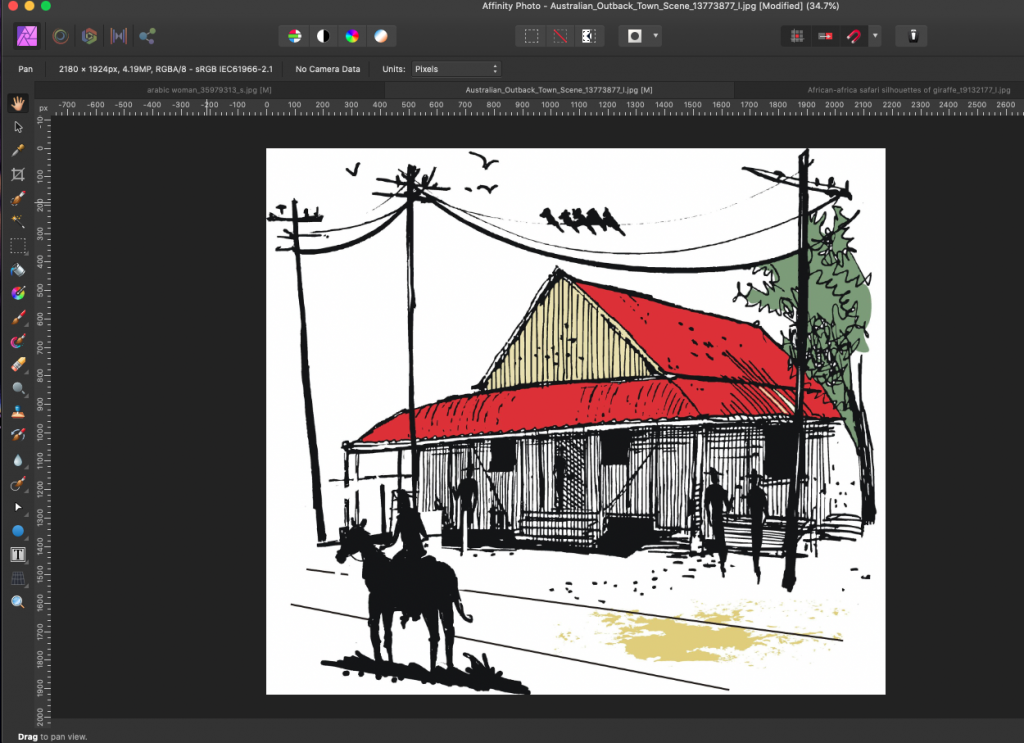
The great thing about cropping inside Affinity Photo is your original picture is still there. All you need to do is Select Document -> Unclip canvas and your original image is back in place. You can also use CMD+Z for the same result, even after you have pressed Apply.
Select DocumentUnclip CanvasRestored Image
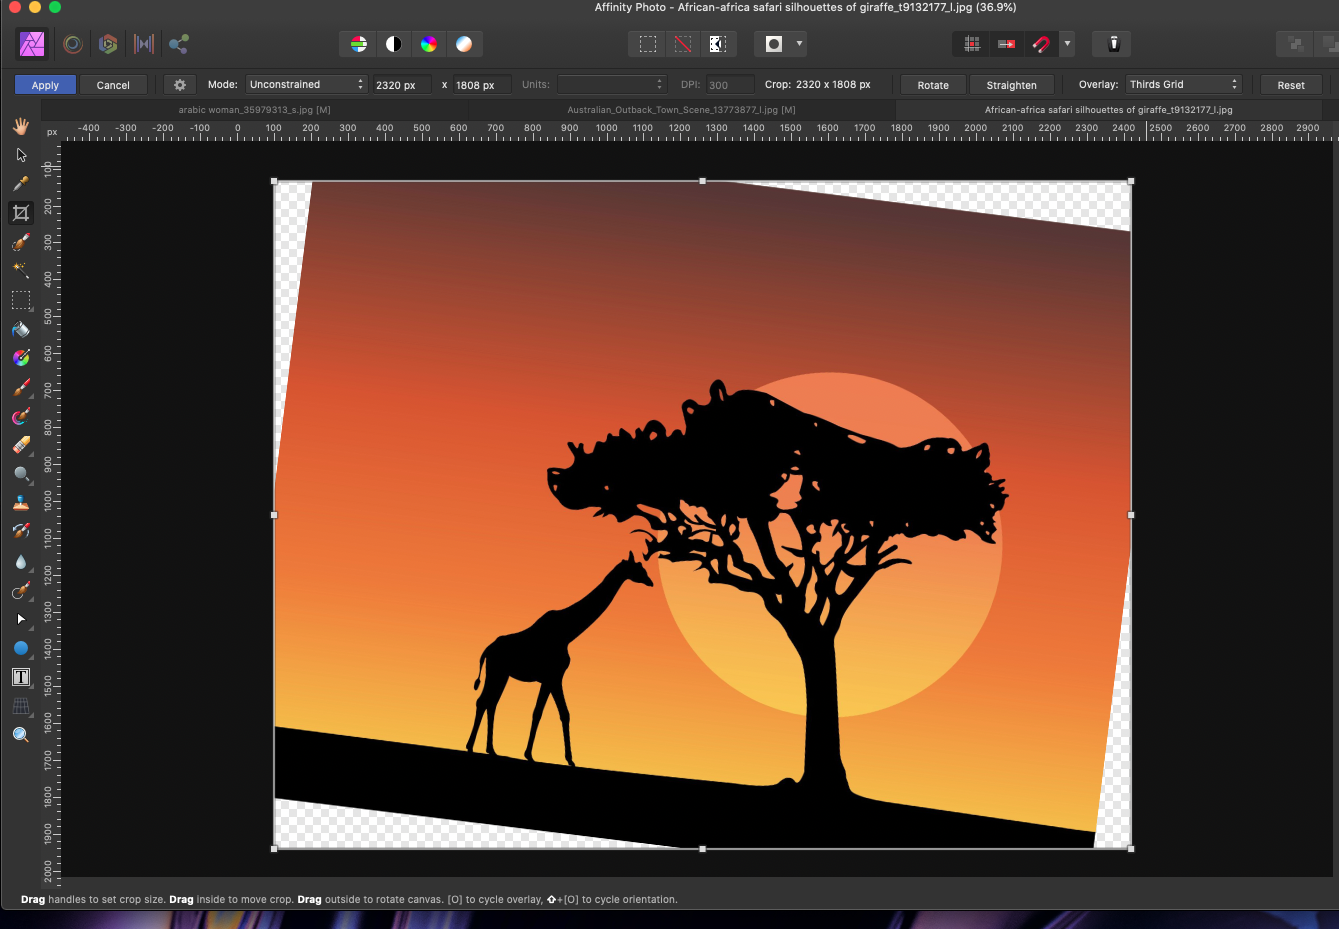
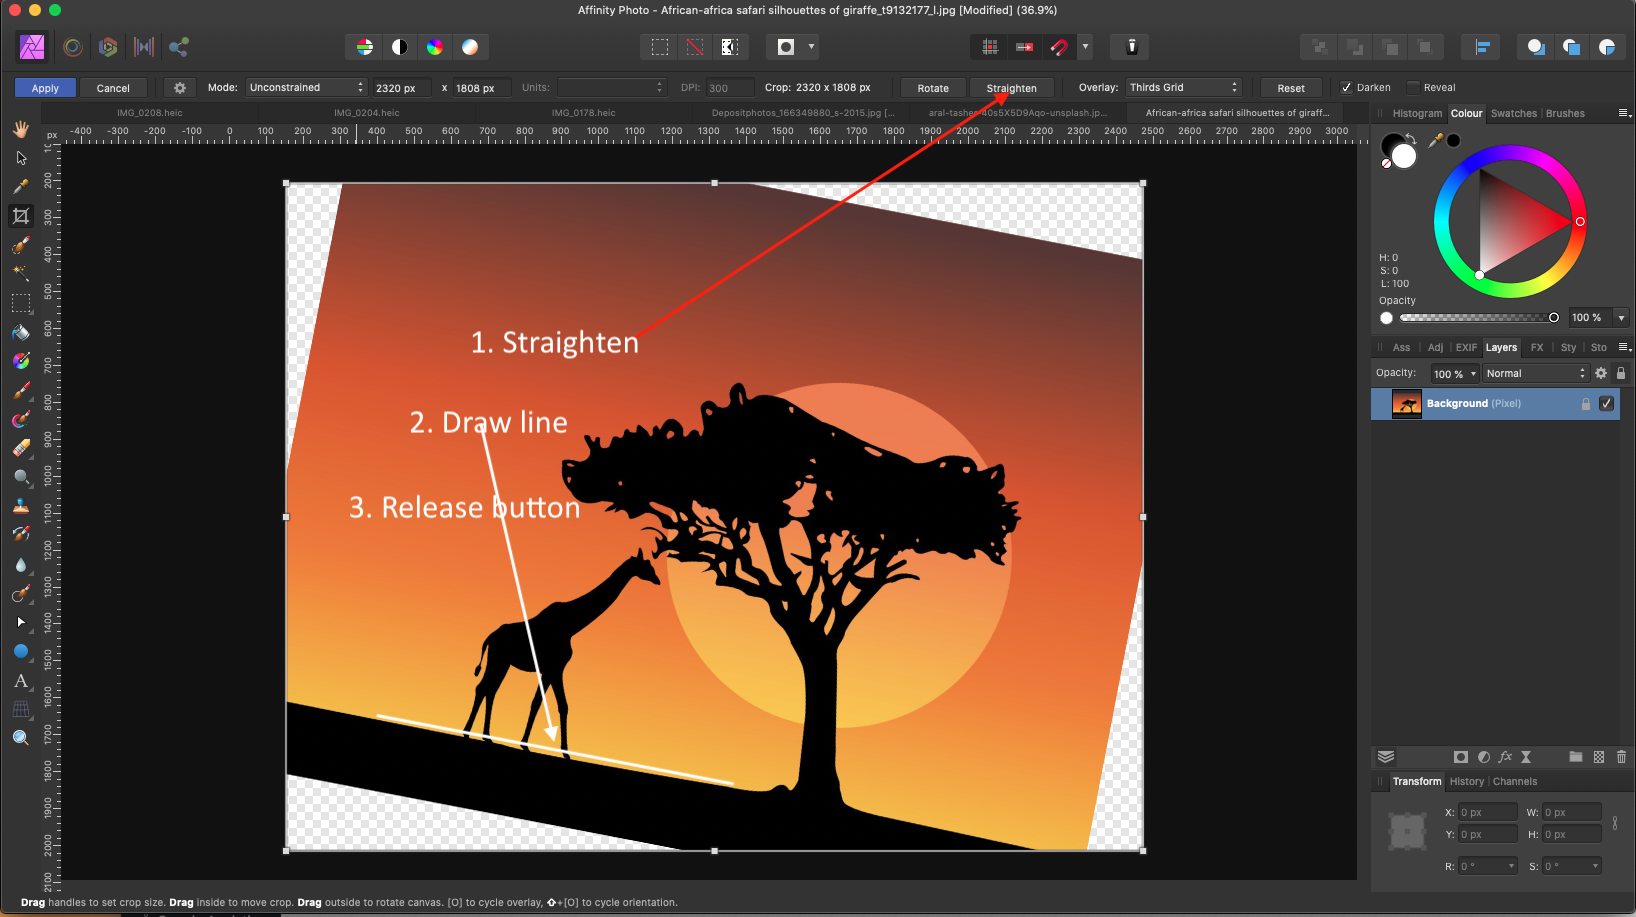
A great feature of the crop tool is it also allows you to straighten your pictures. I’m going to press C for the crop tool and then go up to the context toolbar and select straighten. Then you just need to click and drag on the part of your picture that should be straight, such as a horizon line or a building.
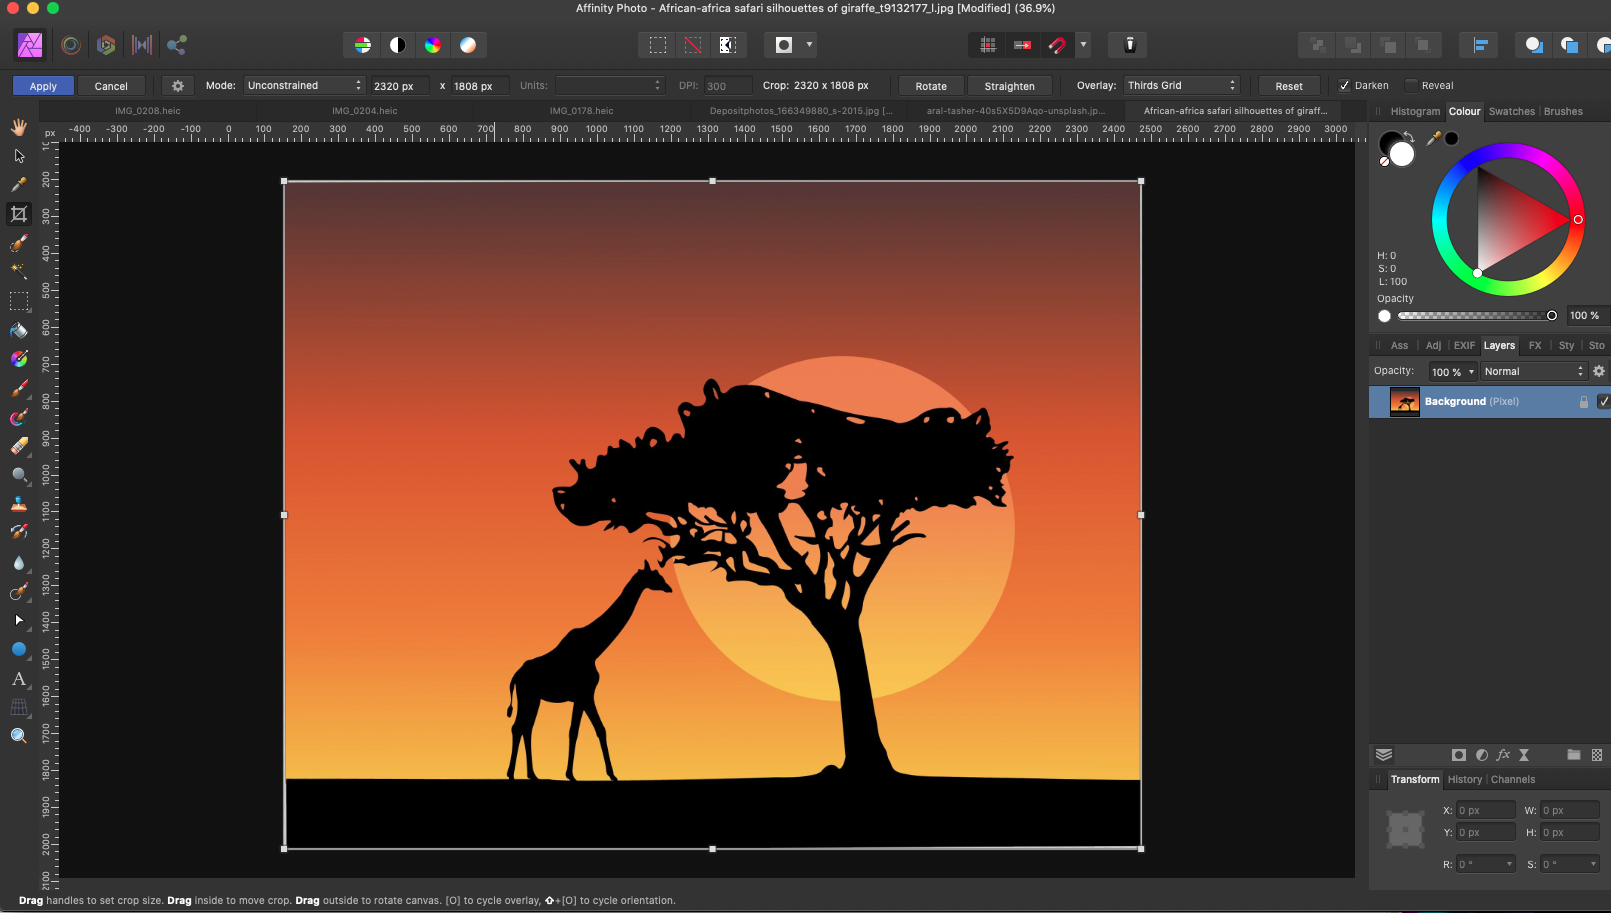
In this case, I should have a straight horizon line so I’m going to click on Streighten and drag to draw a line going along the horizon line, then when I release the mouse the picture will automatically be straightened to match the line that I drew.
You can also rotate your picture by hovering your cursor on the outside corner while Crop is selected. Once your cursor turns into these two arrows you can click and drag to rotate your photo. Then you just need to press ENTER to confirm your rotation. Cropping and straightening pictures inside Affinity photo really is as simple as that.
Section 4
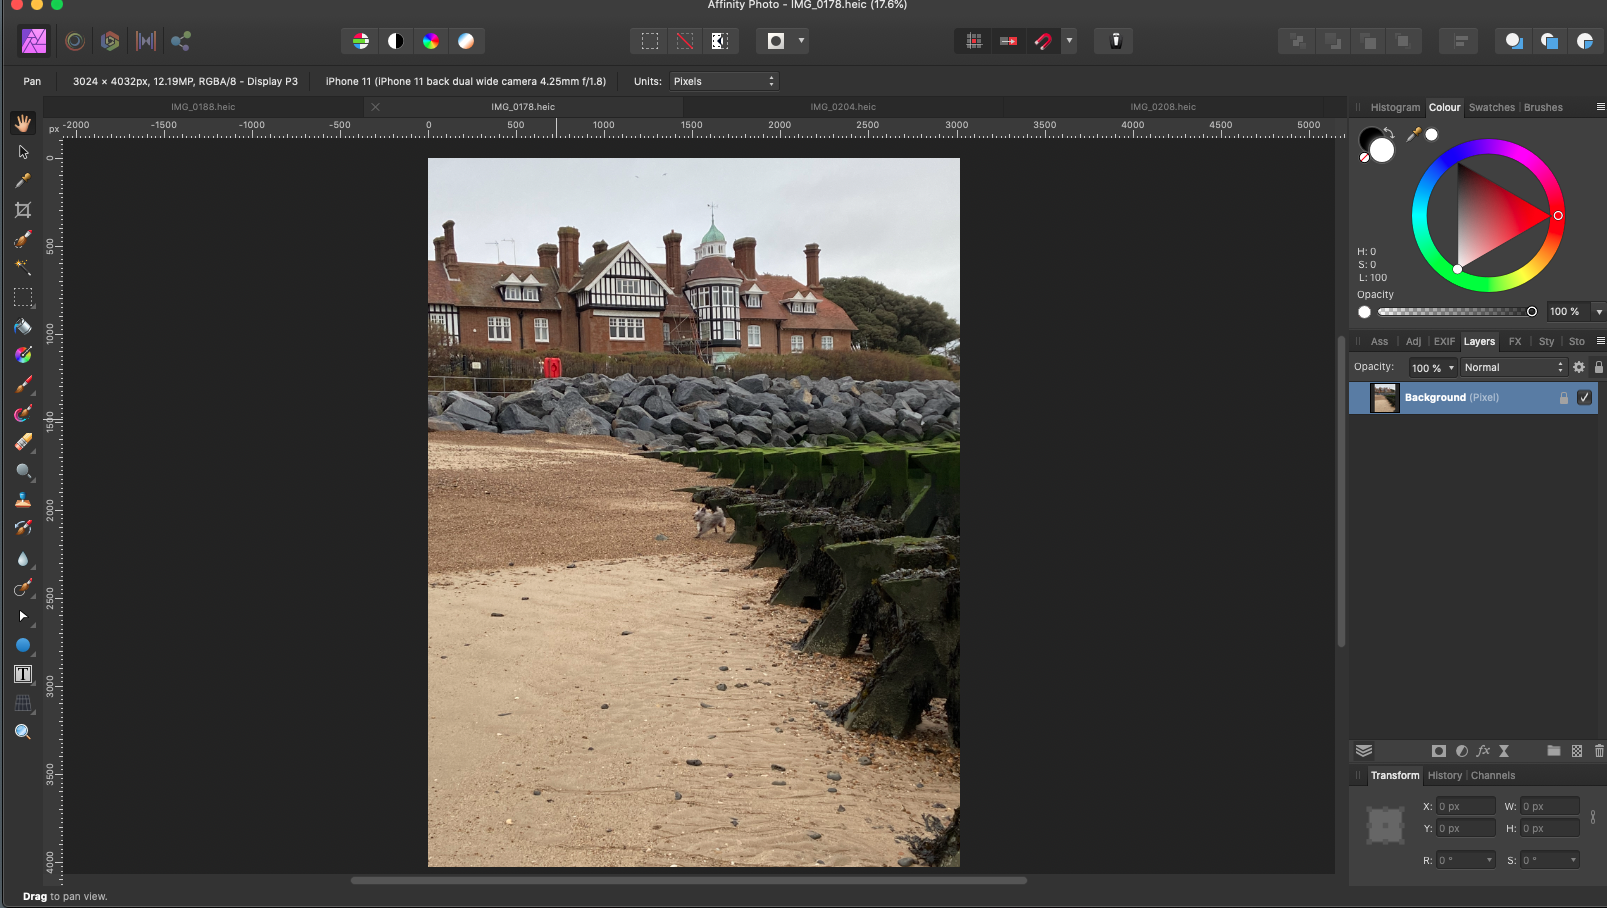
Removing blemishes and imperfections from a photo is one of the most used things in the photographer’s tool kit.
In this example, I’m going to remove the red fire hydrant box that is evident near the top centre of the photograph.
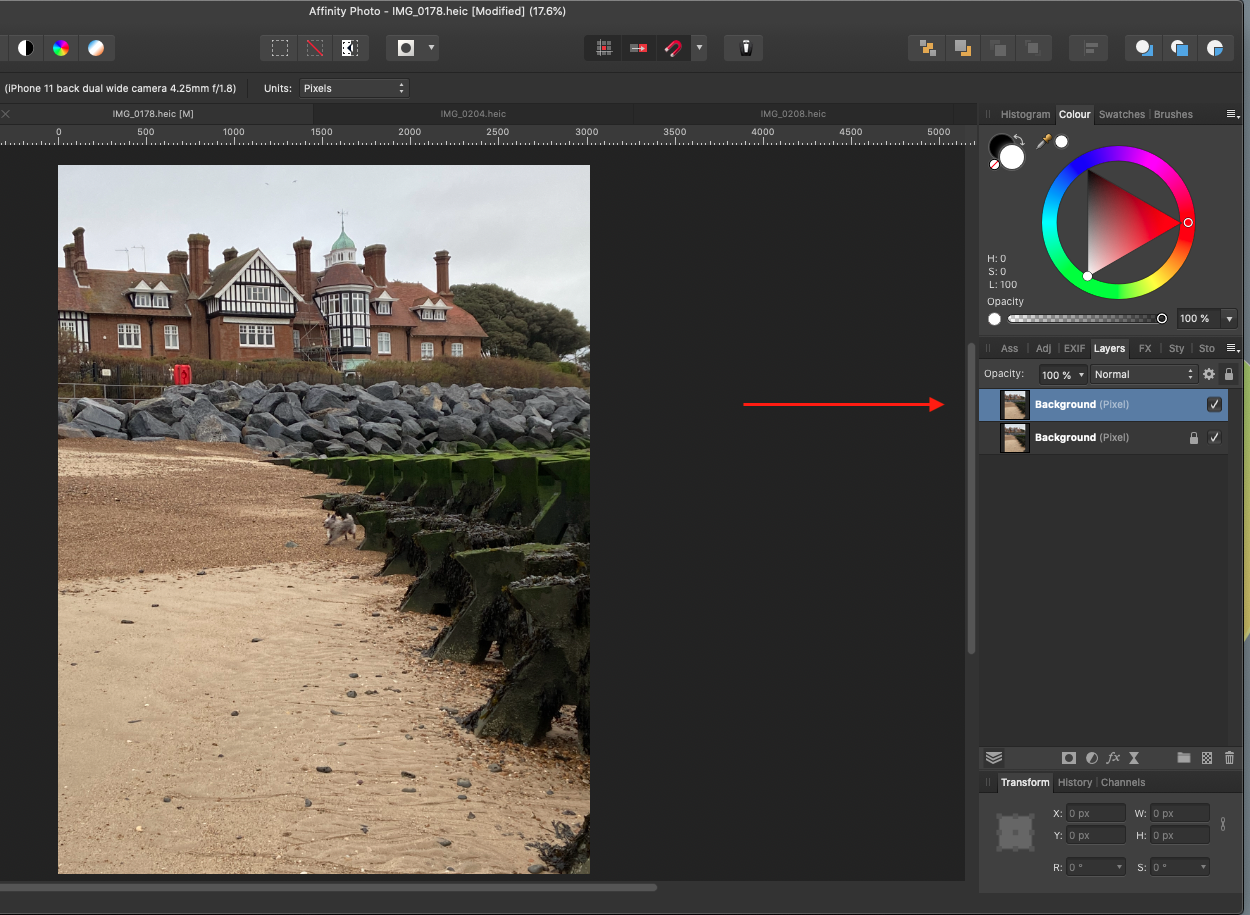
but before I remove it I’m going to duplicate the image. To do this you can press CMD+J. You can see that we now have two copies of the exact same picture. You can also Right Click on the Background layer in the Layers Panel on the right, and select Duplicate.
The reason we do this is so that we can work non destructively. This means we’ll keep the original image safe by working on a copy of it. So now that we have a copy of our image we can make as many changes as we want to the picture and the original image will always be safe.
Non-Destructive Safe Working
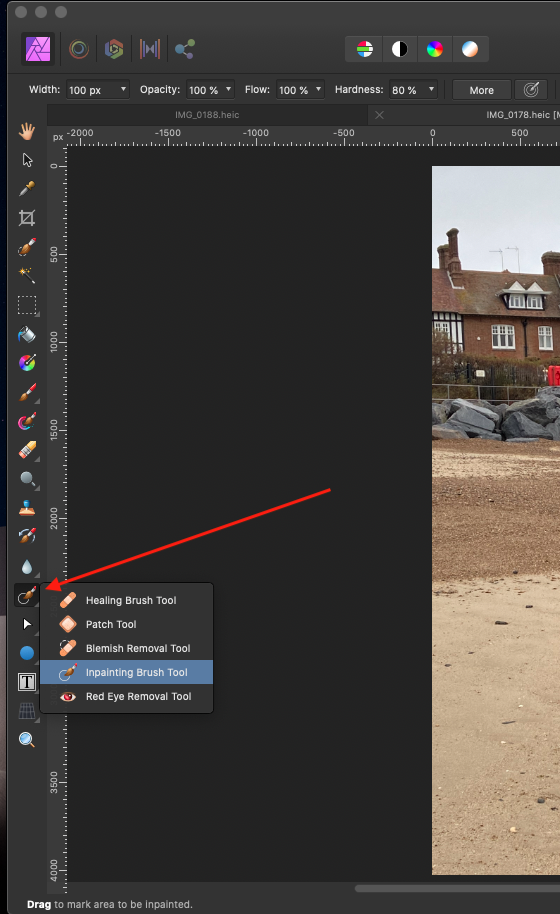
With your duplicate copy ready to go the next step is to remove the red fire hydrant from the image. To do this I’m going to use the inpainting brush To find the inpainting brush you can click and hold on the band-aid icon and then select the inpainting brush tool.
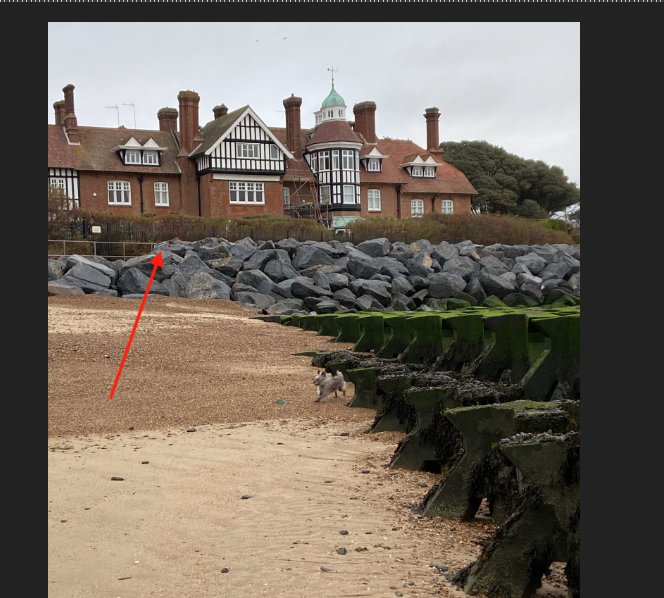
All you need to do is paint over the part of the picture you want to remove and then Affinity Photo will automatically remove it for you. The image will have a red brush applied to it, and when you release the mouse button, the effect will be applied. For this example, I’m just going to paint over the red fire hydrant with a small size brush, about 50px in width, and then Affinity Photo will remove it from the picture almost like magic.
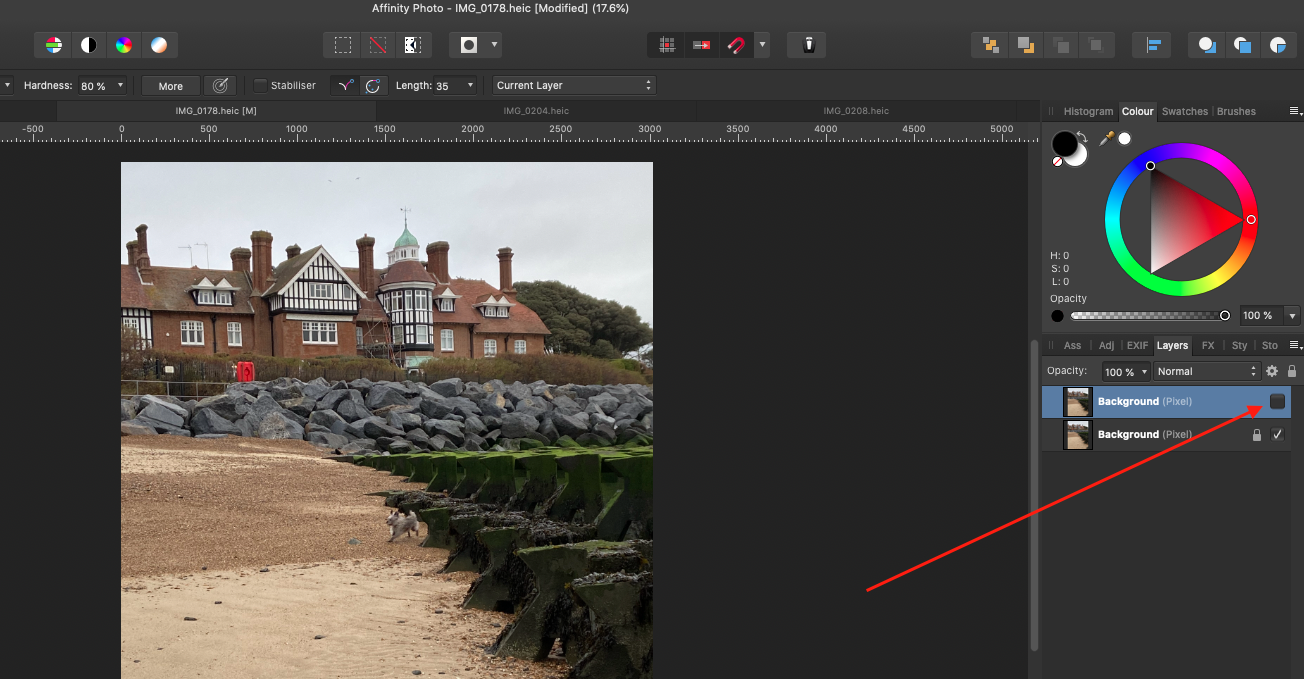
Affinity Photo has removed this object snd if you’d like to see a before and after all, we need to do is turn off the duplicate picture that we made earlier in this example. To do this go to the Layers panel and turn the checkbox off. Now we’re looking at the original picture, but if we turn the checkbox back on we can see how the duplicate photo looks with the object removed
Checkbox unselected
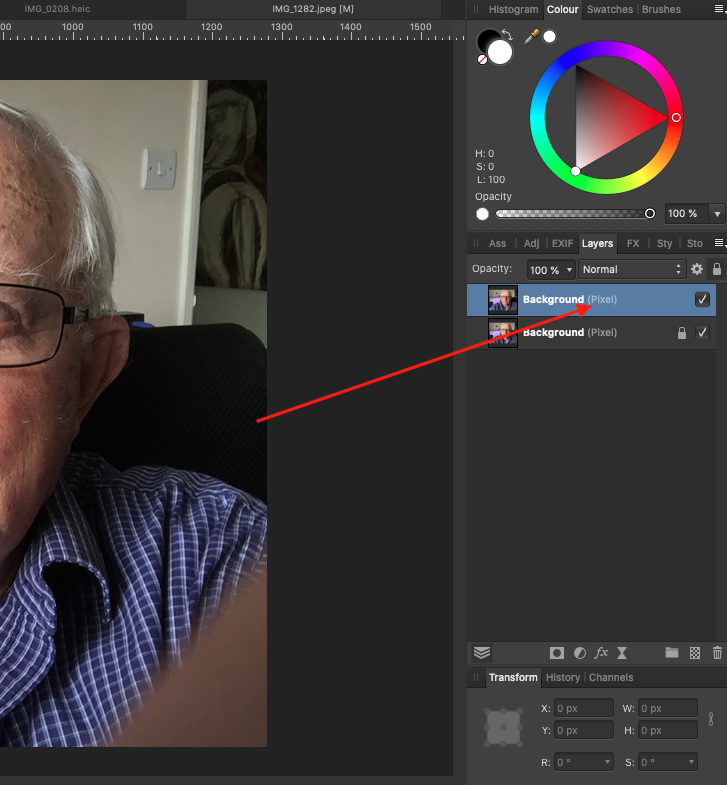
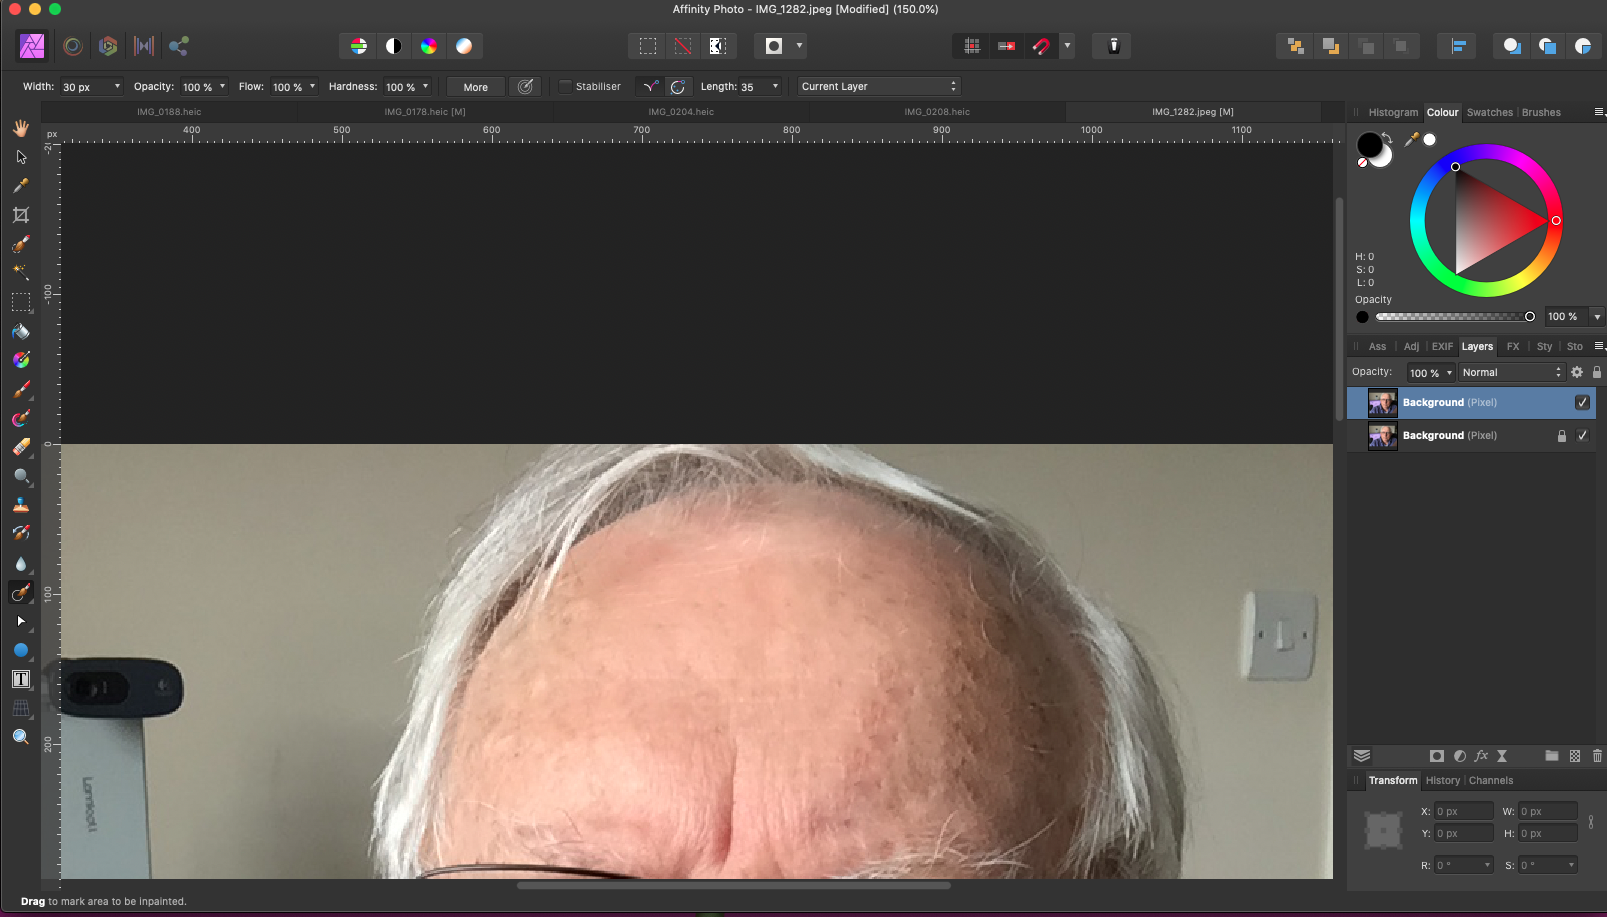
In this next example, I’m going to continue using the inpainting brush but this time I’m going to use it to remove some small blemishes from my skin. My apologies for the model – I don’t mean to frighten you…
But before we make any changes to the photo we’re going to work non-destructively again by duplicating it. Remember that the shortcut for this is CMD+J
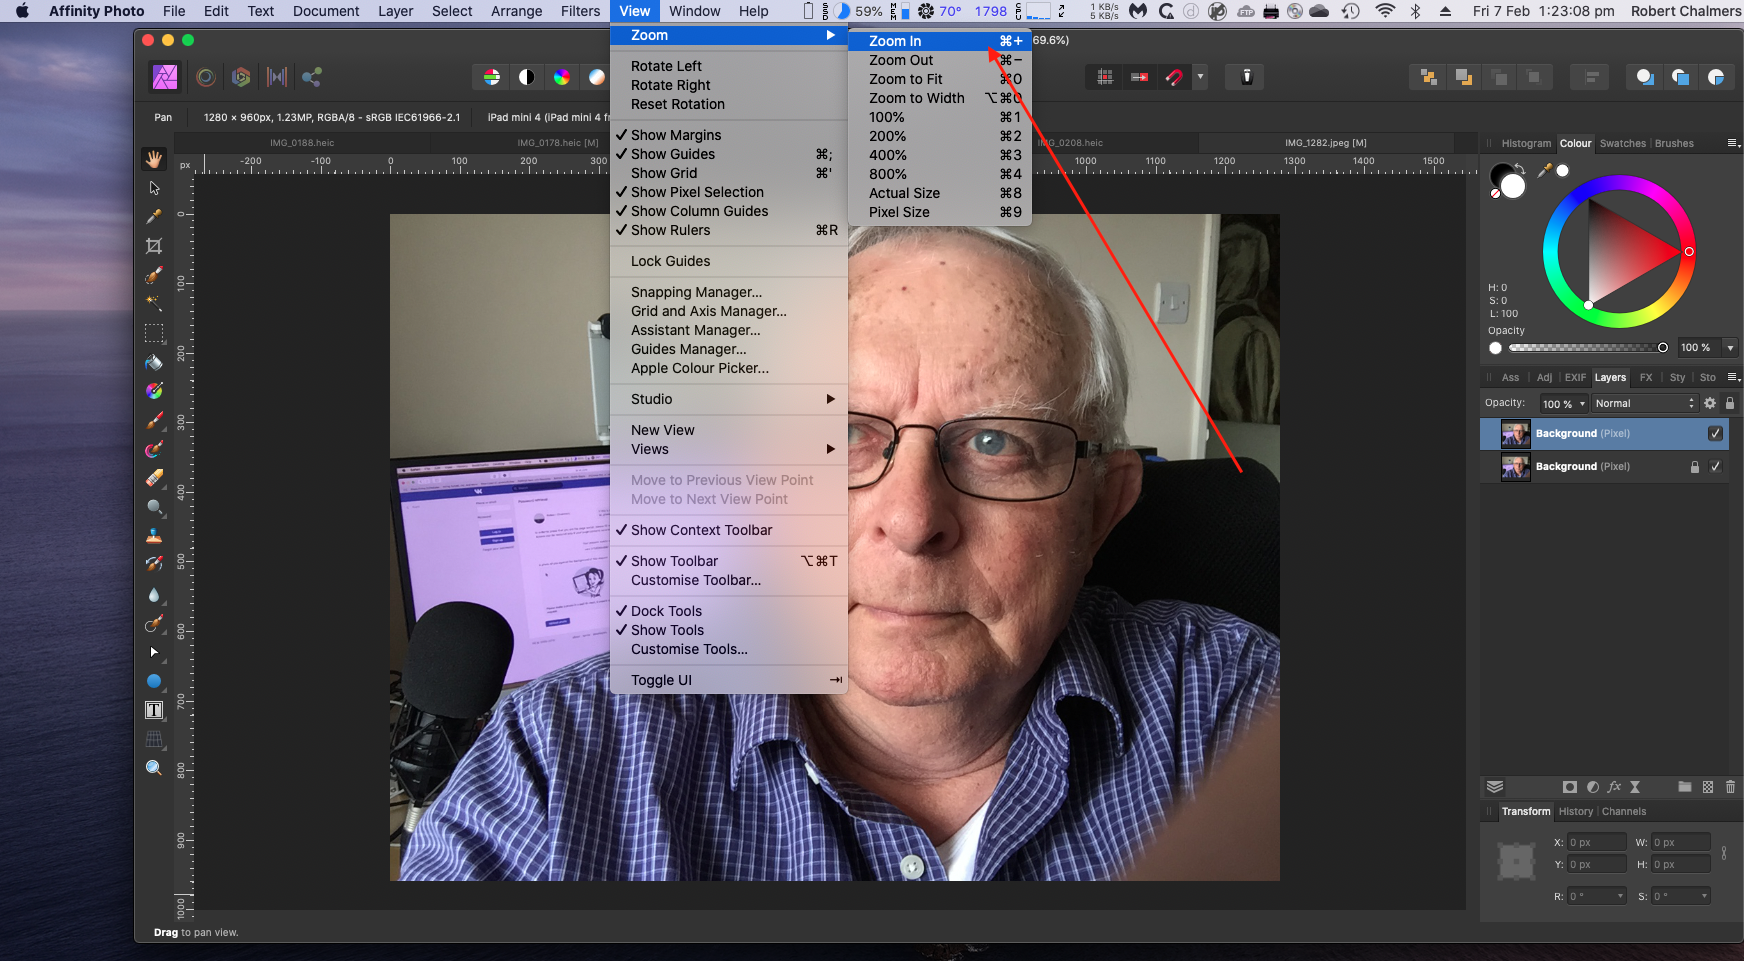
Next, we need to zoom in to the photo so we can see the blemishes more clearly. If you’d like to zoom into your photo you can go up to the top menu and select View then Zoom in or Zoom out
I strongly recommend you memorize the shortcuts (CMD -) or (CMD +) to zoom in and out.
To move around the picture all you need to do is hold down the spacebar and click and drag the image.
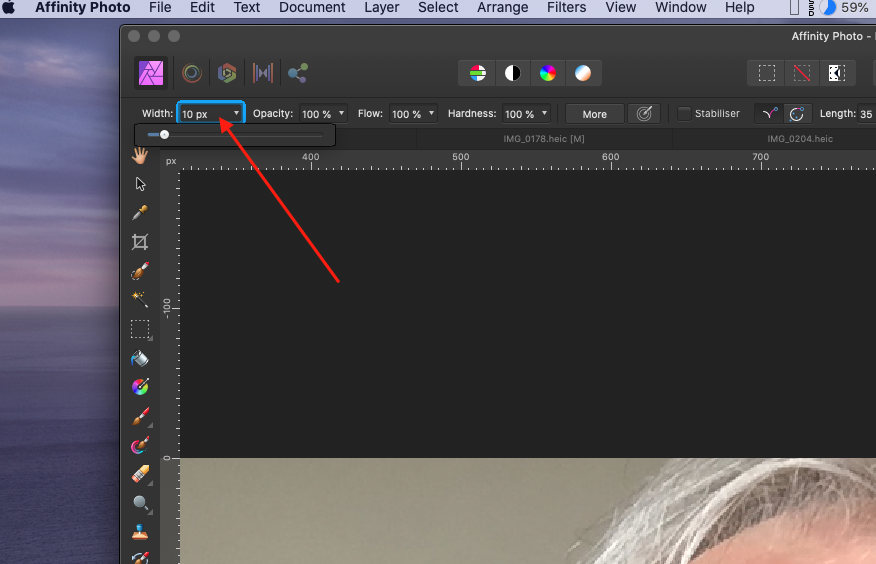
Before we begin inpainting I also want to highlight a couple of options that you can change in the context toolbar. Generally, when you’re working with the inpainting brush you want to change the hardness from 80% to 100%, so I’m going to click and drag to highlight the adjustment and then type in 100 then I’ll press ENTER to confirm 100% hardness. You can also change the size of your brush in the same area. Depending on how big the imperfection is you’ll want a different sized brush because if we’re working with very small imperfections we’ll want a smaller brush size I’m going to change the brush size to just 10 pixels in this instance.
A great shortcut to change your brush size is the bracket keys underneath the equal sign on your keyboard. If you press the right bracket key then your brush size will get bigger and if you use the left bracket key then your brush size will get smaller. After you’ve set your brush to 100% hardness and an appropriate width all we need to do is begin painting over the blemishes to remove them from the photo. Then to see the before and after, uncheck the duplicate layer to see the original photo and then we’ll see it with the blemishes removed.
By using the inpainting brush it’s extremely easy to remove imperfections from a photo but as great as this tool is it doesn’t always do a perfect job, but the first time you paint over something if that’s ever the case with you just try painting over the same area again and generally it will do better the second or third time.
Section 5
Adjustment layers are very powerful tools. Adjustment layers allow you to non destructively change the colours of your photographs.
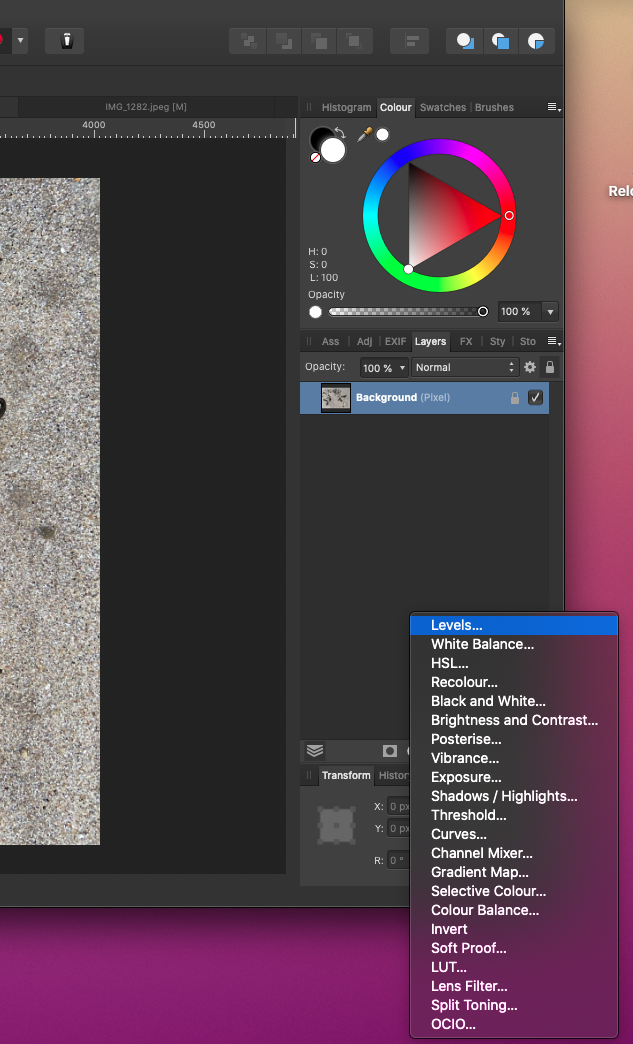
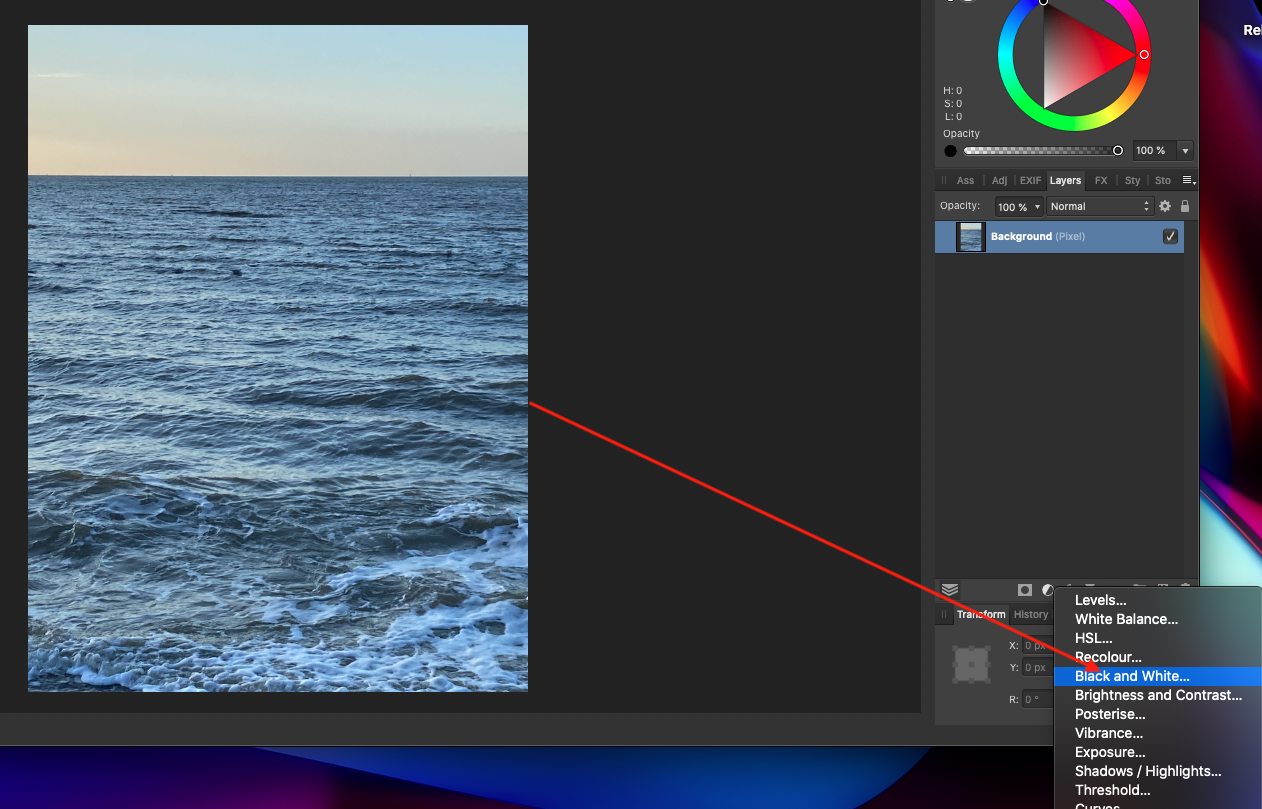
To apply an adjustment layer we need to press on the little icon in the Adjustment Panel, shown down here. It looks like a black and white circle.
After you click on this icon you have many options for different adjustments that you can apply to your picture.
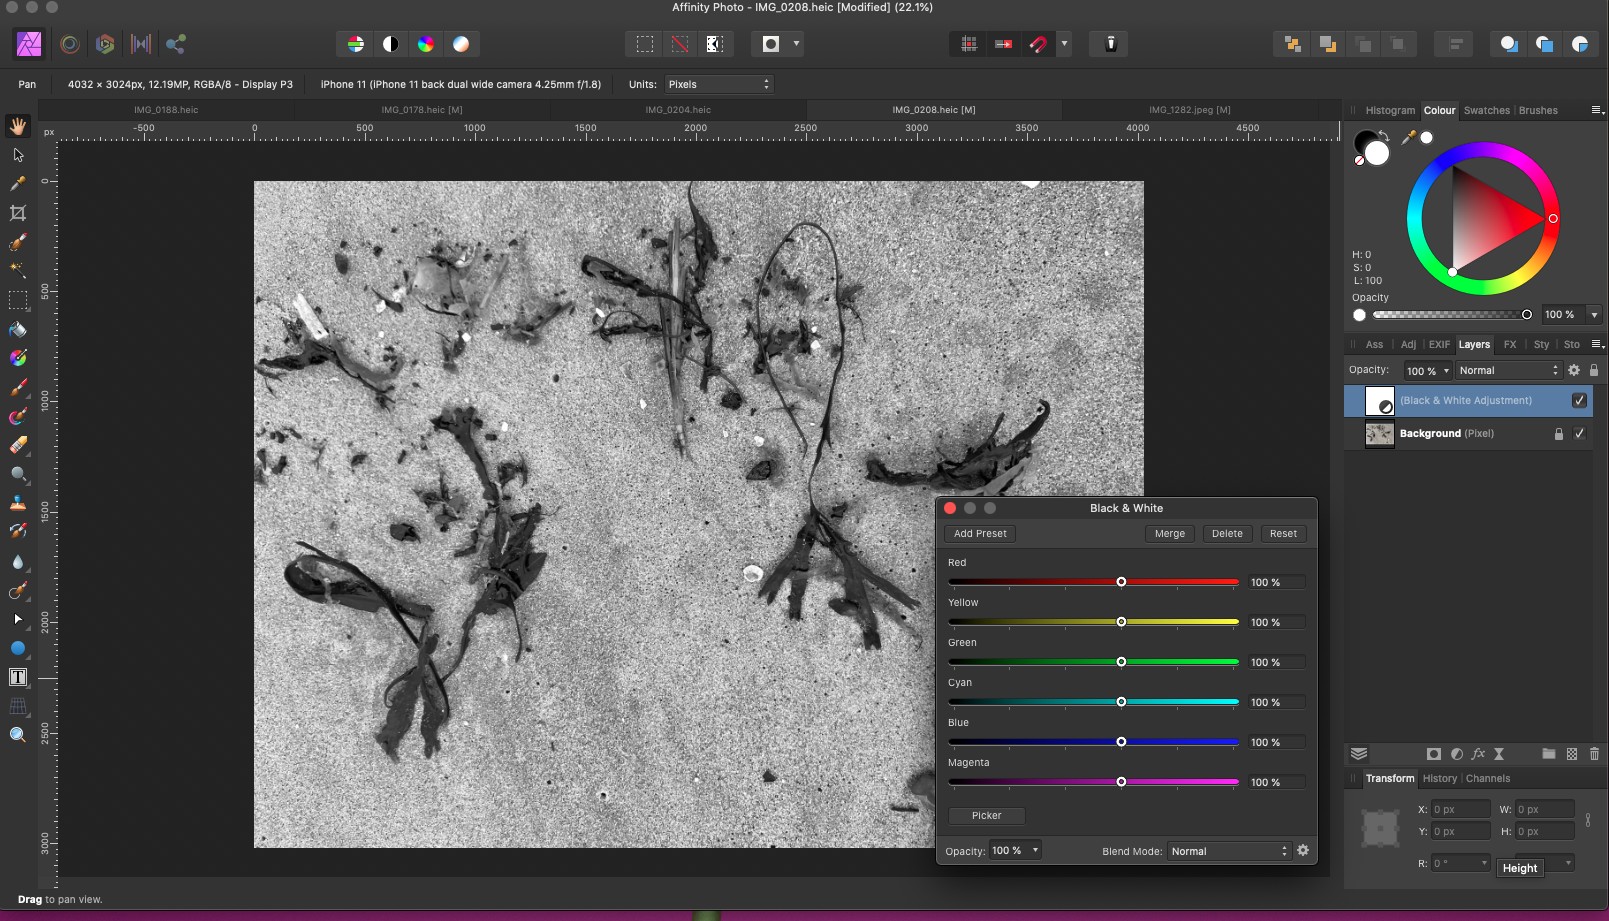
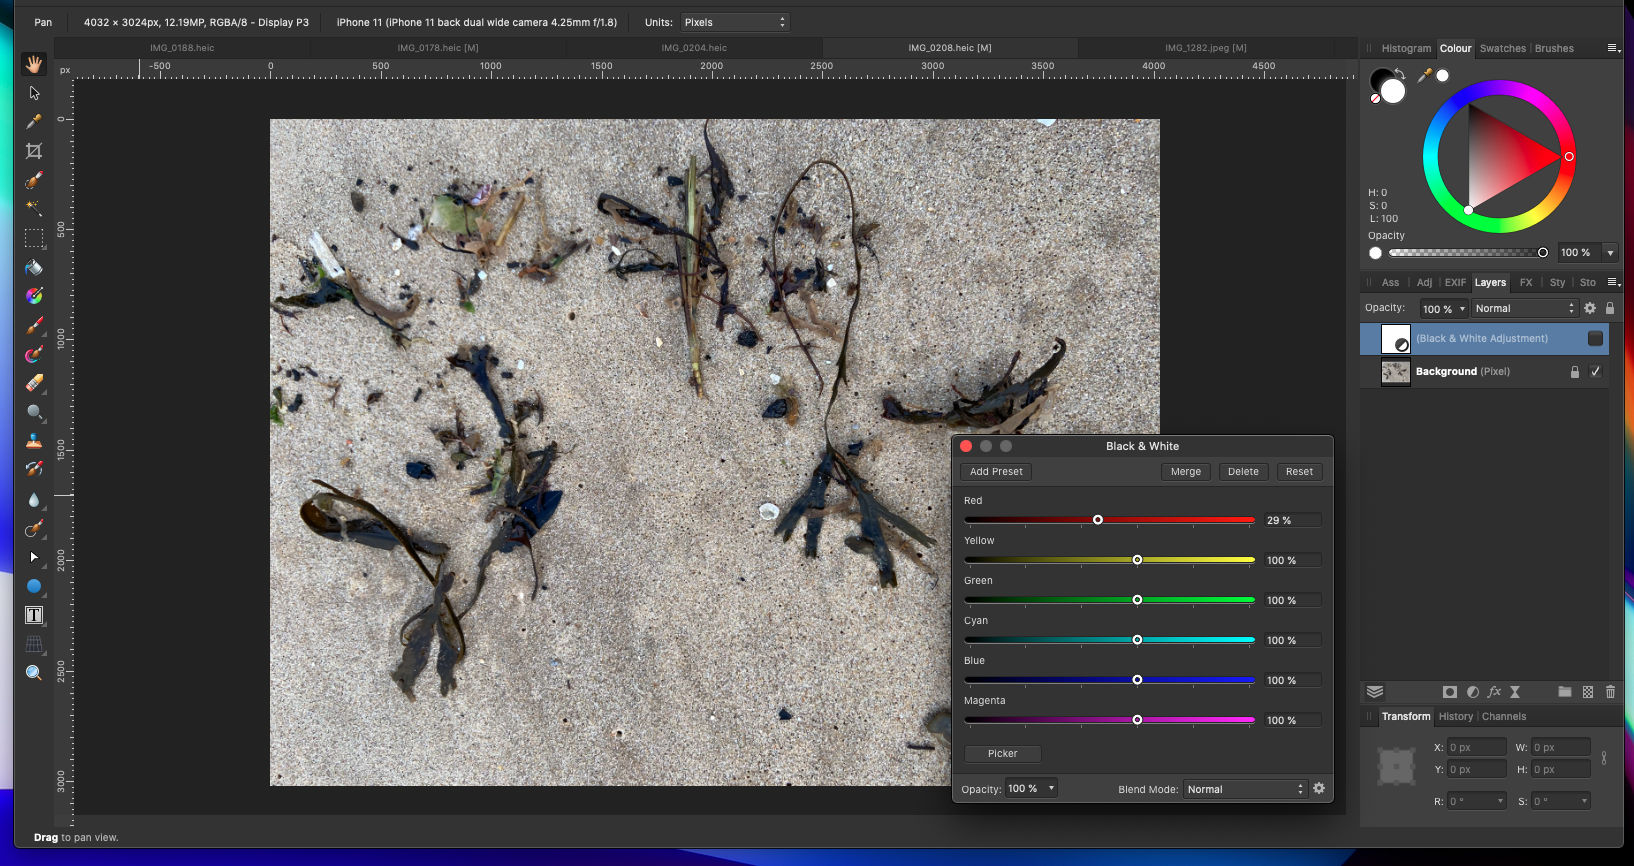
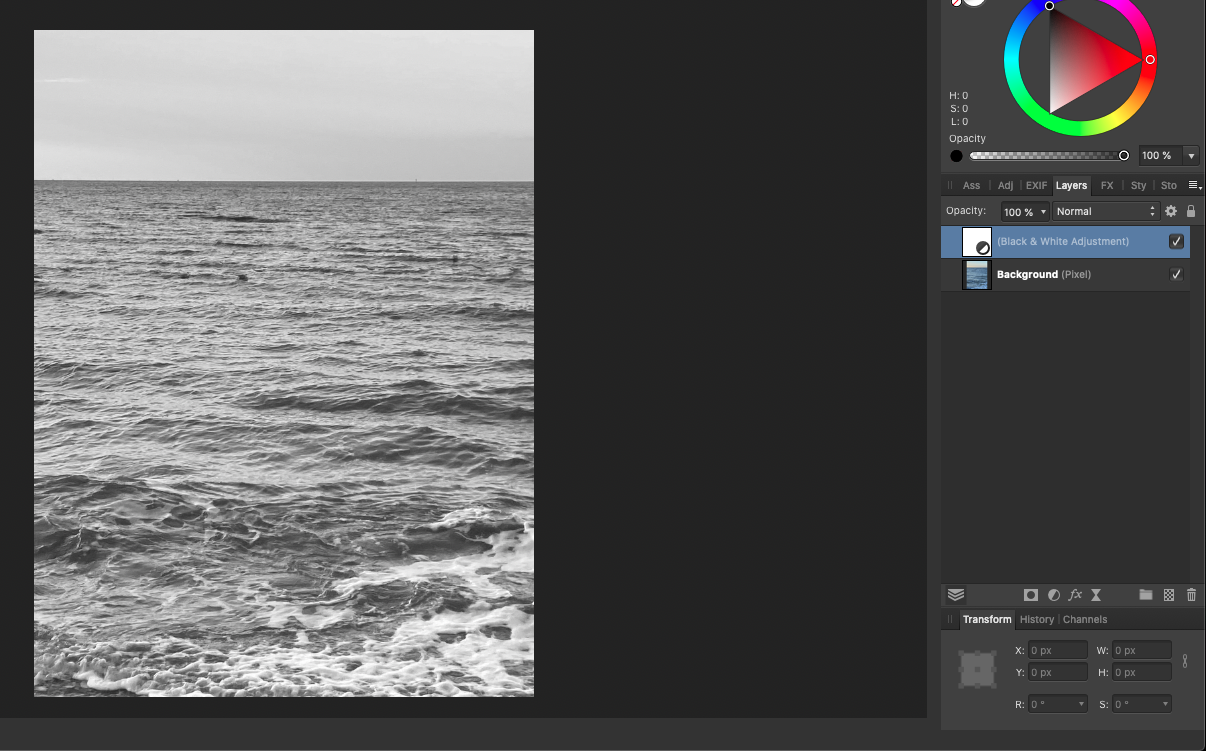
As an example let’s try applying a black and white adjustment, and as you can see it’s automatically turned our picture to black and white.
It’s important to note that every adjustment layer works differently but in this case, we can use these sliders to determine how bright or dark certain colours become.
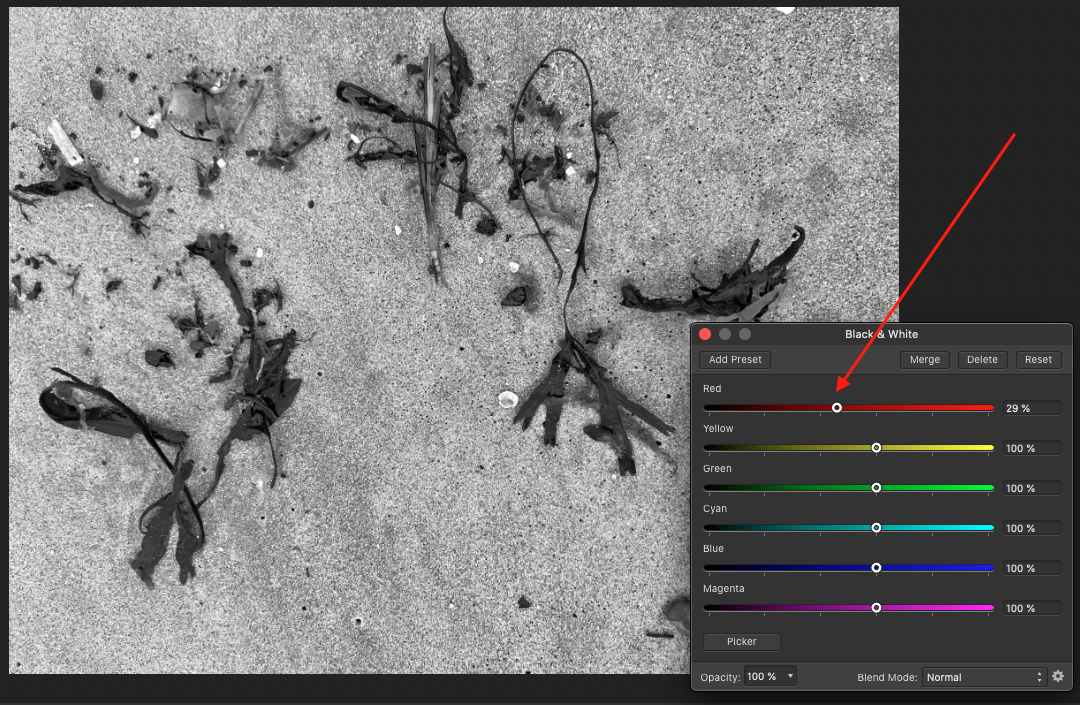
In our black-and-white picture for example if we bring the red slider to the left all of the reds in our photo will become darker but if we bring it to the right then they will become lighter. I thought it looked better darker so I’m going to bring this slider back to the left.
You can continue this process for the rest of the colours and when you’re done adjusting your black and white photo you can exit out of this dialogue box by pressing on the little red circle in the top left of the Black and White Dialogue box, and just as we saw earlier on we can see a before-and-after view by turning this layer off and on.
If you ever want to change how your black and white adjustment looks all you need to do is double click on the icon on the left edge of your Adjustment Layer in the Layers panel and then the dialogue box will reappear and you can continue making adjustments.
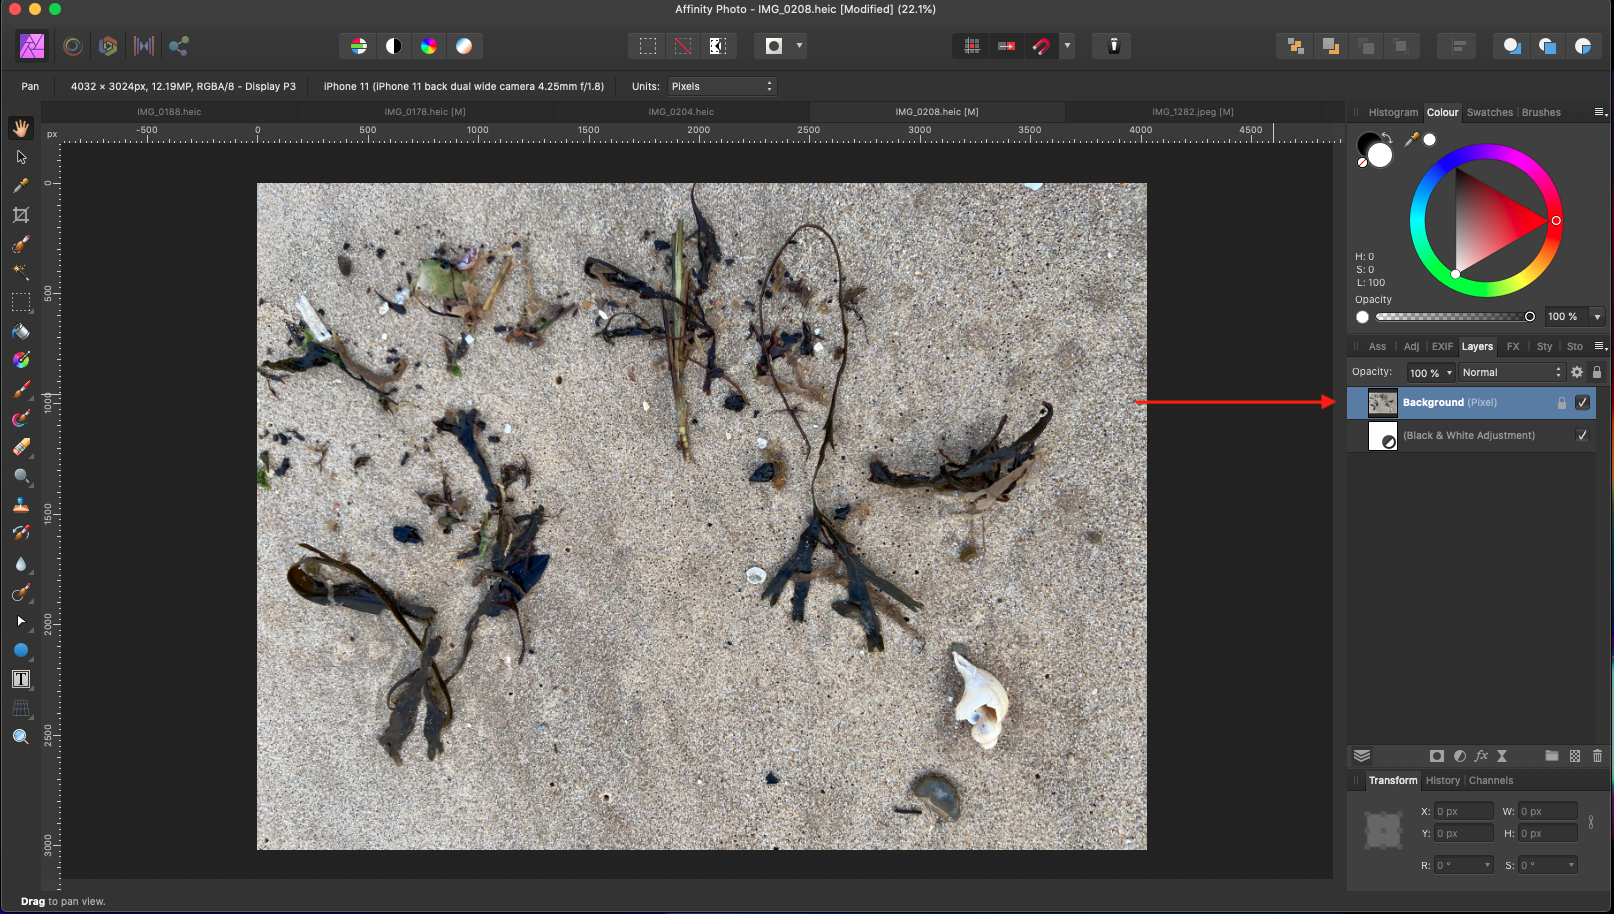
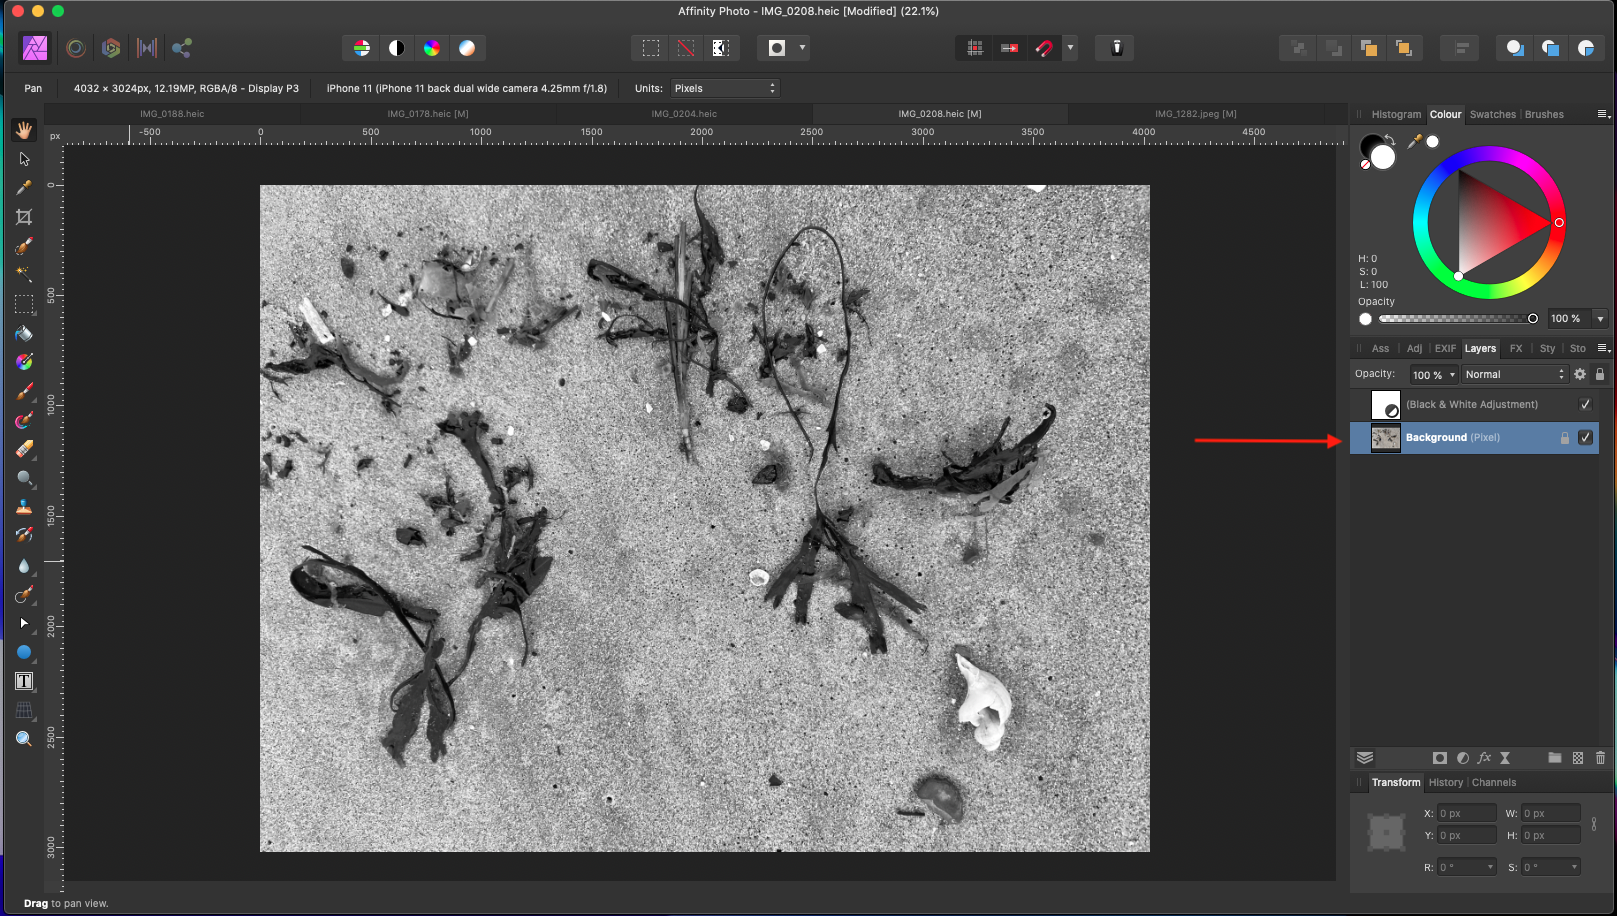
To use adjustment layers effectively you need to know that every adjustment layer only affects the layers beneath it so in this case because our picture is beneath the adjustment layer it’s being affected
but if we were to move our photo on top of the adjustment layer then the adjustment layer would no longer affect it
So if you want an adjustment layer to affect your picture you need to make sure the adjustment layer is above your photo as in this example.
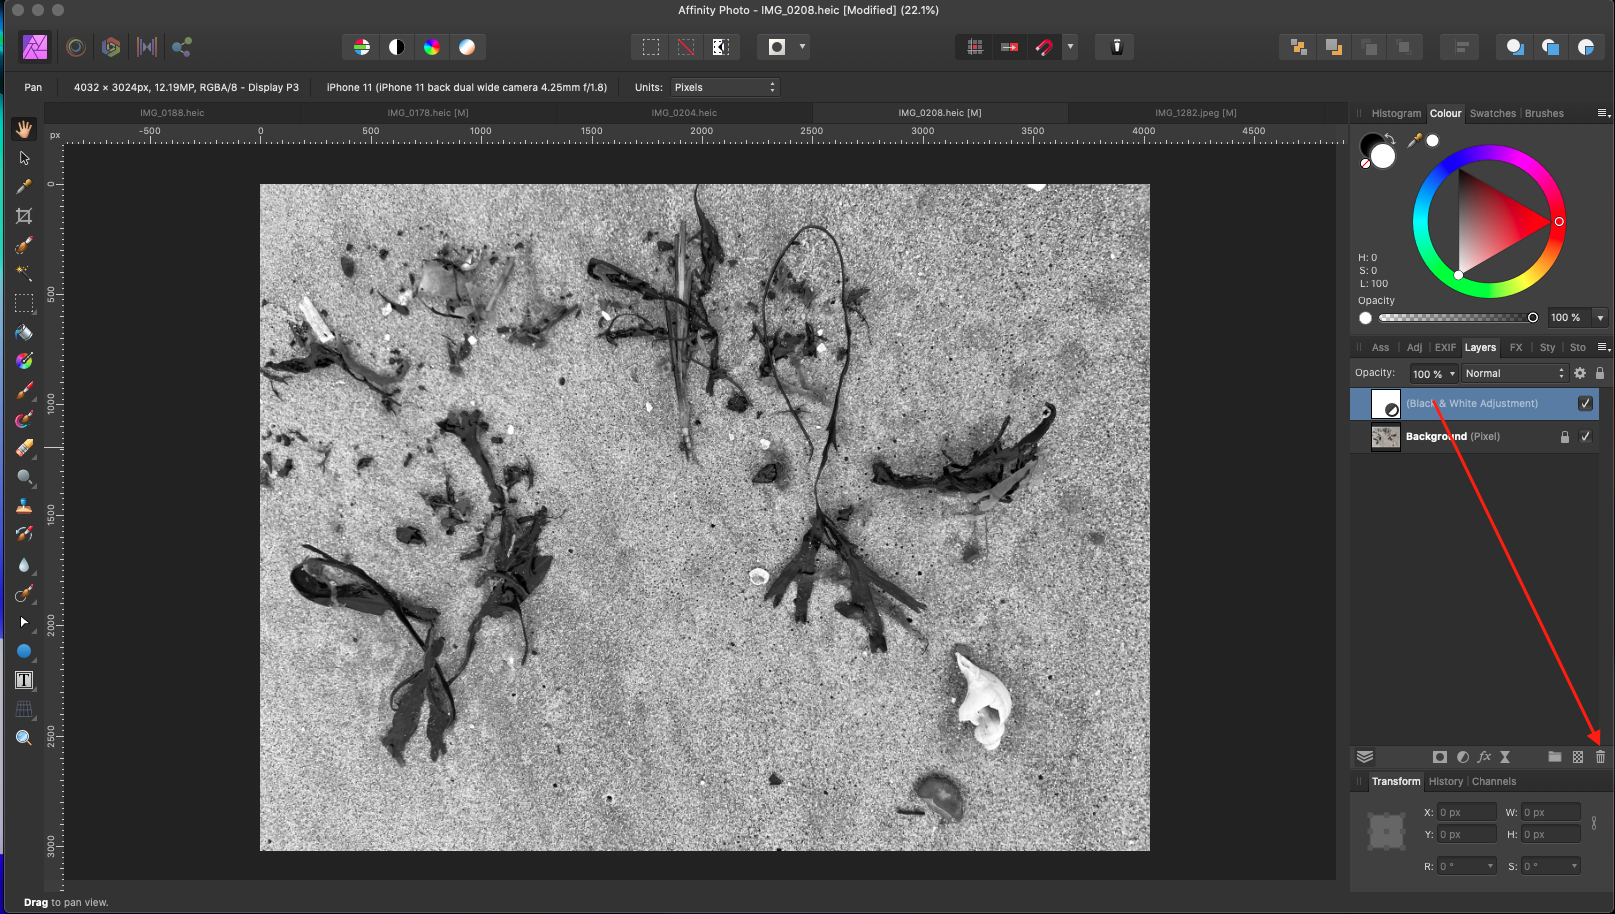
If you ever want to delete a layer all you need to do is click and drag it down to the trashcan, or right-click the layer, and select Delete from the drop-down menu.
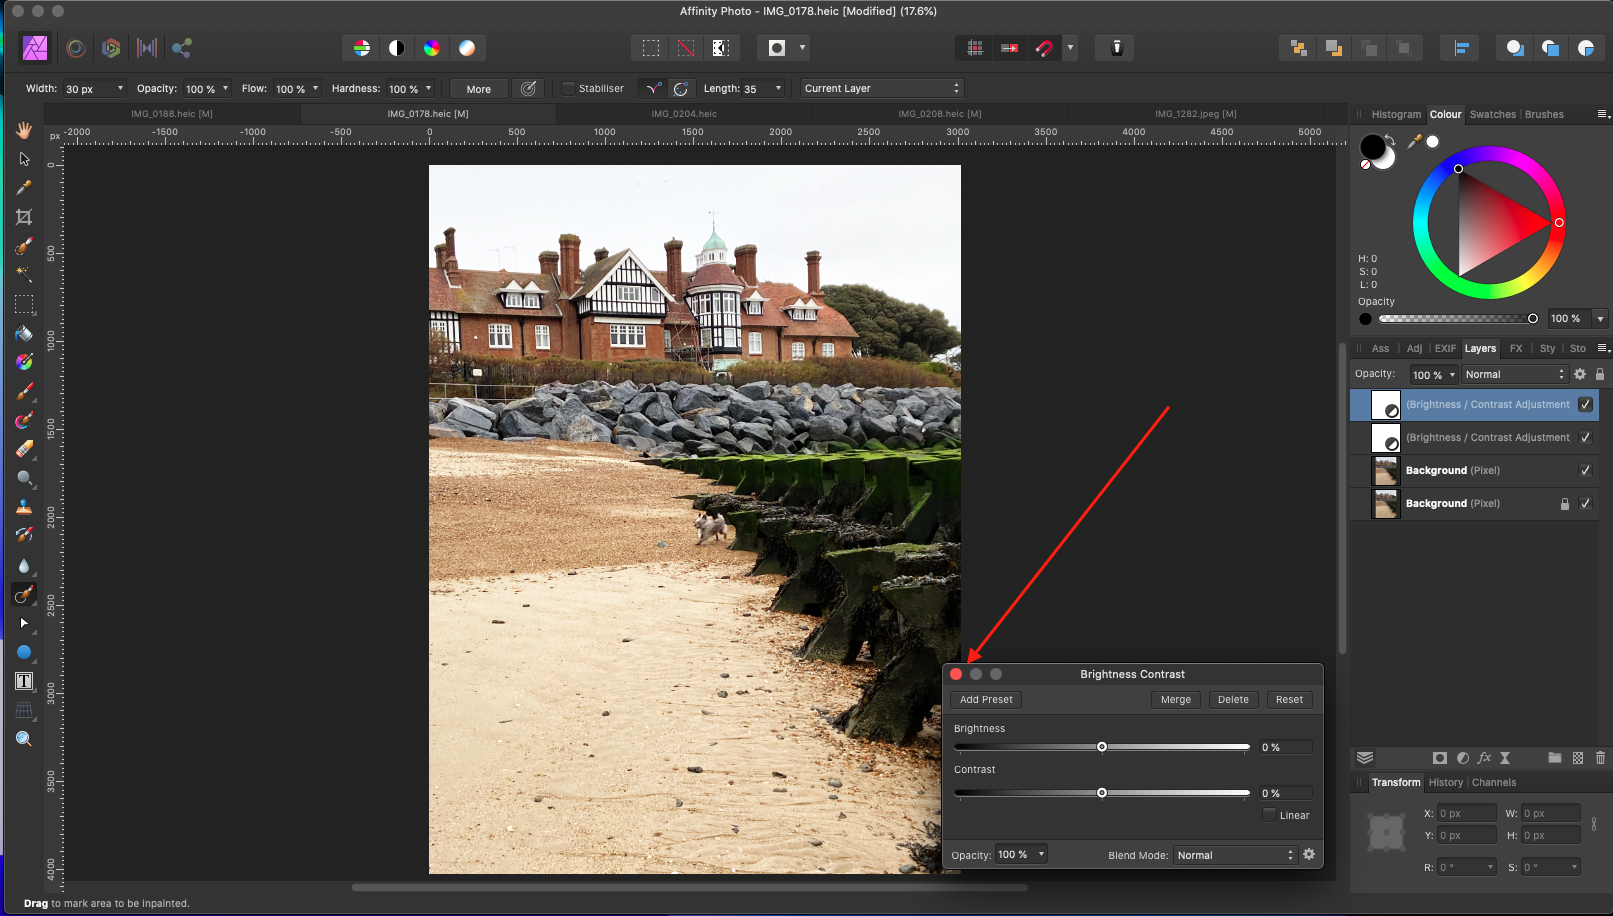
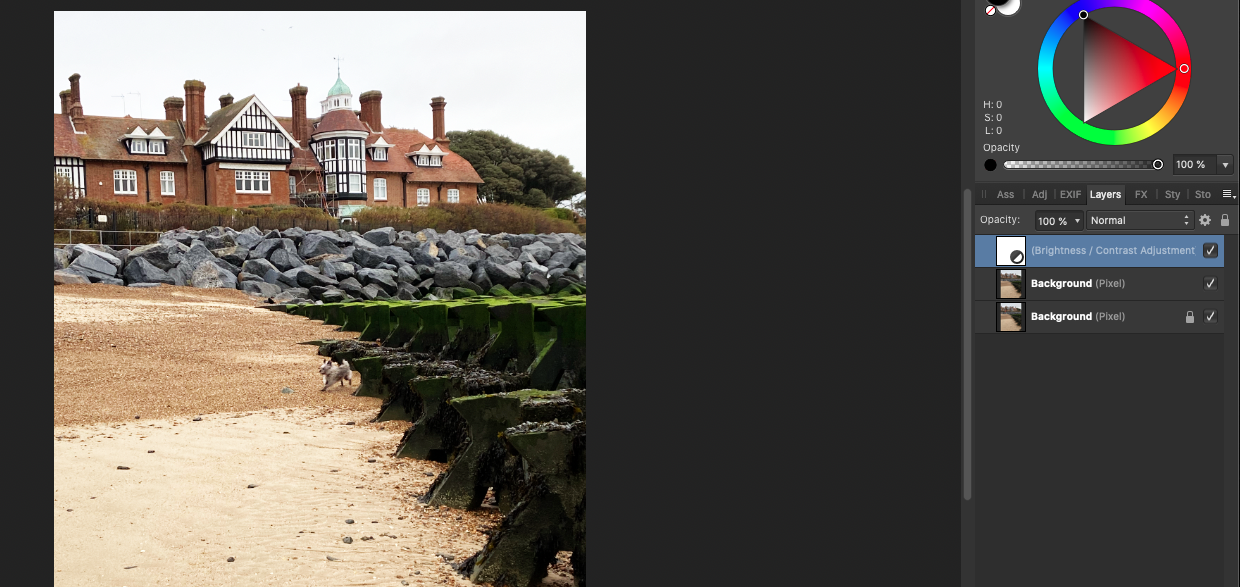
As another example of how adjustment layers work let’s try enhancing the colours of this next picture. I’m going to click on the adjustments icon and then select brightness and contrast. With this adjustment layer, I’m going to increase the brightness and also increase the contrast then I’ll exit out of this dialogue box to see a before and after.
I’ll turn this layer off and on but it looks like this adjustment layer is a little too strong so let’s go back into that dialogue box by double-clicking on this icon and then bring the brightness and contrast down a little. Now I’ll exit out of this box again and see a before and after again.
Exit Dialogue BoxBefore. No tick in the checkboxAfter. Checkbox ticked.
A general editing tip for you is to make small changes to your pictures
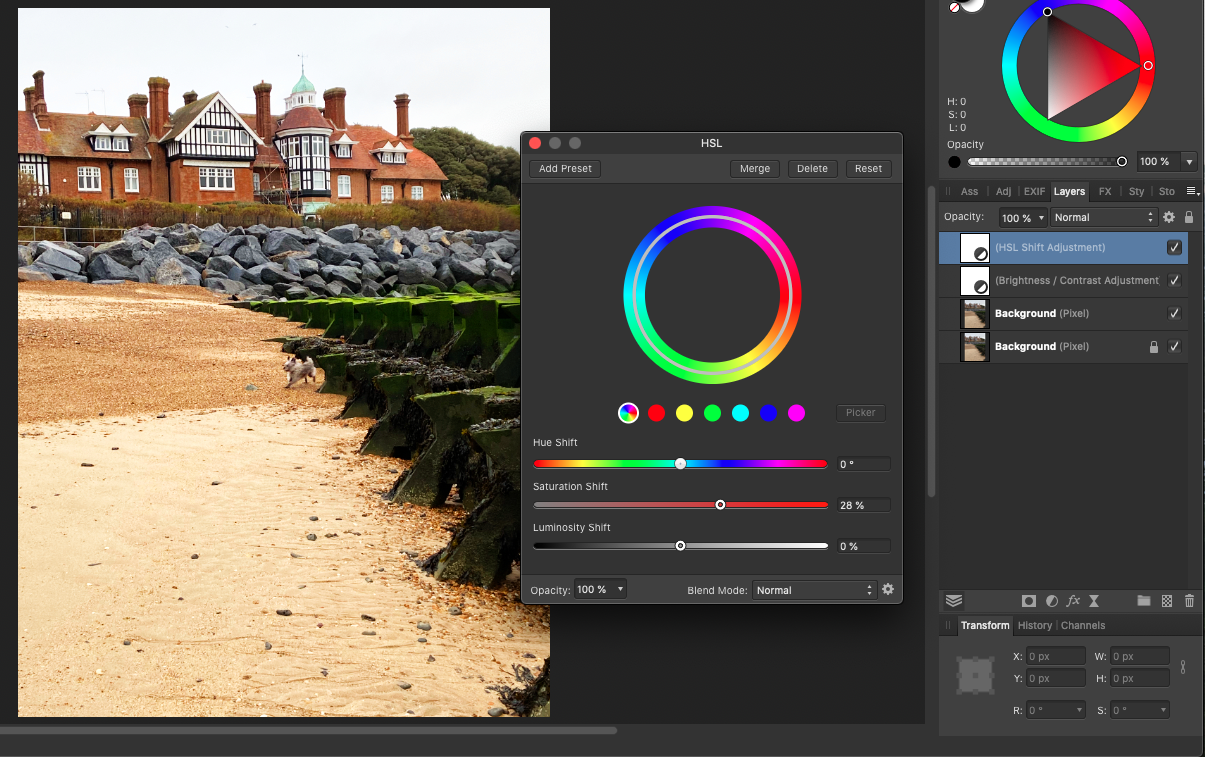
As a final example of how to use adjustment layers let’s come back to the adjustments icon and then select HSL. With an HSL adjustment, we can increase the saturation of the colours in our picture.
All we need to do is click and drag on the slider and see how the HSL adjustment is improving our photo.
There are many other adjustments that we could use to continue enhancing our photo but we don’t have time to learn about all of them right now. I suggest the best course of action is to open a new photo or two and experiment with each of the different adjustment options in turn initially.
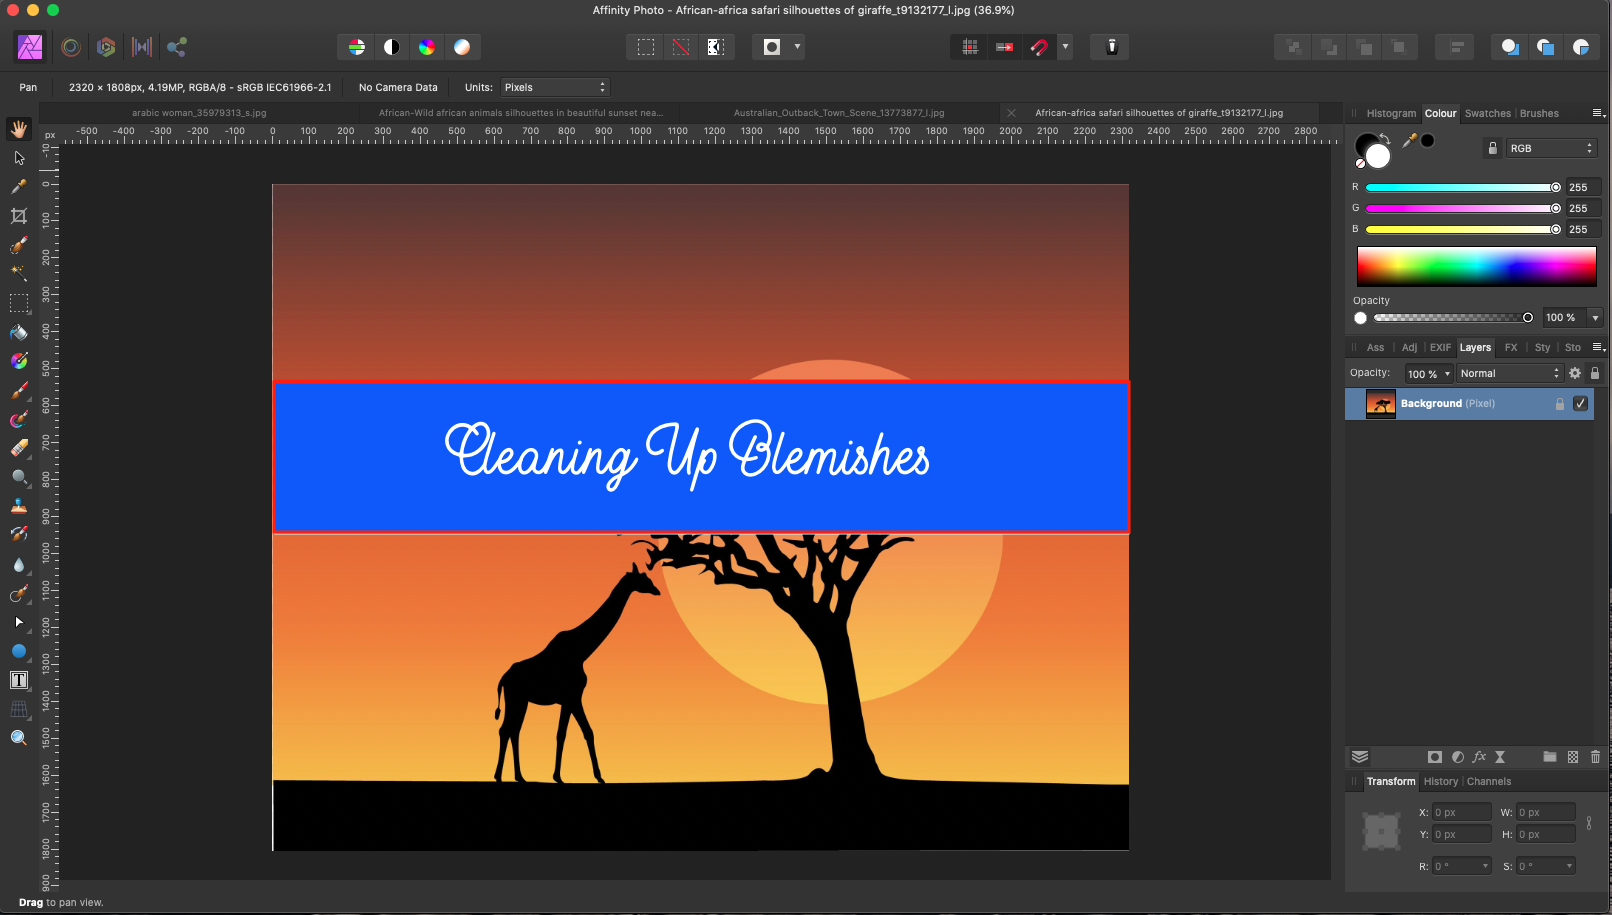
Section 6
How to use masks
A mask hides or shows parts of a layer. A white mask means a layer is totally visible while a black mask means a layer is completely invisible.
But what does this really mean, and how do I apply it to my images?
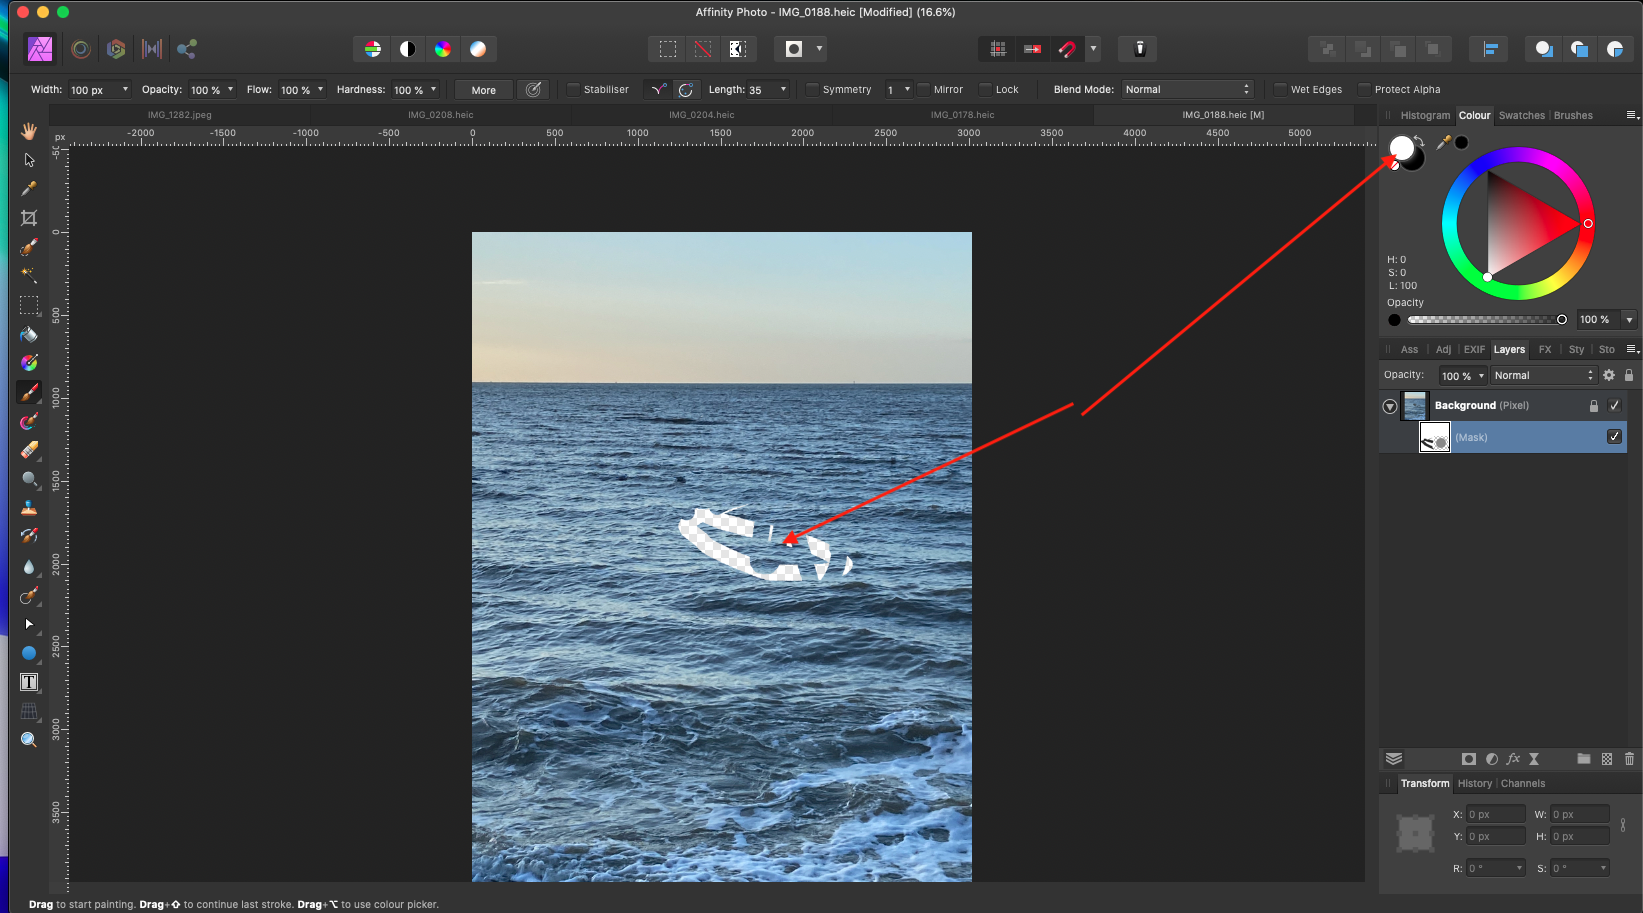
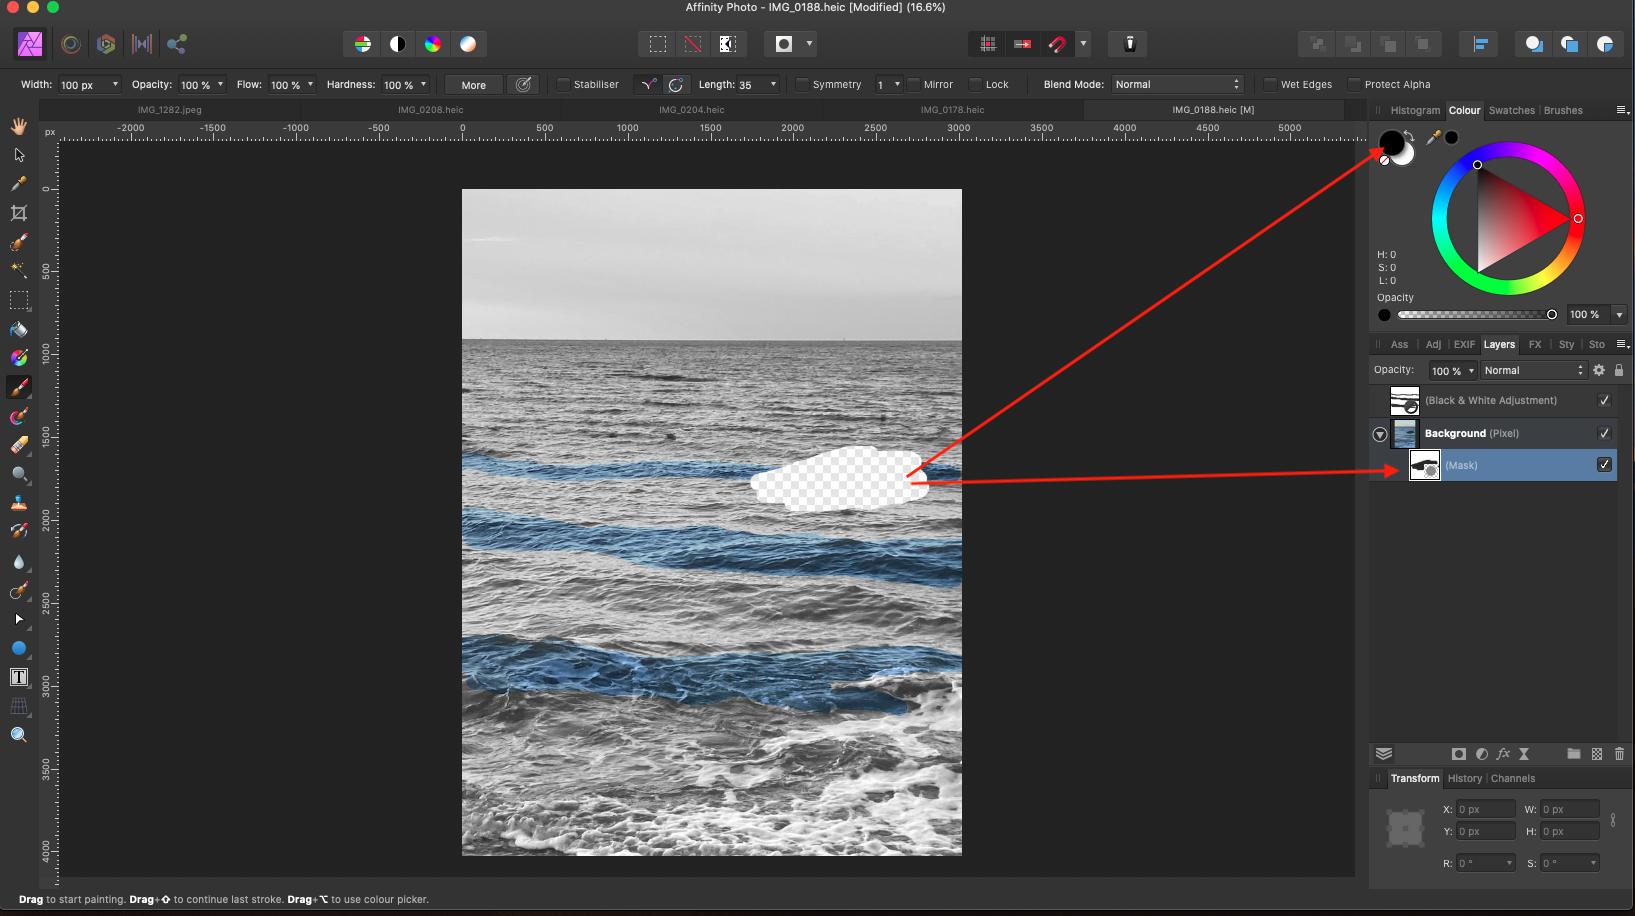
To see how this works let’s try applying a mask to our photo. First, make sure that you have the image layer selected then press on the mask icon in the lower panel, it looks like a Japanese flag. You can see that we’ve applied a white mask to our phot. Remember a white mask means everything is visible but if we paint black on the mask then the layer will become invisible.
First, click on the mask icon to make sure we have it selected go over to the left side and select the paint brush. Inside the color panel check that you are painting in black. If not, change the colour to black by clicking on the black colour circle. So as you paint black on the mask the layer will become invisible. This transparency indicates that there’s nothing there. This is because we’ve painted black making our layer invisible. Note that it’s not actually black. The black and white of a mask are simply switches. Observe where the rough figure of eight has been painted.
Fortunately, you can paint white whenever you want to reveal the layer once again. Just press on the curved arrow next to the little colour circles to switch your colour from black to white, and then begin painting in white. You can see as you paint in white the picture is revealed once again and just like any other layer, you can turn a mask off and on by using the checkbox.
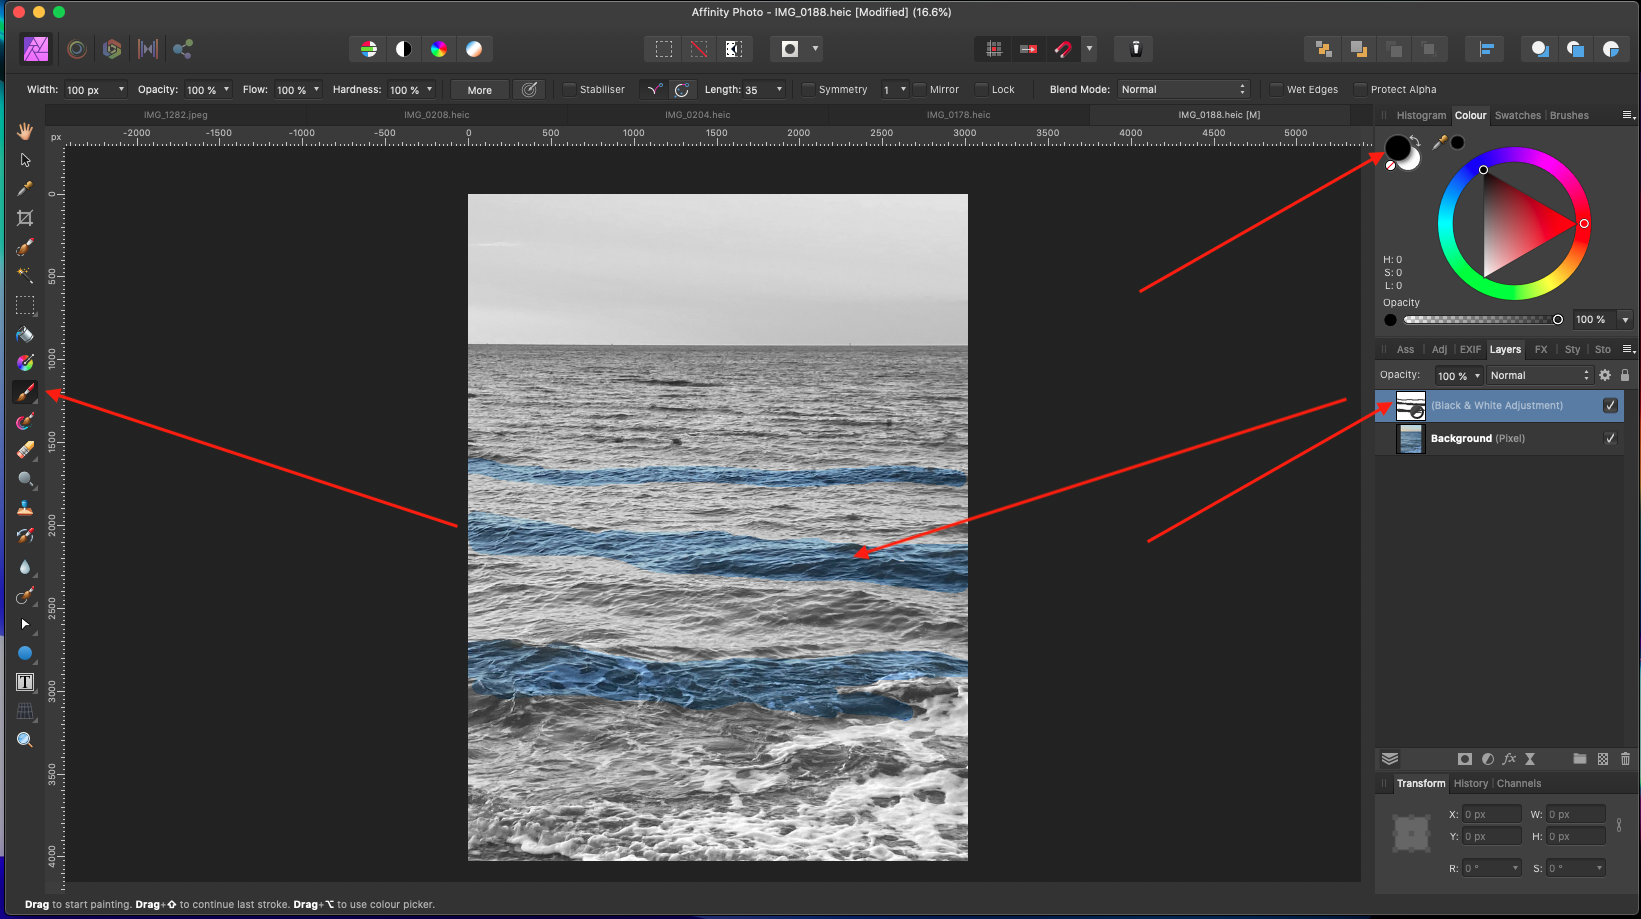
Now that you understand the basics of masks let’s see how they apply to adjustment layers. I’m going to move to the adjustments icon and select black and white then exit out of the dialogue box.
The great thing about adjustment layers is they come with a pre-built mask. All we need to do is have an adjustment layer selected and then we can paint in black or white to hide or show the layer. I’m going to switch my colour to black and then begin painting. You can see that the black and white adjustment layer is invisible in all of the areas that I’ve painted. It’s because the black and white are invisible. It means all of the original colour is being shown from the layer underneath.
If we wanted to be more precise with our painting though we’ll need to zoom in to our picture. Remember that you can press CMD + to zoom in. Then we can continue painting to make the black and white adjustment layer invisible if that’s what you need.
If you ever paint too much all you need to do is switch your colour from black to white then begin painting and the black and white adjustment layer will be shown once again.
When you’re painting on a mask I also recommend you change your hardness from 80% to 0%. If you’re painting in 100% hardness then your brush strokes will be very harsh and noticeable but if you’re painting with 0% hardness then you can blend the areas of the picture that have the mask black or white. By using a 0% hardness and switching your colour between black and white you can paint precisely on a mask to apply a layer exactly where you want it. Just make sure you have the right layer selected before you begin painting.
For example, if you take your original photo and applied a mask to it then it would make a difference whether we had this mask selected or this black and white adjustment layer selected. If we have the black and white adjustment layer selected and then we begin painting in black it will be hiding the black and white adjustment, but if you have the mask selected that’s applied to the background photo and then you begin painting in black it will hide the original photo. One of the most common mistakes that new users to Affinity Photo make is having the wrong layer selected, so make sure you have the right layer selected before you begin painting.
Section 7
Making Object selections. Selecting specific parts of your image.
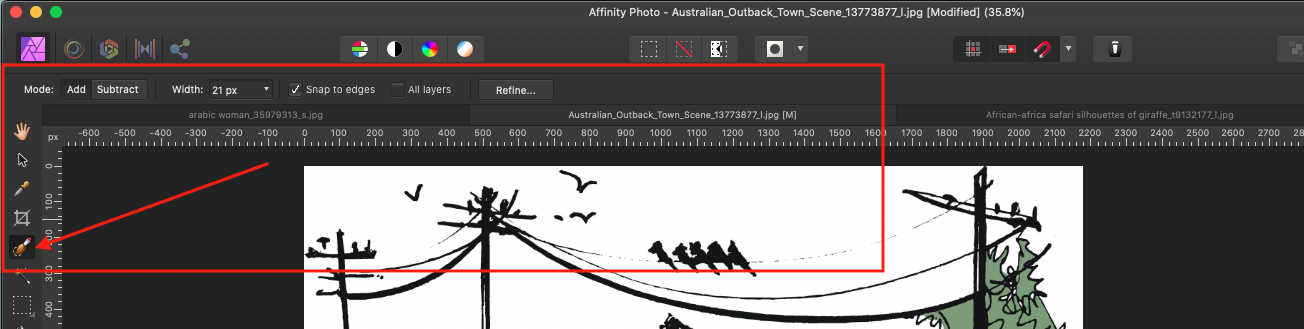
The easiest way to make selections is to use the selection brush tool.
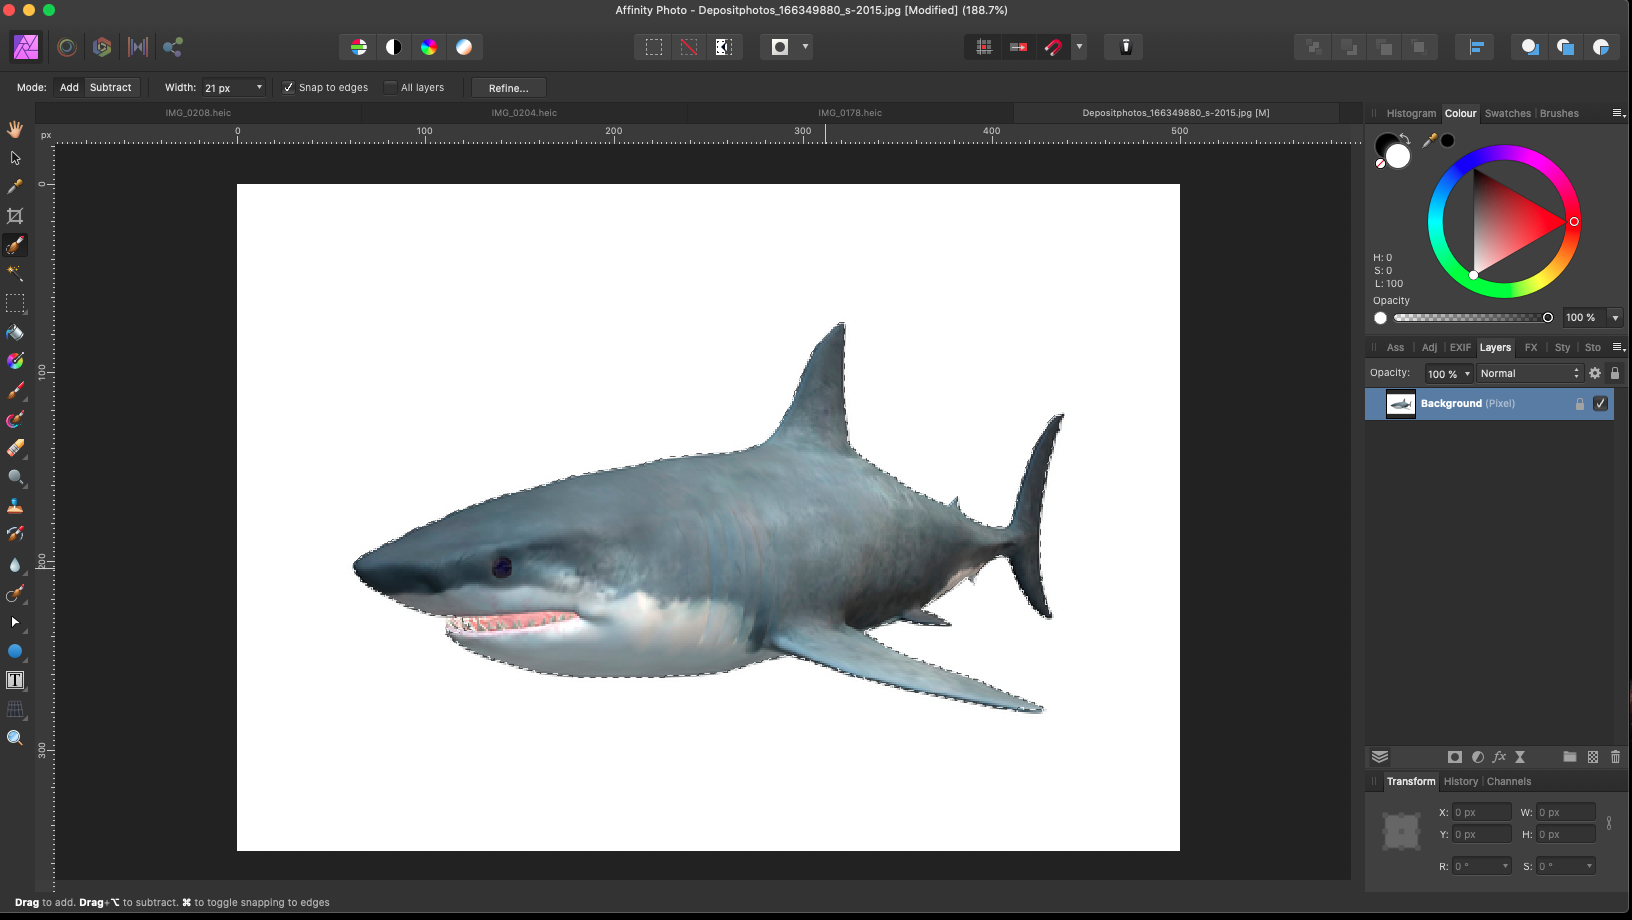
With this tool, all we need to do is paint across the part of the picture that we want to select. As we paint Affinity Photo will automatically detect the object that we’re trying to make a selection of.
Let’s try painting a selection across the shark. If you ever select too much when using the selection brush you can always change the mode from add to subtract which appear in the context toolbar.
You will see the dotted “crawling ants” line appear around the outline of the shark as you paint.
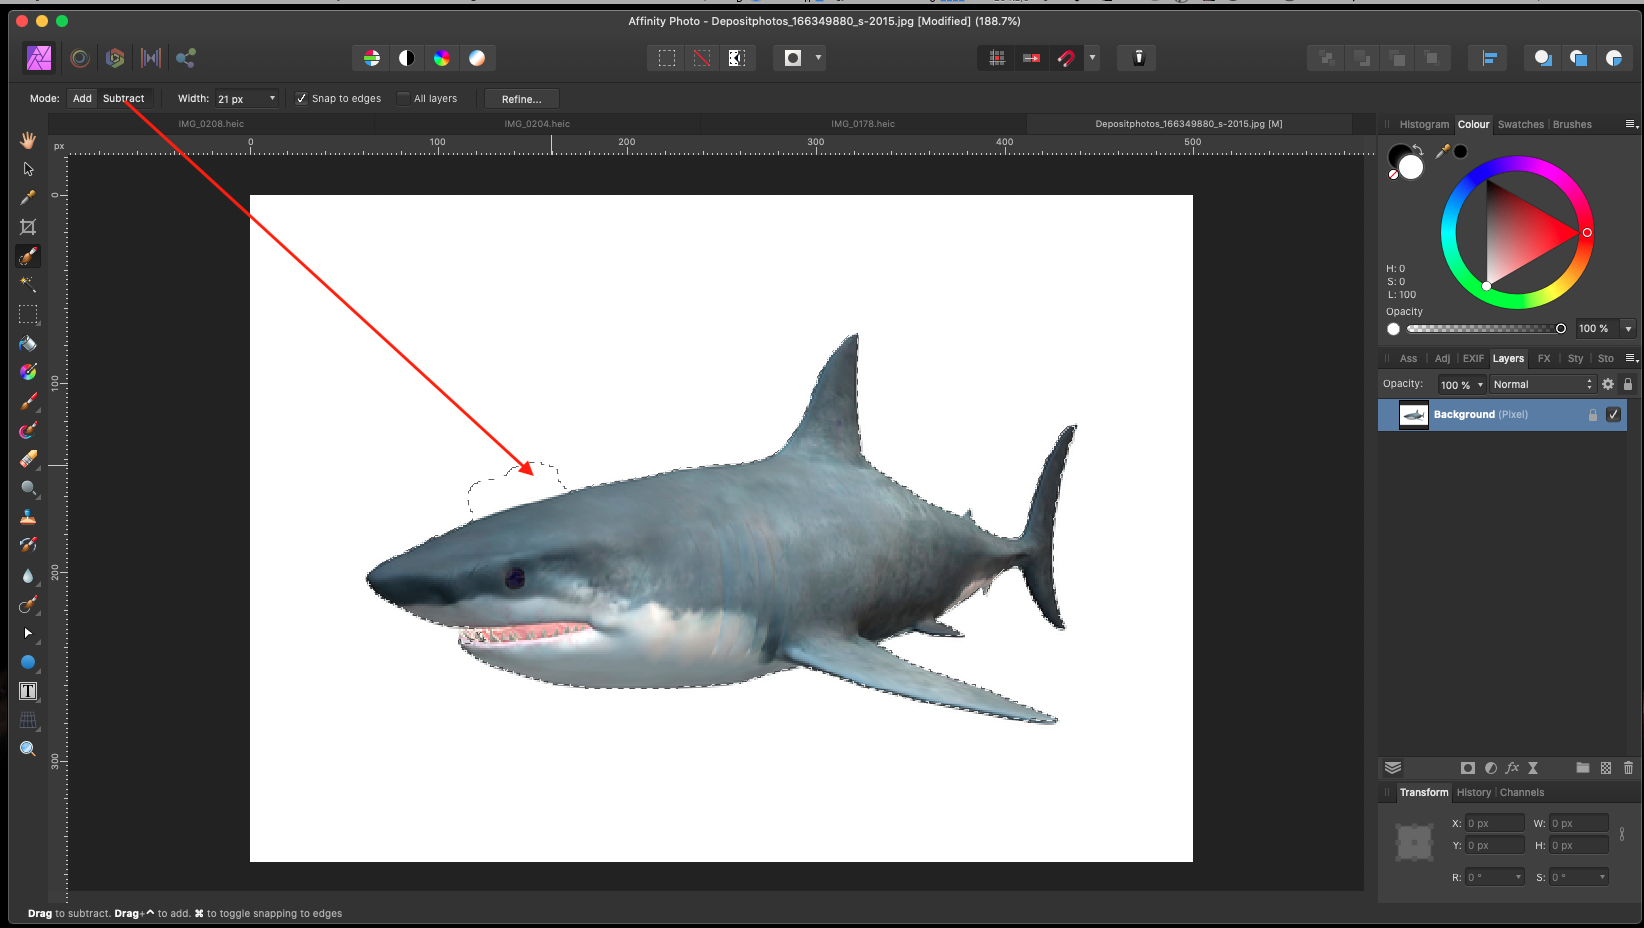
Zoom in to the photo though and you’ll notice that the selection is not perfect. If you’re in subtract mode any selection you paint across will be removed from your selection. You can also change the width in the context toolbar depending on if you’re trying to select a bigger or smaller object.
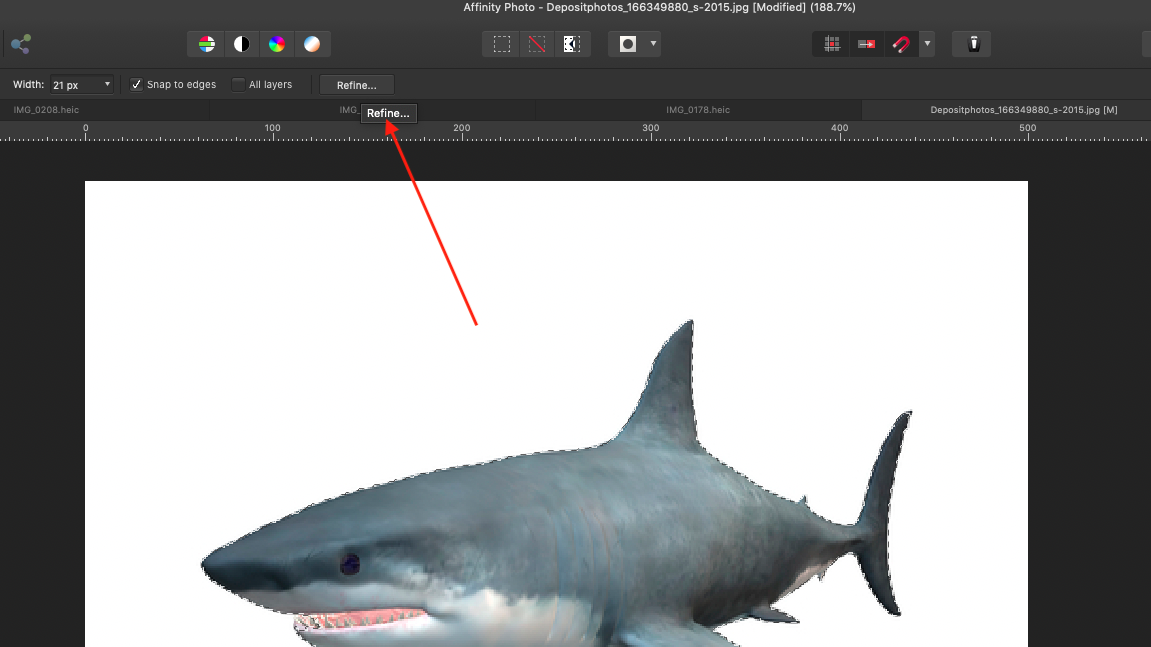
You’re going to refine it by pressing refine in the context toolbar.
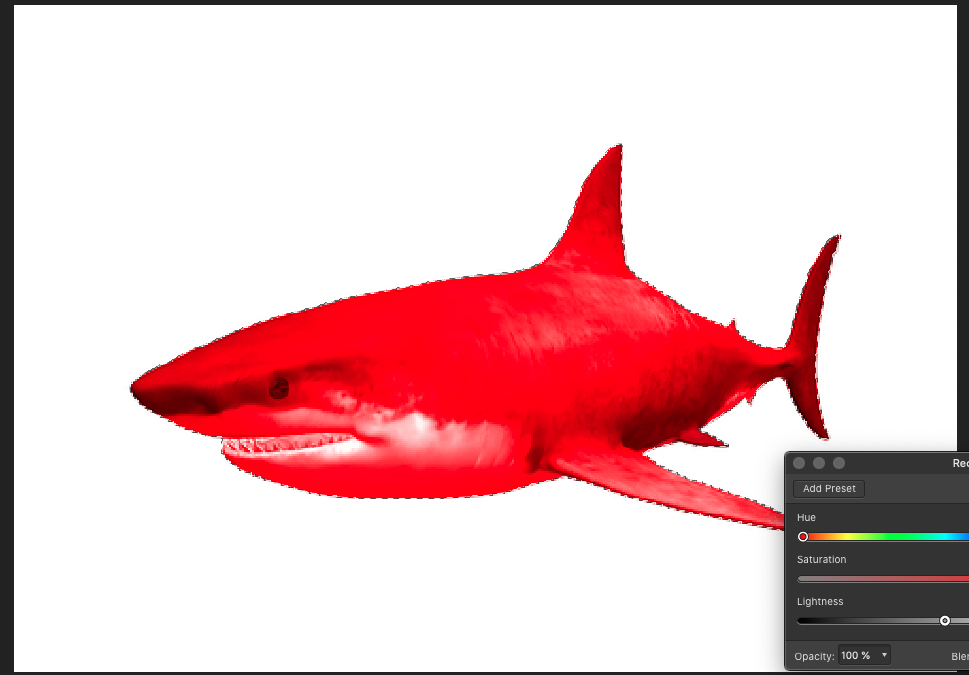
As you can see you have quite a few options in the refine selection dialogue box. In this example, you want to increase the smooth slider. This will remove all of the jagged edges from the selection and now you have a nice smooth selection going around the shark.
Once you’re satisfied with your selection you can press apply.
With a selection made you can apply an adjustment layer to only the part of the picture that you have selected.
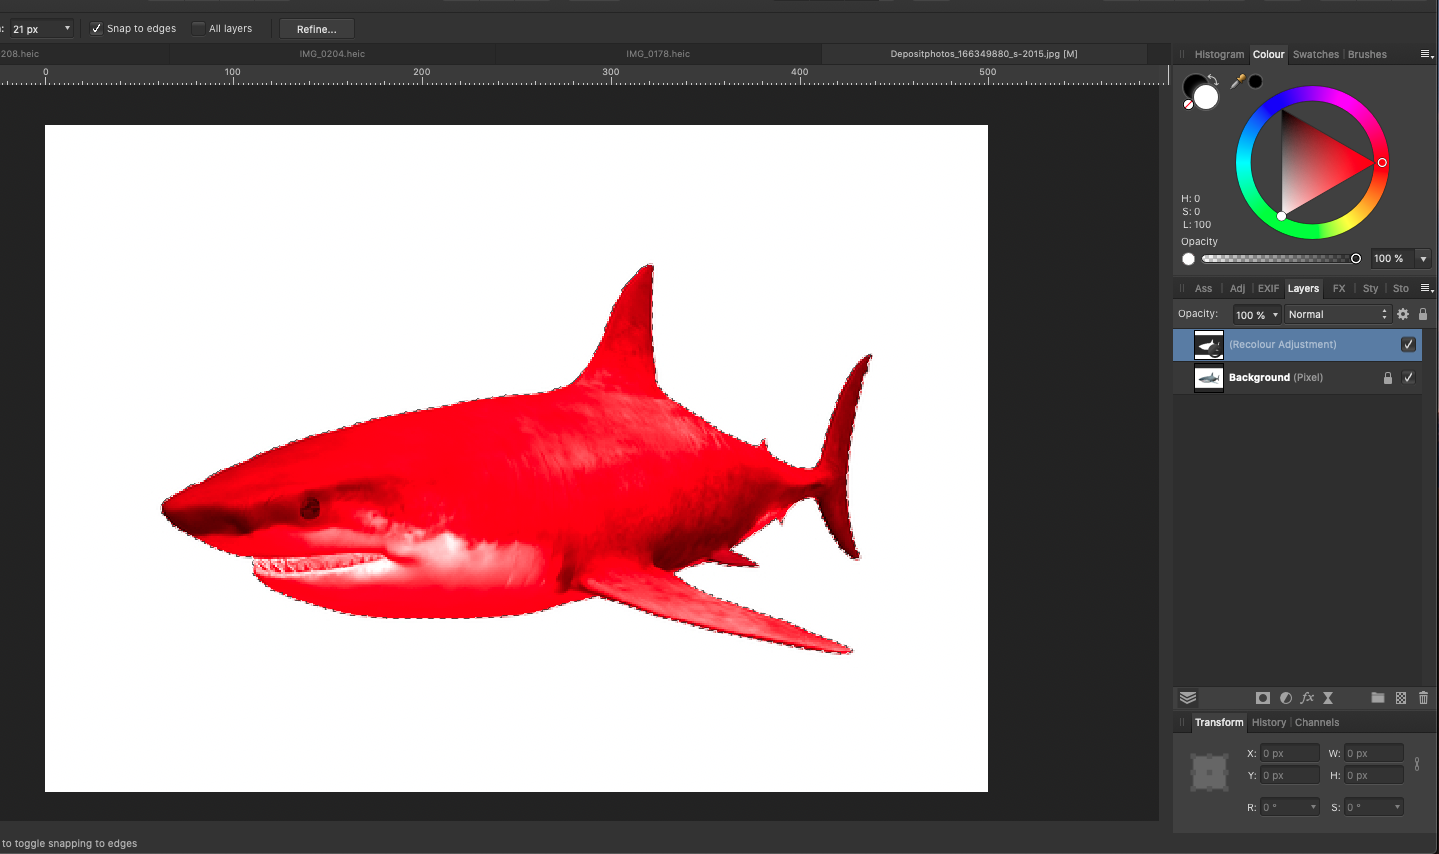
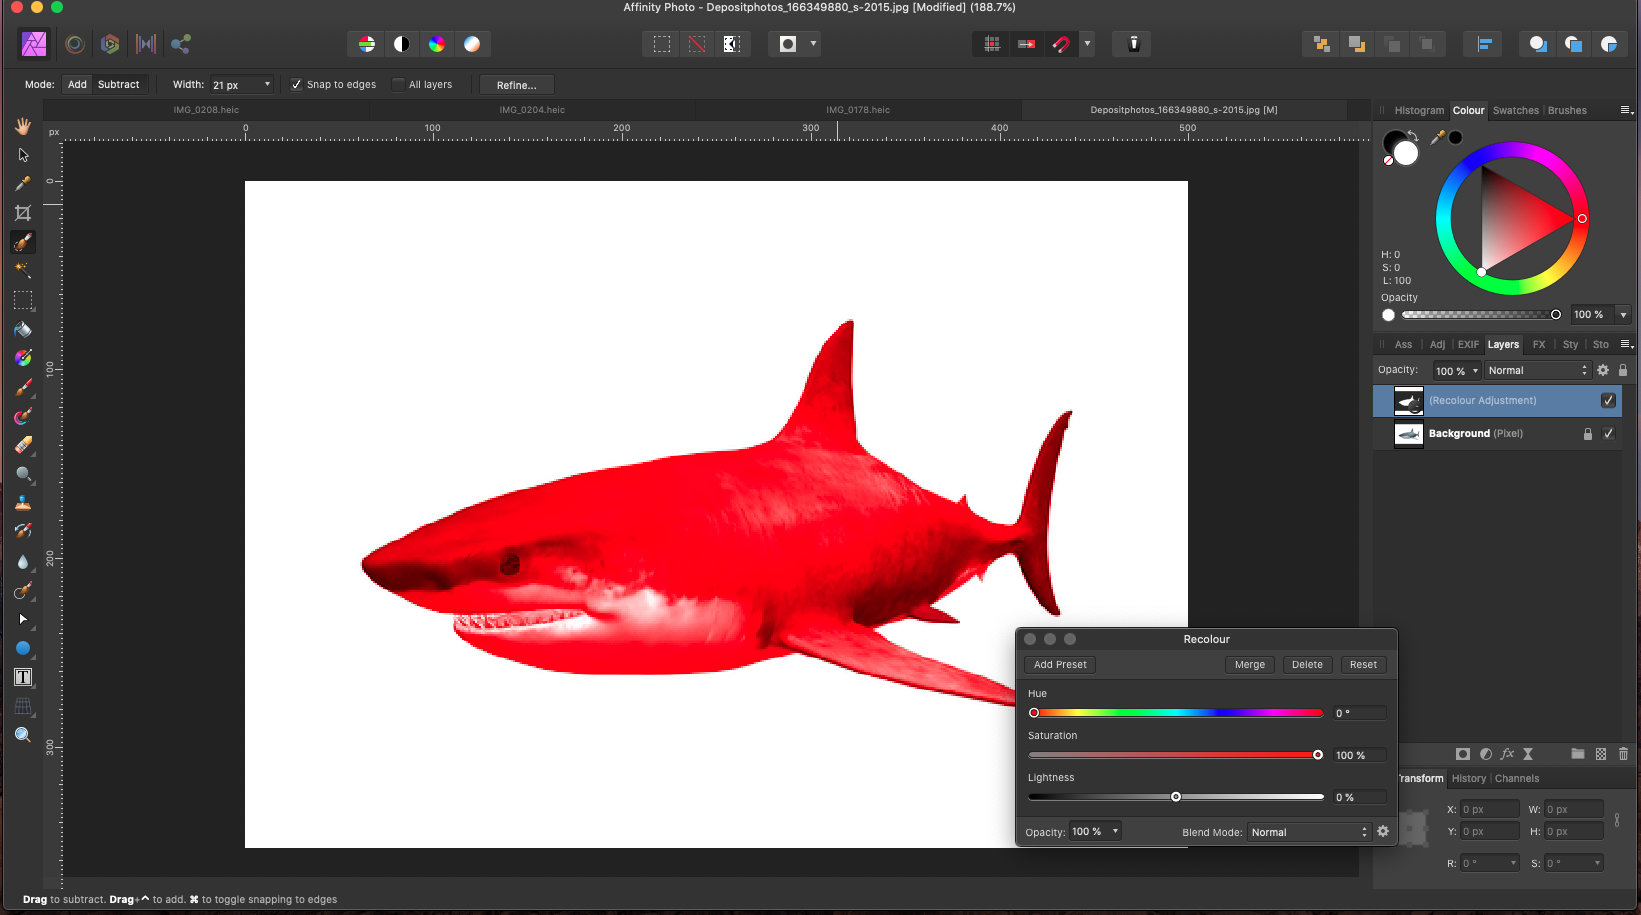
To see this go to the adjustment icon and then apply a recolour adjustment. As you can see the recolour adjustment is only being applied to where the selection is. This is because a mask has been applied to the adjustment layer. You can see in the layers panel that the mask is white in the centre where the selection is and then black everywhere else. As you’ve already learned a white mask means the adjustment layer is being applied as it is here and a black mask means the adjustment layer is not being applied inside the rest of the photo.
Exit out of this recolour adjustment and then deselect by pressing CMD D.
Section 8
To change the background the first thing you’ll want to do is make a selection of the part of your picture that you want to keep. You could make another selection of the shark or you could use a shortcut to reload the selection you have already made.
Because we used our selection to make this adjustment layer, if we hold down CMD and then click on the adjustment layer mask icon it will reload our selection. This is a very helpful shortcut to remember.
You will see the “crawling ants” surrounding the selection.
Now that you have your selection made you’re going to apply a mask to the photo. In this instance the background becomes transparent.
Remember to have the right layer selected and then apply a mask. Just as before your Mask Layer has become white wherever the selection was and black wherever it wasn’t selected. Now we can press CMD D to deselect.
If all you want to do is remove the background then you’re done just make a selection of what you want to keep and then apply a mask but…
if you want to get your picture a new background we can copy and paste this layer into a different picture.
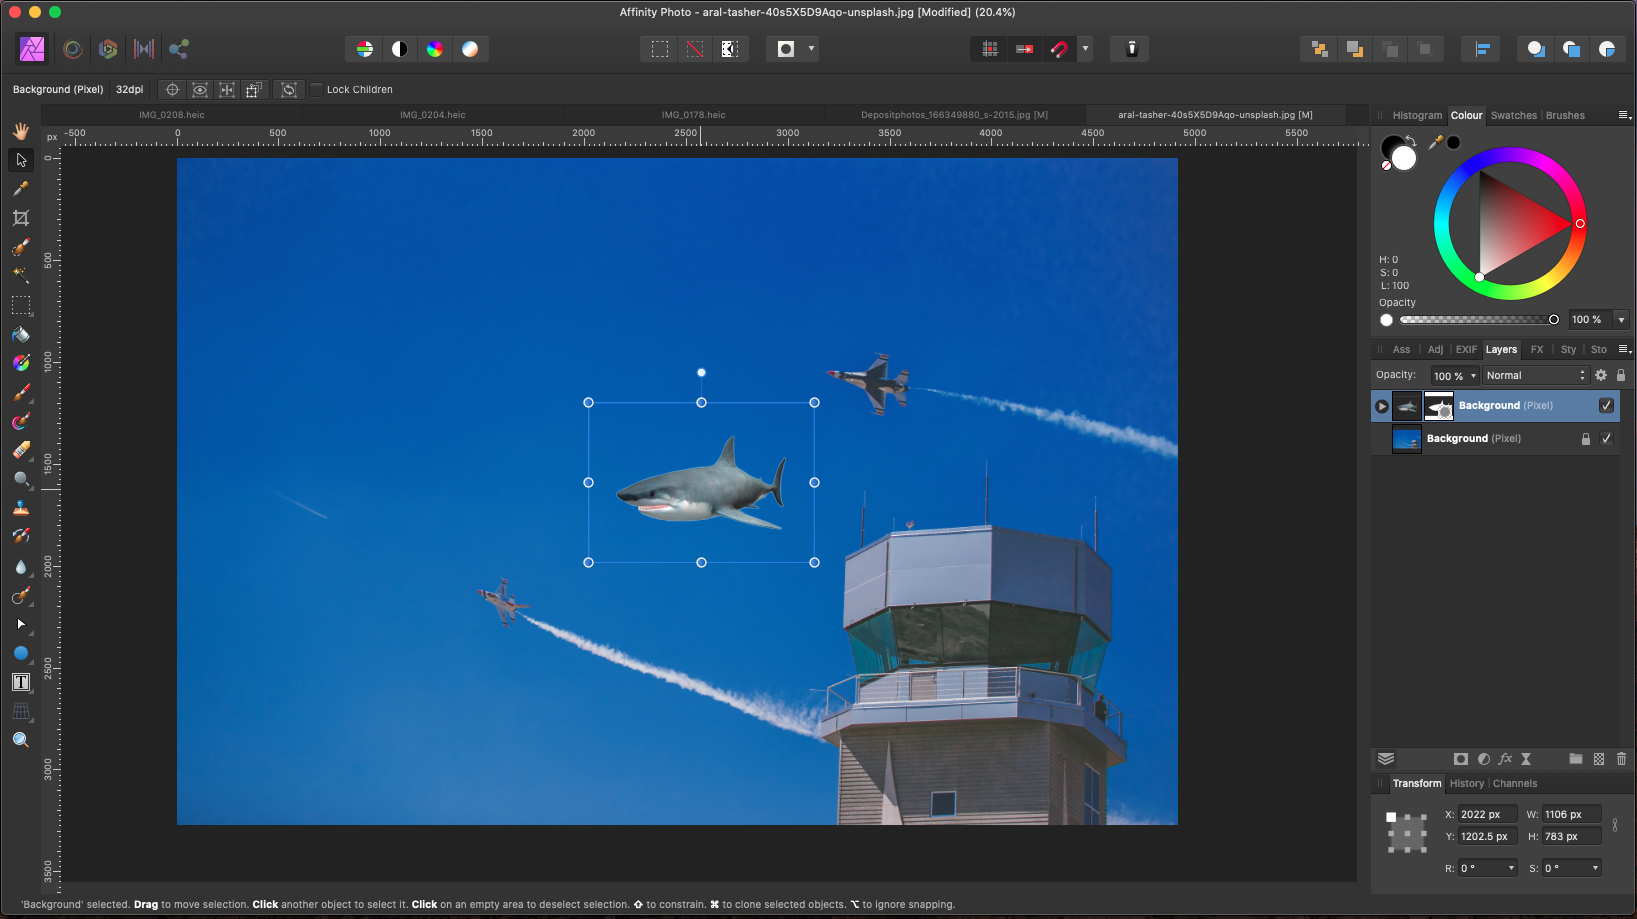
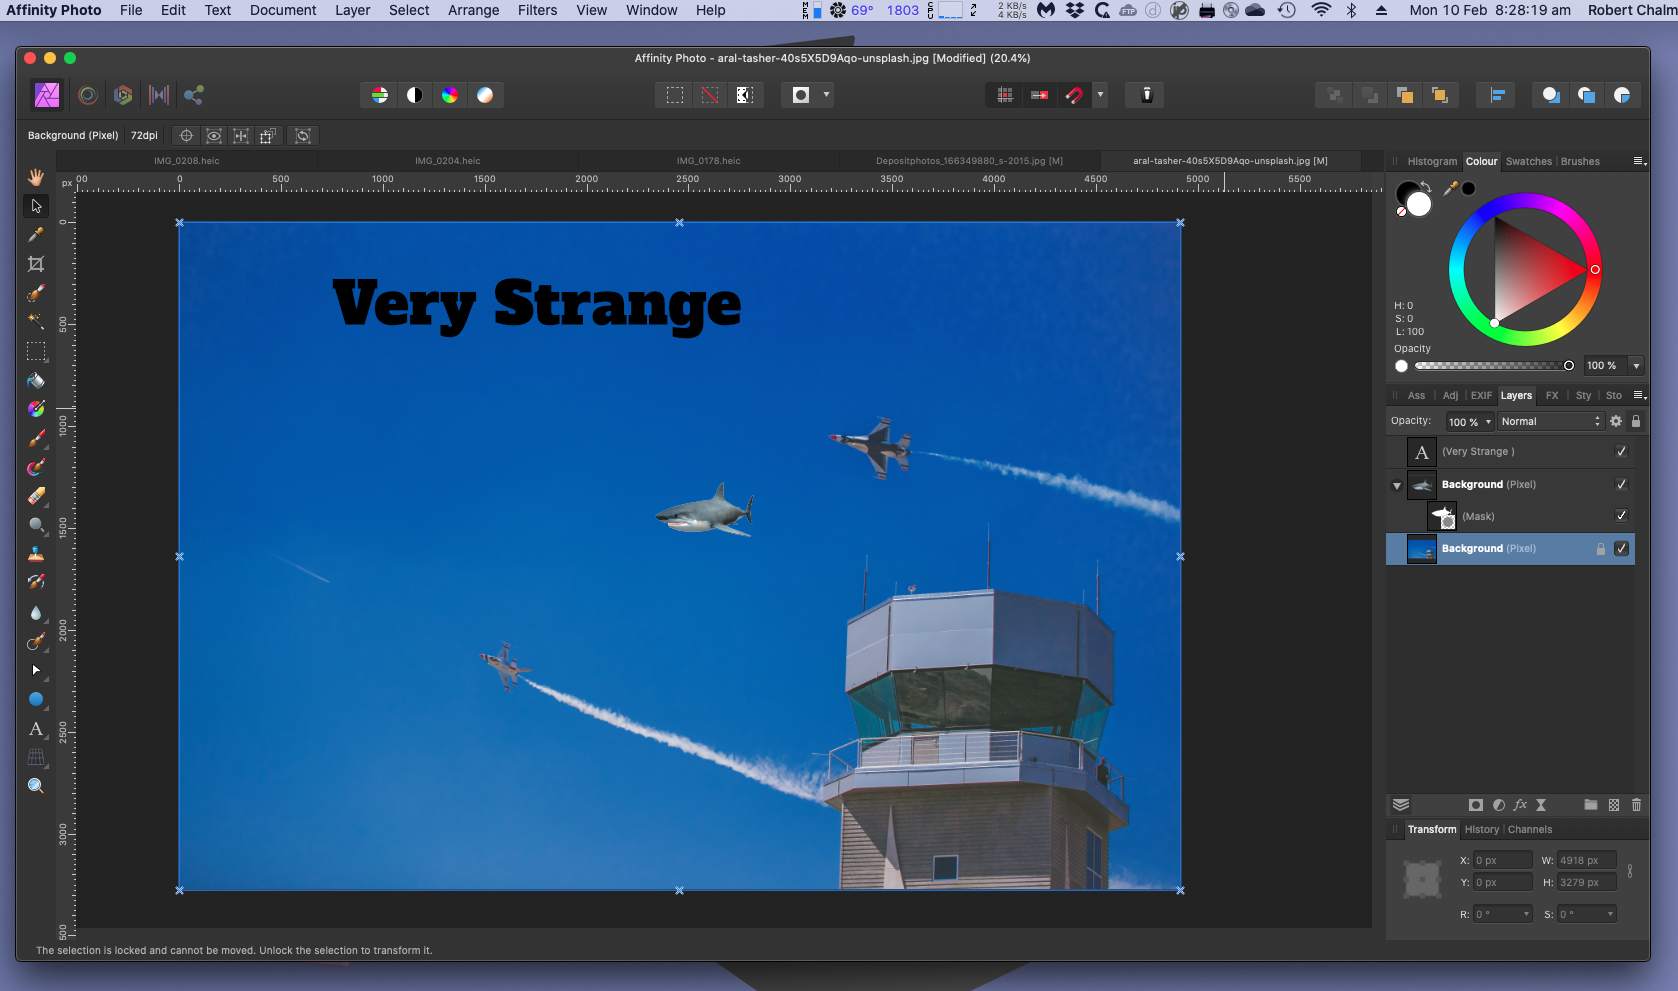
First, you need to open another picture. You can use use the shortcut CMD O to open a new picture. Your library will open. Then I’ve selected the jet fighter photo and then press open. Coming back to the shark picture I’m going to select the layer of the shark and then press CMD C to copy it. Then I’ll move back to the jet fighter photo and press CMD V to paste it. As you can see I’ve only copy and pasted the shark because that was the layer I had selected. If we wanted to copy and paste the recolour adjustment layer then we would need to have had the layer selected. Because the shark is all I wanted, now go back over to the jet fighter photo and now we can move and resize the shark layer by using the move tool. You can find the move tool on the top left of the toolbar or press V on your keyboard. Now we can move the shark wherever you want or resize it by using any of the handles. If you want the selection box to disappear you can click anywhere outside of the photo or click off of the layer down in the blank panel area.
You’ve now successfully added this shark to the fighter jet photo for a bit of comedy relief…
Section 9
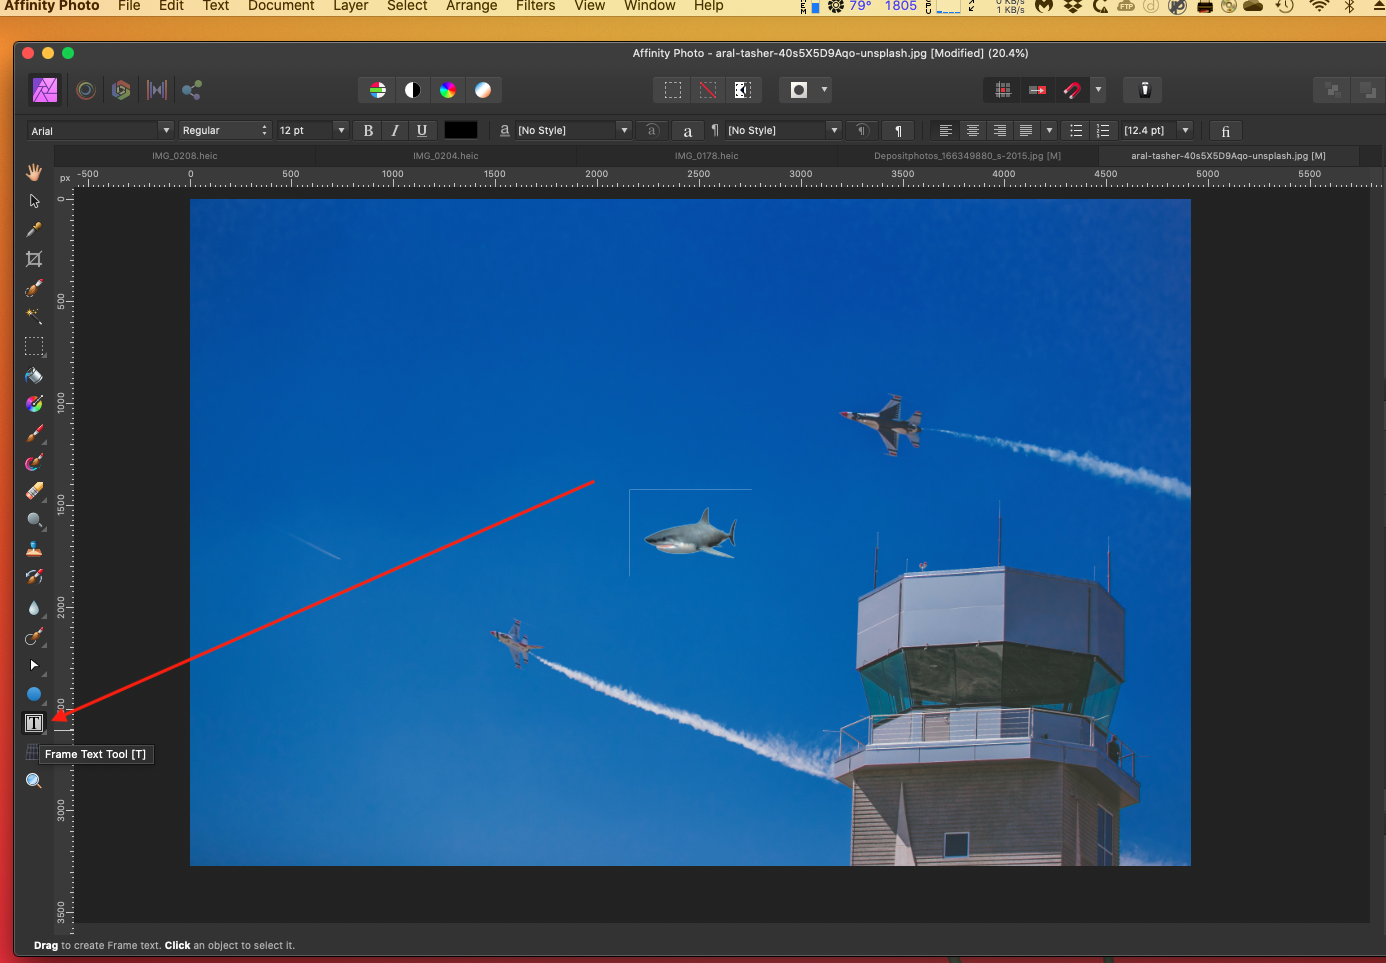
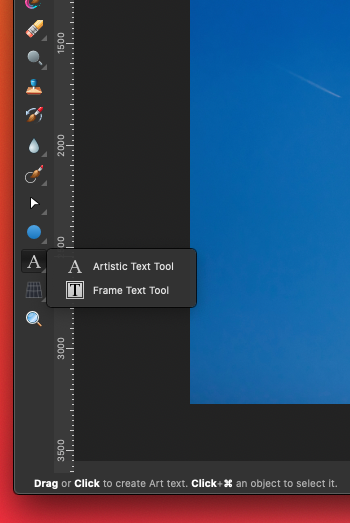
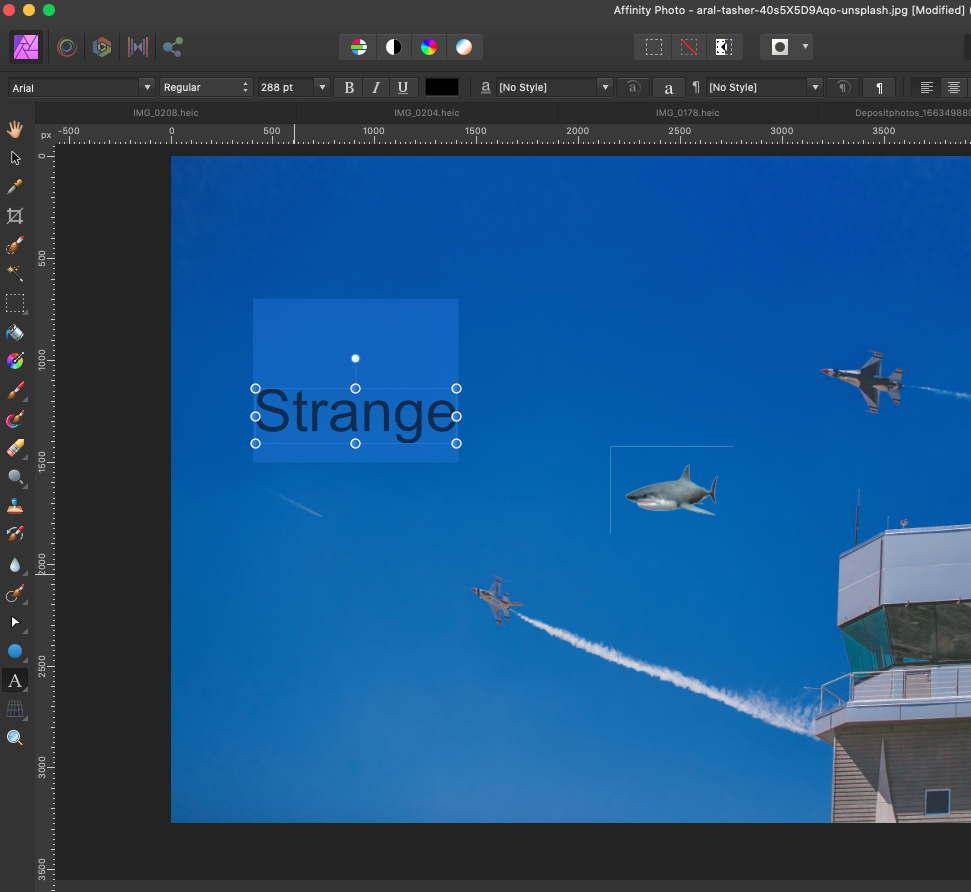
Adding text is very easy to do in Affinity Photo. All you need to do is select the artistic text tool then click and drag to specify how big you want your text to be then you can begin typing.
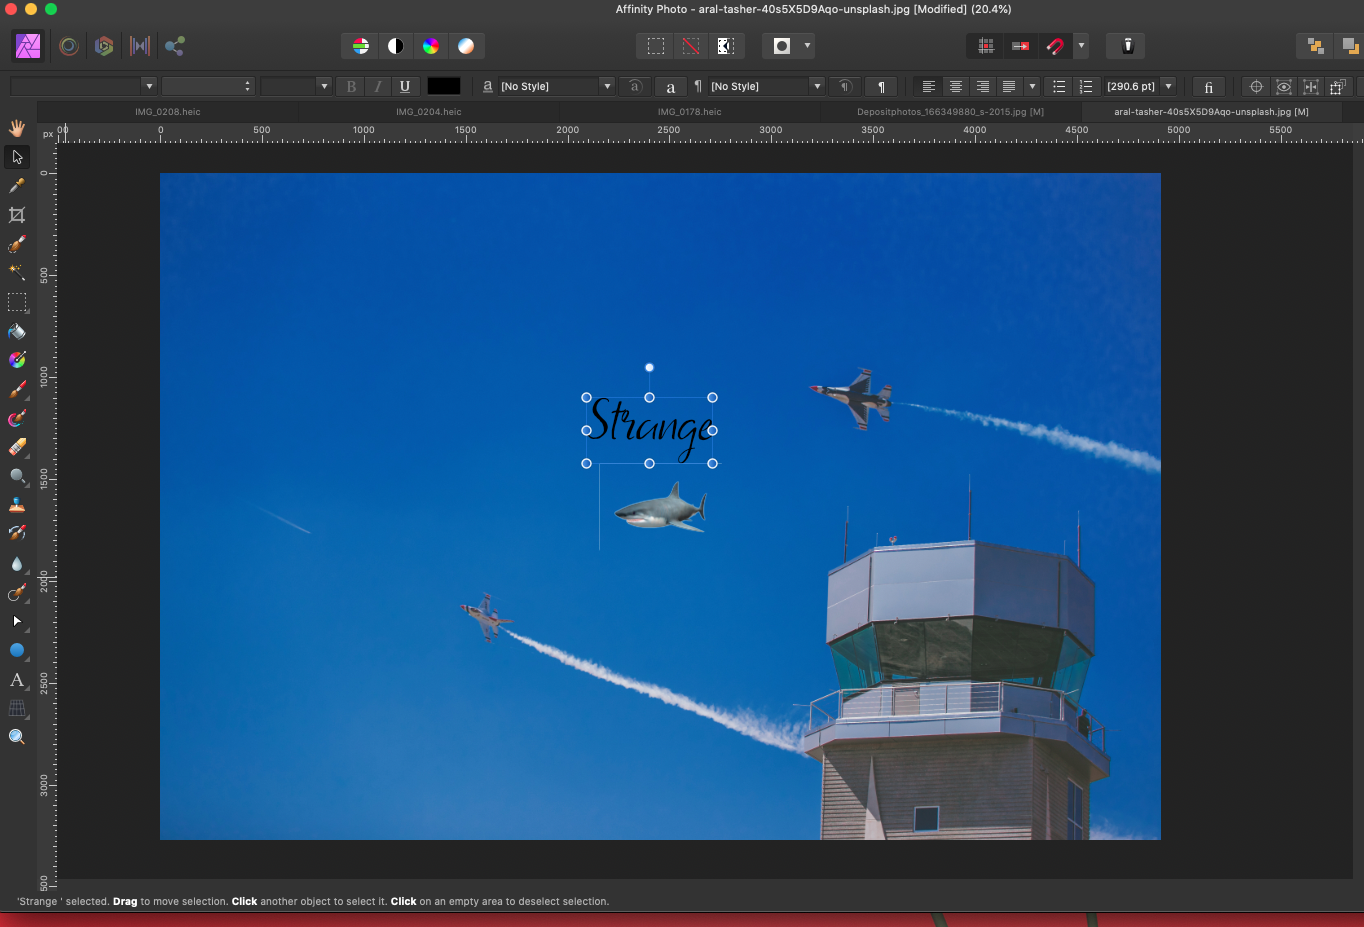
If you want to modify your text first press escape to exit type mode then with the text box still selected change the text by using the context toolbar. Let’s change the font.
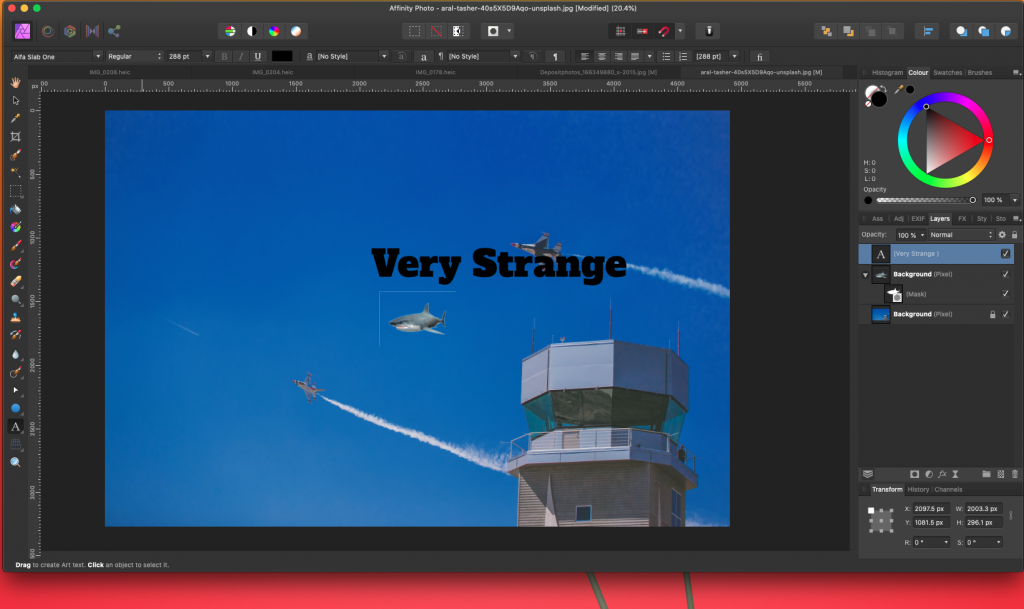
You can also change the font size from the context toolbar. You can also make it bold, italicized or underlined and if you use the colour panel you can change the colour of your text. Then with the move tool, you can resize and position the text.
If you ever want to continue typing all you need to do is select the artistic text tool and then click anywhere inside the text box. Then you can continue typing and of course, you can always reselect the move tool to reposition your text box. Always check that you have the correct layer selected.
Section 10
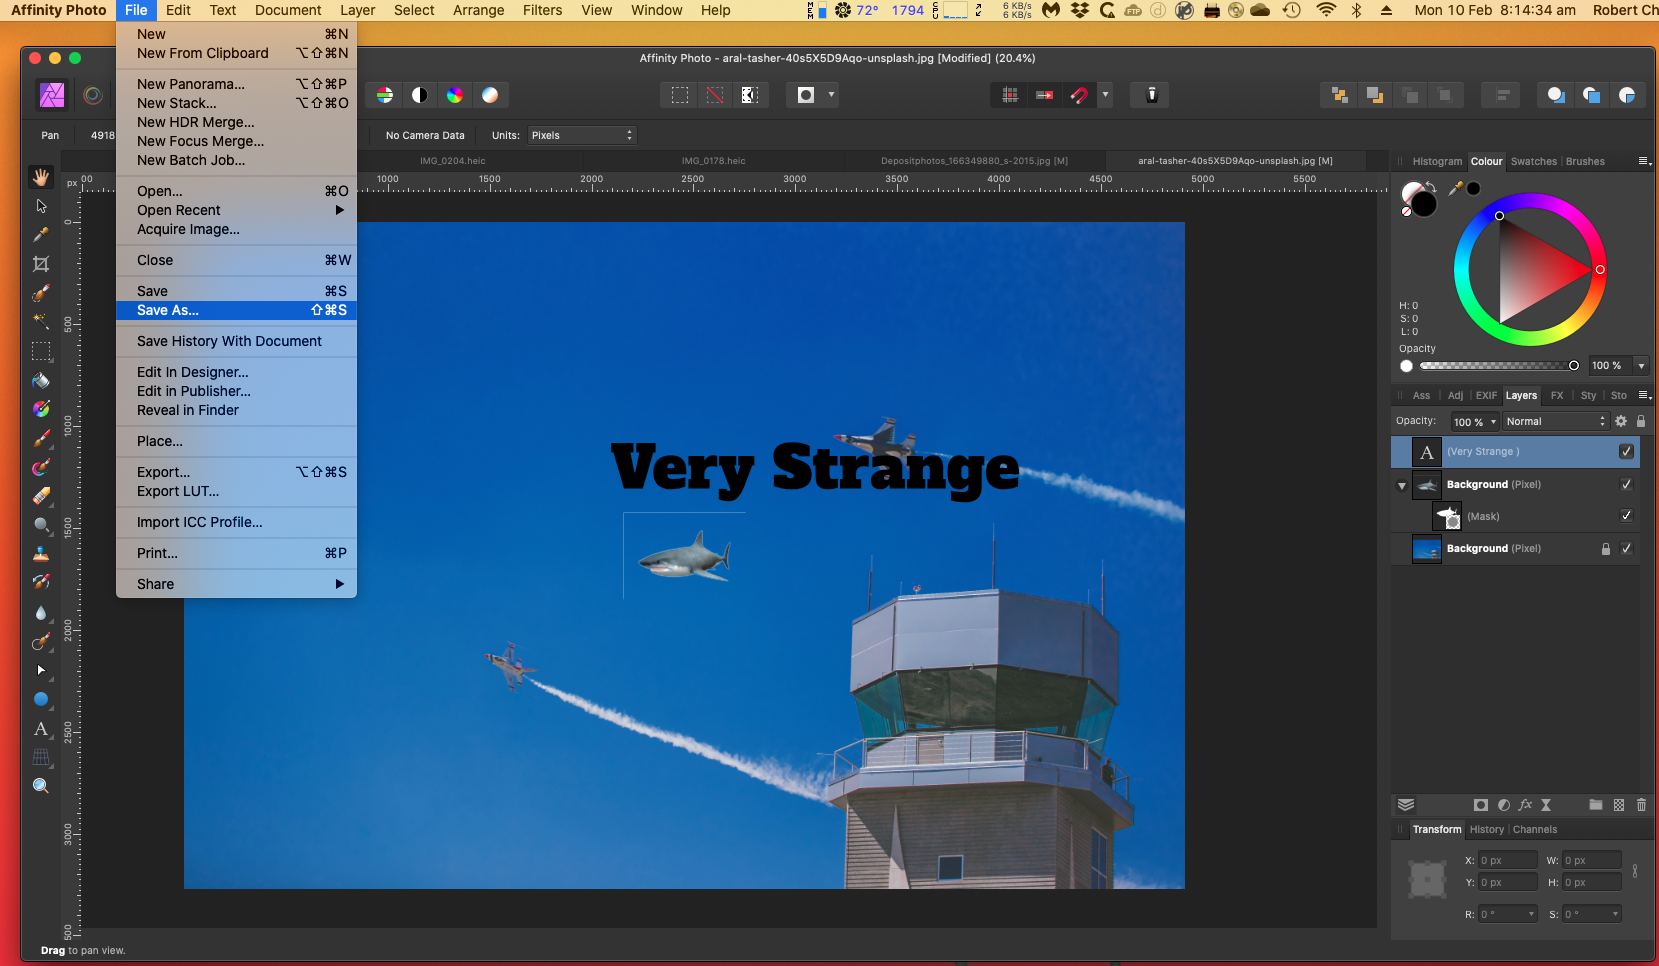
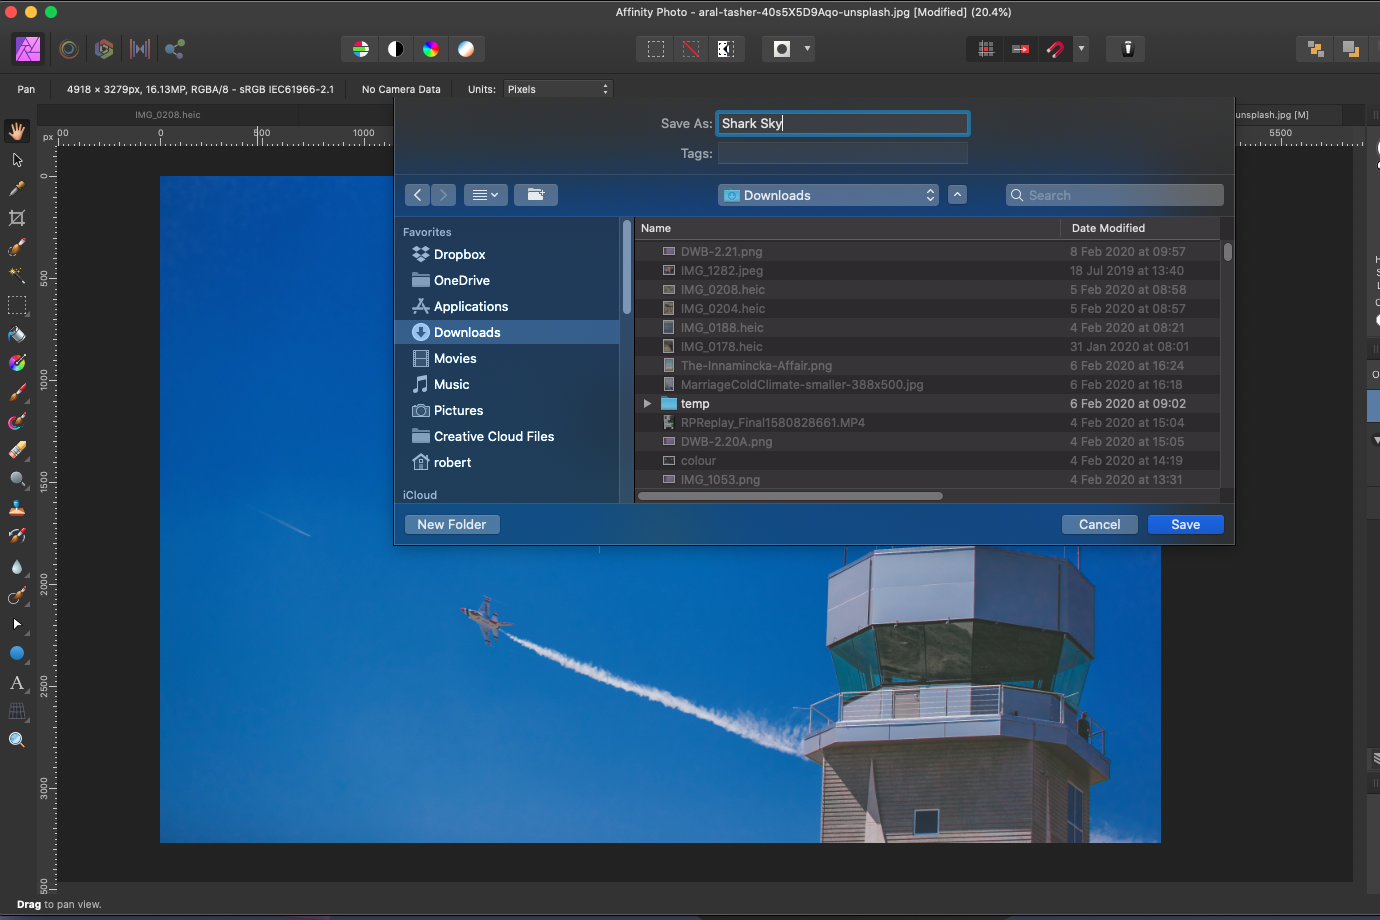
If you want to save this Affinity Photo file so you can continue to work on it later just go File -> Save As and this will save your document as an Affinity Photo file type so you can continue working at a later date.
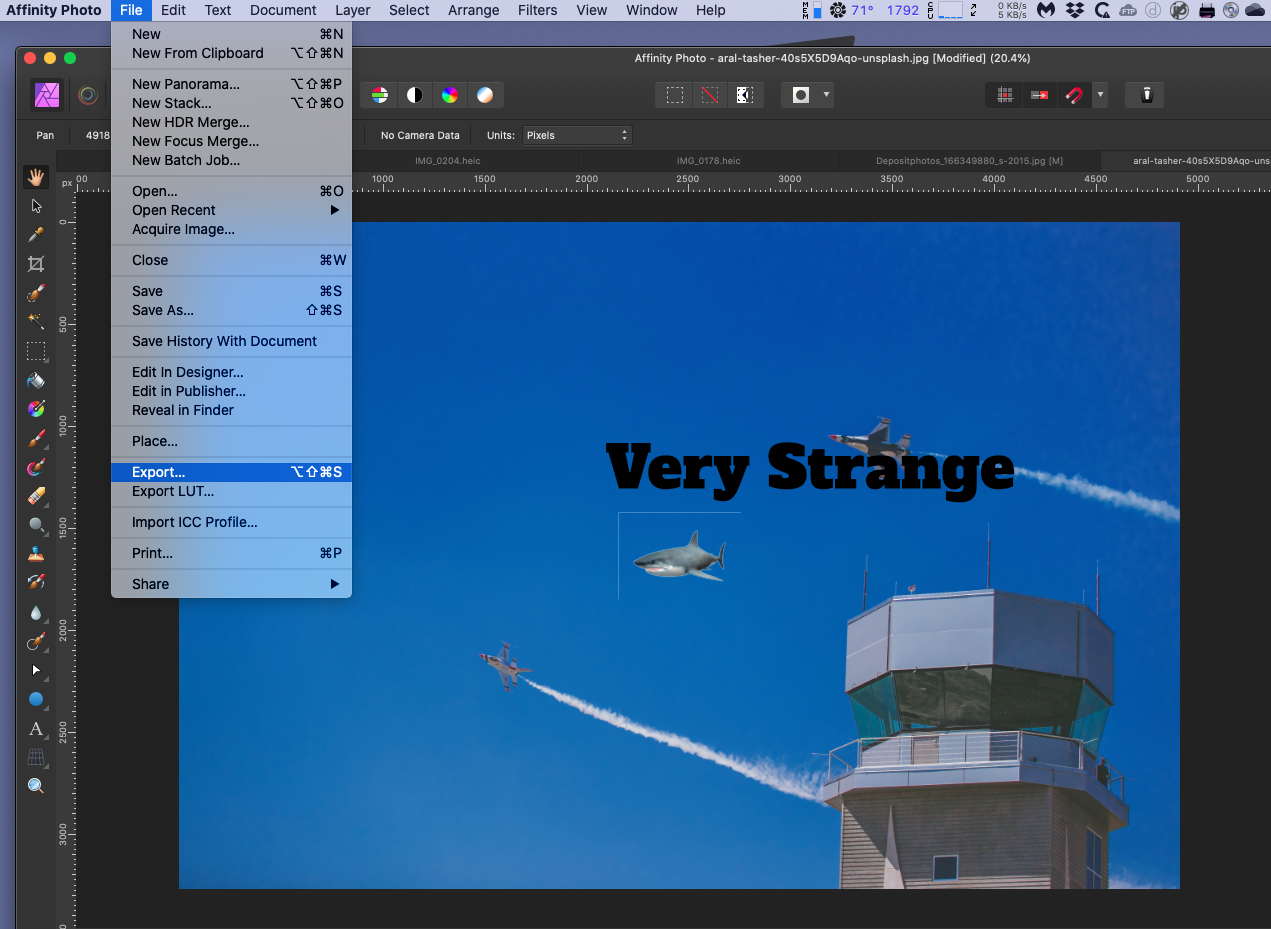
If you’re completely done with your picture and want to export it you can scroll down the File list to select Export.
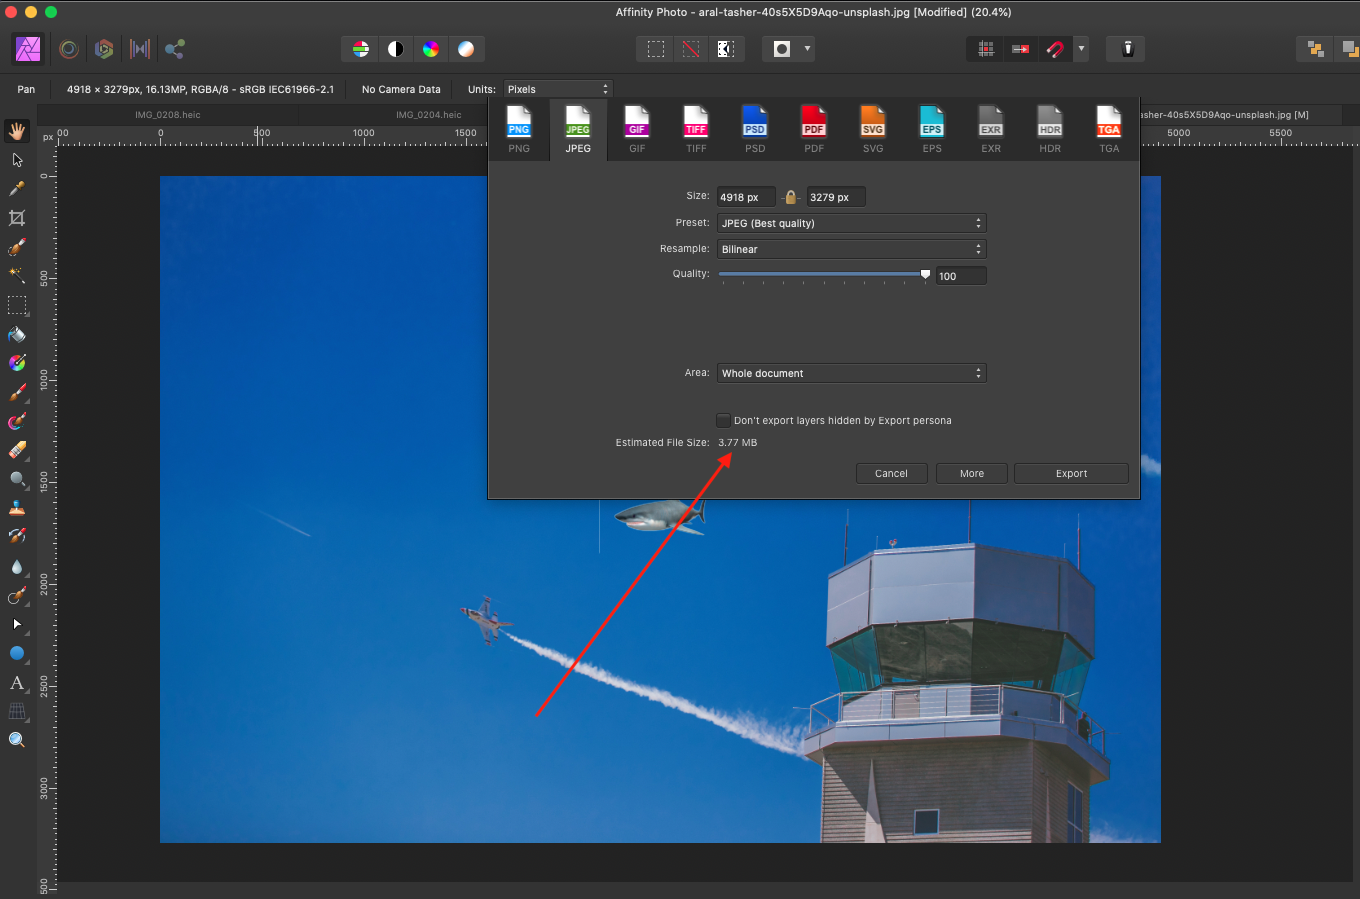
As you can see Affinity Photo has a wide range of formats that you can export your document into. The two most common formats are PNG and JPEG. JPEG is useful because it will export your picture into a small file size but PNG is useful because it allows you to preserve transparency layers. Since this picture doesn’t have any transparency layers let’s export it as a JPEG. Right now you can see the estimated file size is 3.77 megabytes.
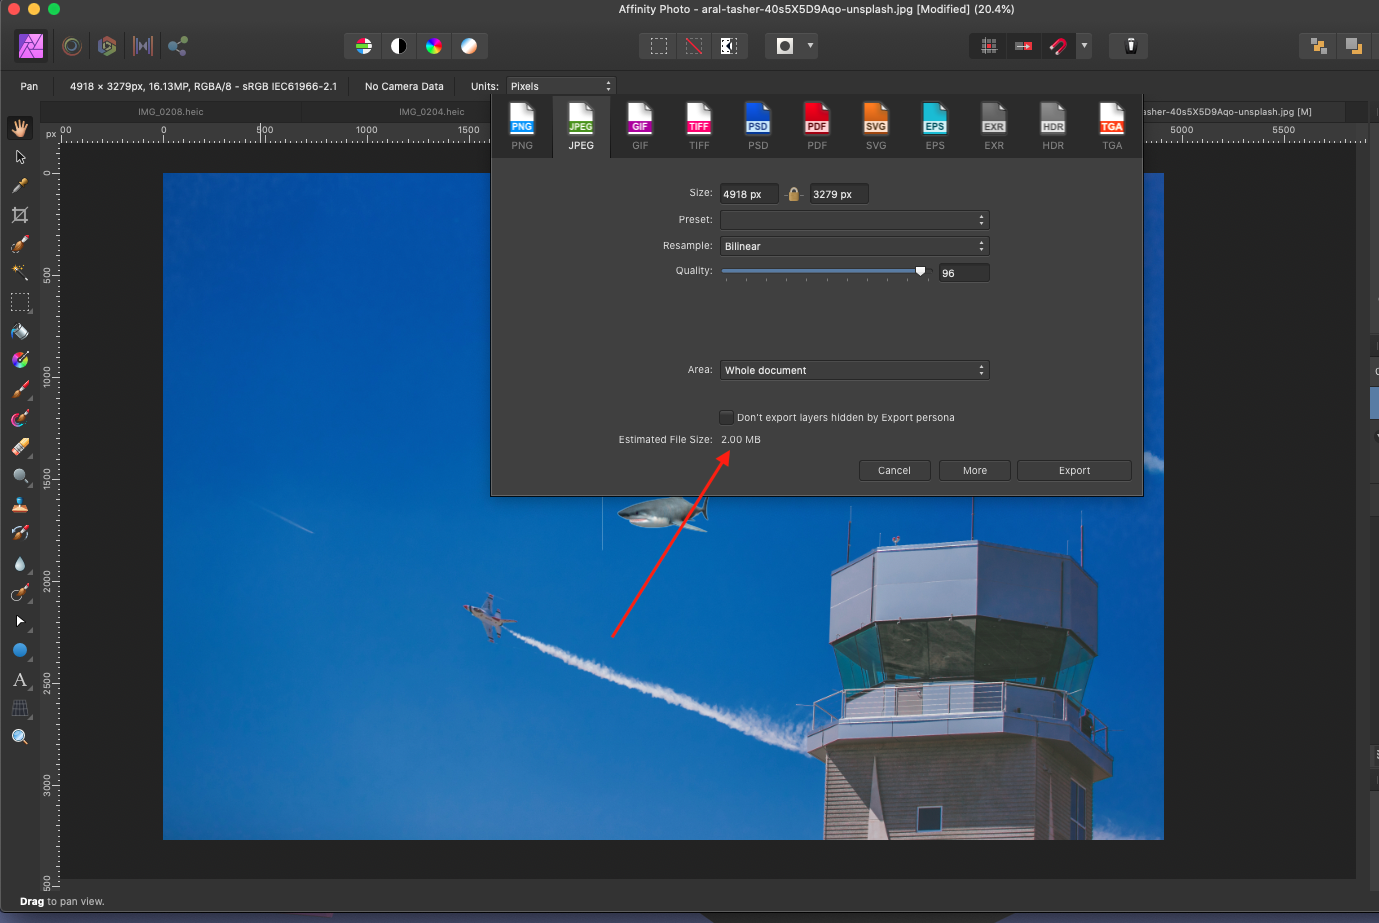
If you wanted to make that even smaller you could either change the size or lower the quality. By lowering the quality just a little bit you can dramatically lower the file size. So from Quality equals 100 in the first instance, to Quality equals 96 in the second instance.
Let’s try lowering the quality to 96%. By just slightly lowering the quality you can see that you’ve almost cut the file size in half.
Now that you have a very small file you can export the file. Now all you need to do is give your picture a name and choose where you want it to be saved then just press on the Save button.
Now there we have finished this little introduction to Affinity Photo. I hope you have found it useful. You can find a lot of useful videos I have made on YouTube that will show you in some depth how to use all of the Affinity packages. Photo, Designer and publisher.
4 thoughts on “Affinity Photo – Beginning. An Introduction With Clear Easy Steps.”
I didn’t know anything about affinity photos before I read your post. But after reading your post, it seems that now I know a lot about Affinity Photo Editor. The steps in your tutorial are very simple. Many thanks for teaching me something new.


I didn’t know anything about affinity photos before I read your post. But after reading your post, it seems that now I know a lot about Affinity Photo Editor. The steps in your tutorial are very simple. Many thanks for teaching me something new.
Thanks for the comments. It’s nice to be able to help.
This is brilliant.
Thank you so much for taking the time to put this together for newbies like me.
Much appreciated.
kind regards
Carol
It’s a pleasure. Thank you.