The Innamincka Affair: Love. Lies. Mortal Danger. A lot can happen with an affair at Innamincka. Rebecca Boucher is a respected junior partner in a London law firm. When she’s sent to Australia to meet with the owner of a vast cattle property, she’s expecting a straightforward legal matter. But what she finds is Cooper Read More ...
Marriage in a Cold Climate View it on the UK Amazon Store The stark beauty of the frozen wastes of Siberia, where the cold can snap steel rails, and the empty sweep of the tundra, alternately a snow-muffled wasteland and an unexpectedly safe trackside haven, are vividly evoked. Against this backdrop, Robert Chalmers weaves an Read More ...
The Dragons of Sara Sara Innocence and terror meet in a fast-paced evocation of a time far in the future. Set among momentous happenings, Robert Chalmers catches a society on the brink of a new age. View it on the UK Amazon Store In an age far ahead in time, two young people from very Read More ...
Calorie Counted Recipe Book View it on the UK Amazon Store Introducing the ultimate calorie-counted recipe book for pre-diabetics looking to improve their health and lose weight! Each recipe in this book is designed to keep your daily calorie intake under 800 calories, making it the perfect resource for those looking to watch their Read More ...
How to Colorize Black and White Images in Affinity Photo V1 for iPad
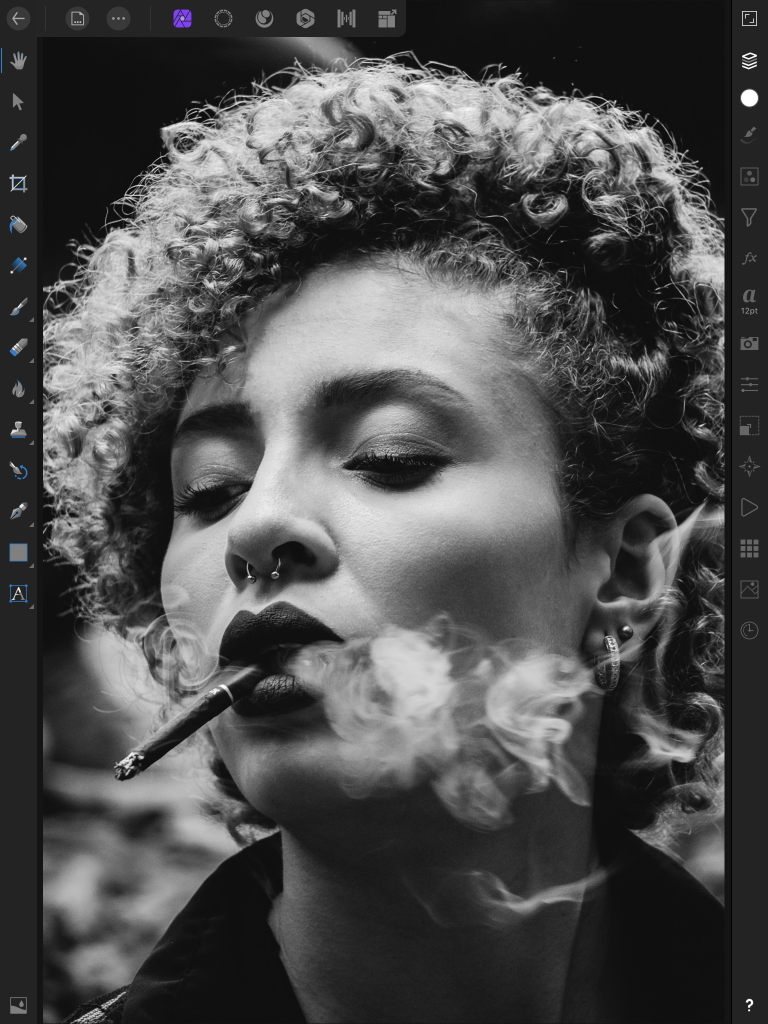
Open your black and white image in AfPhoto for iPad.
Hopefully you are by now familiar with the iPad menu. As you are aware it’s quite different to the Desktop version. Some things are a little more difficult to find than others. So, in this tutorial I will use lots of screen grabs.
I’ll start with the first one, with my image loaded.
talles-alves-Black&White-unsplash Image from Unsplash.com
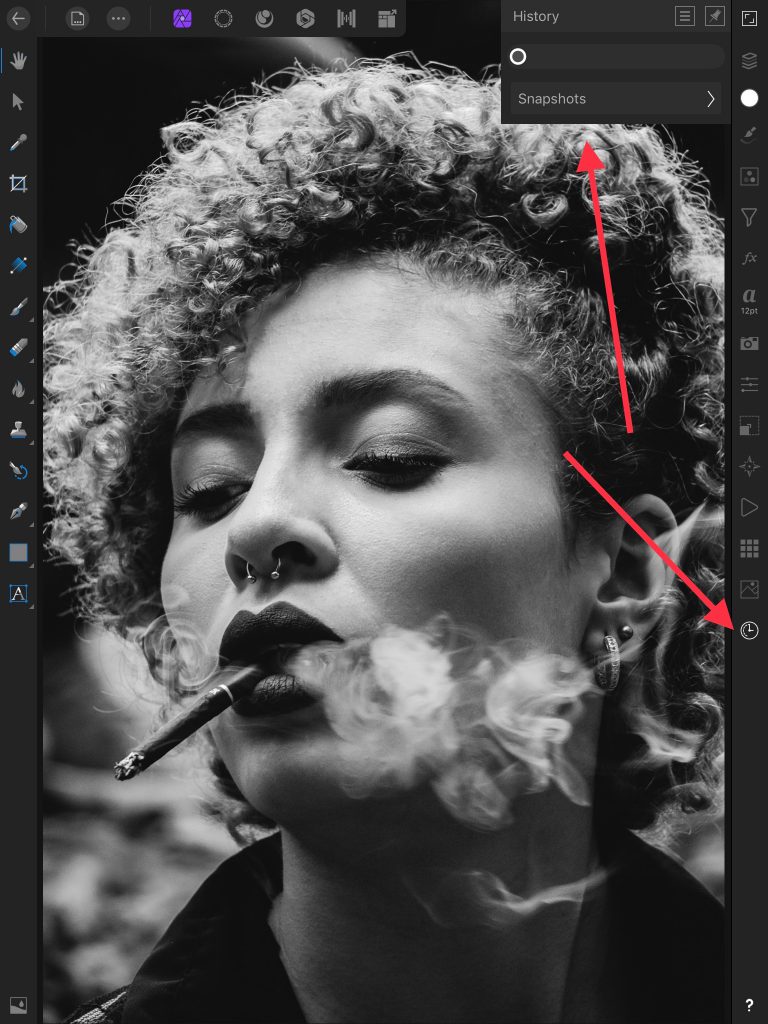
The next image is a quick look at the History log. There isn’t any. Good, because we’ve just loaded the image.
This is a “clean slate” then so let’s get started.
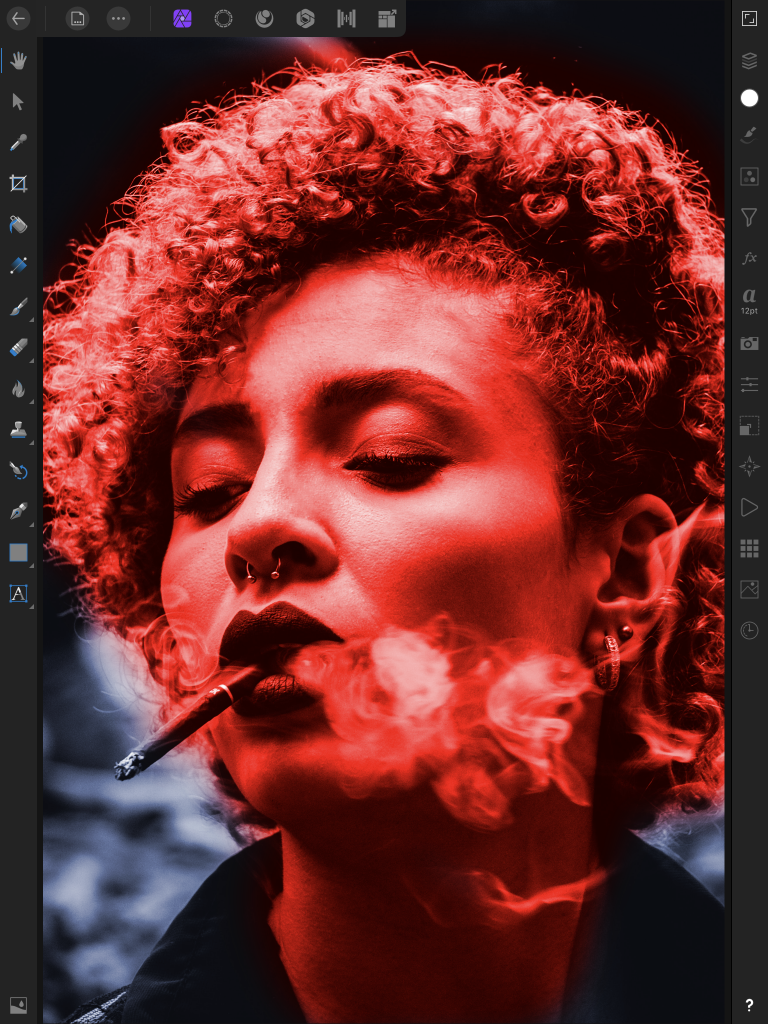
Today we’re going to take this beautiful black and white photo, and bring back its color.
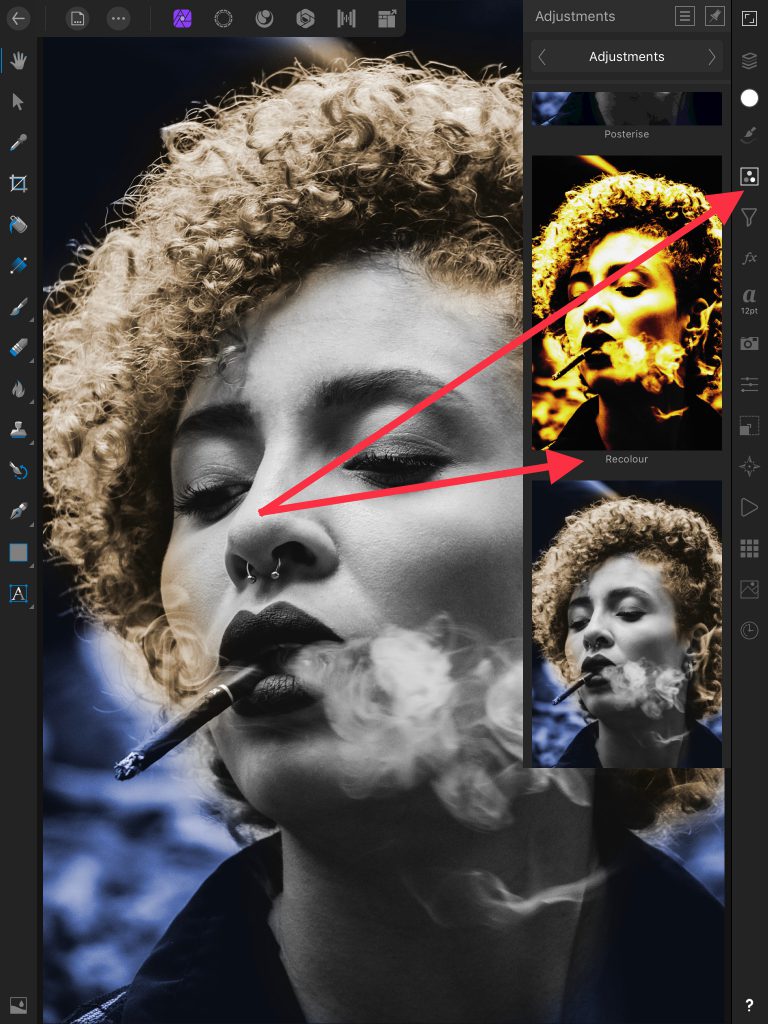
The first thing to do now is to set the first Recolour.
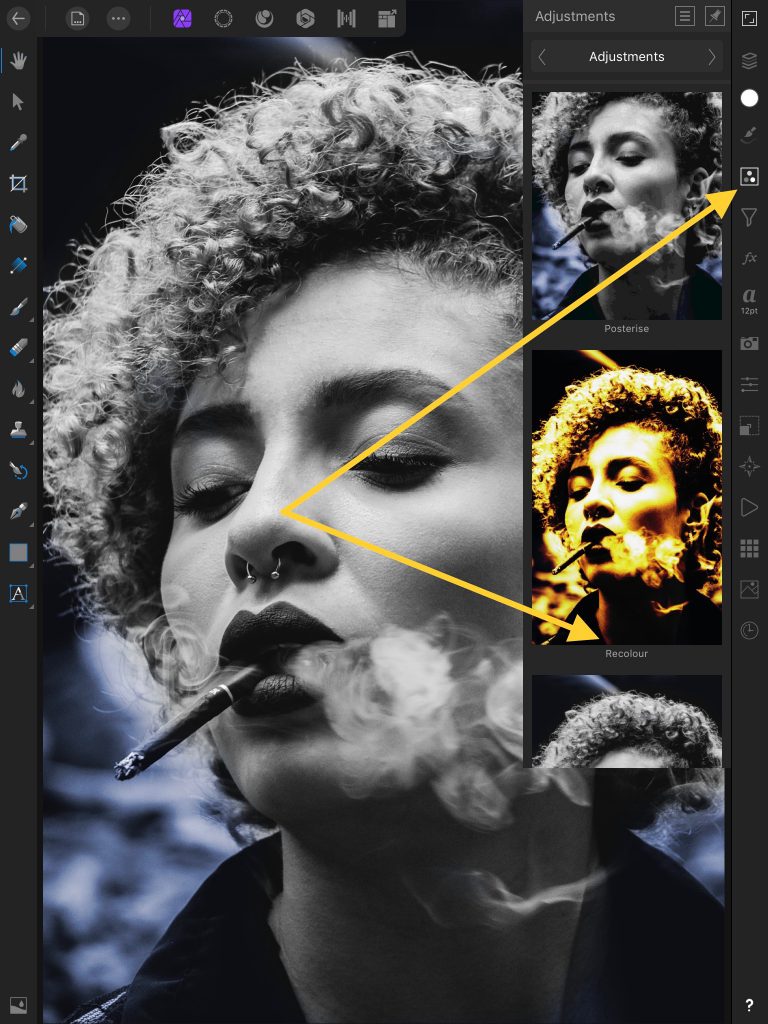
Tap the option with the three dots in the square. The Adjustment Studio.
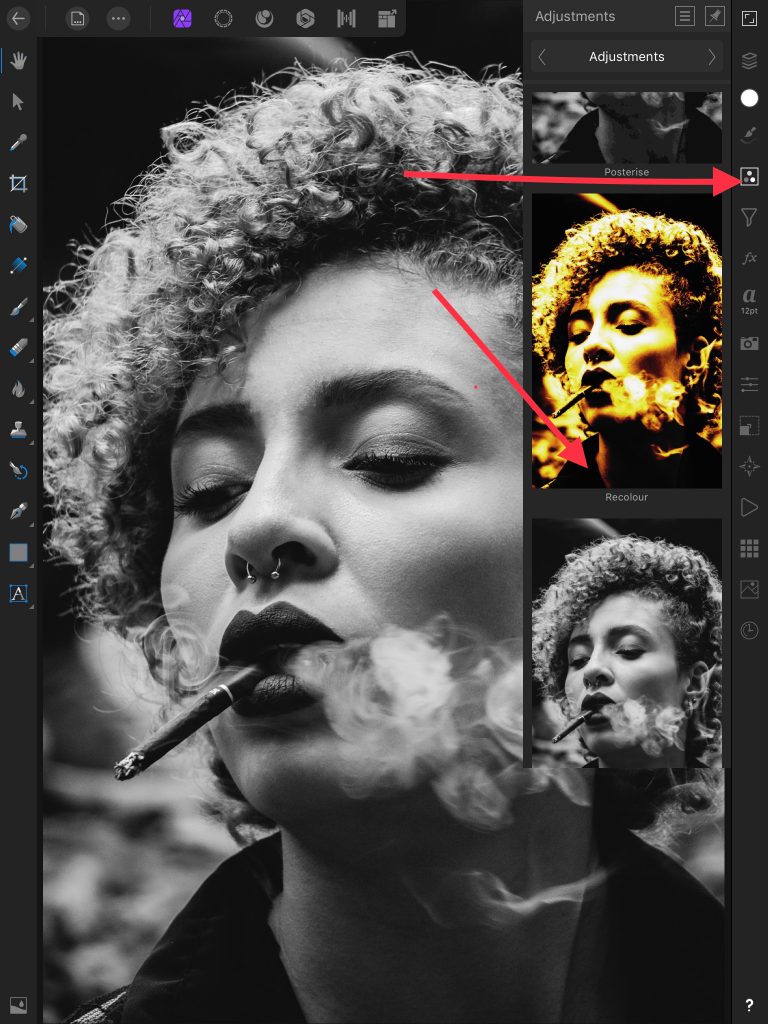
This will bring up the menu you see above. There will be a list of options of image Adjustment types. Scroll down until you see the Recolour one and select it by tapping on it.
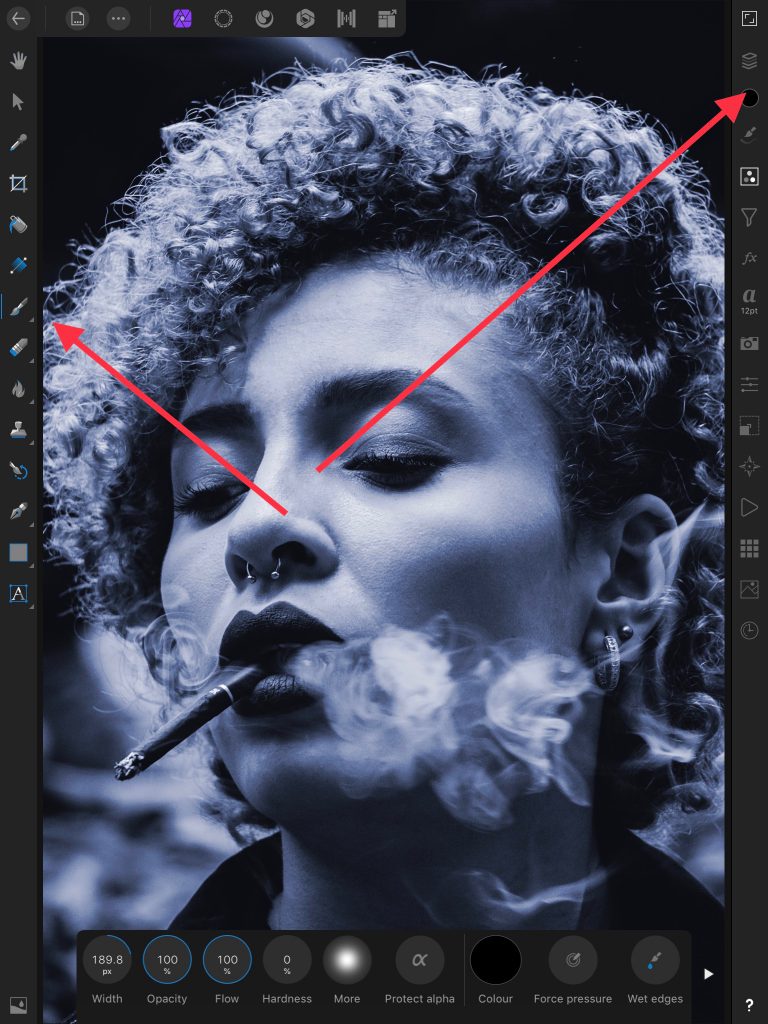
Your image will change to look like this.
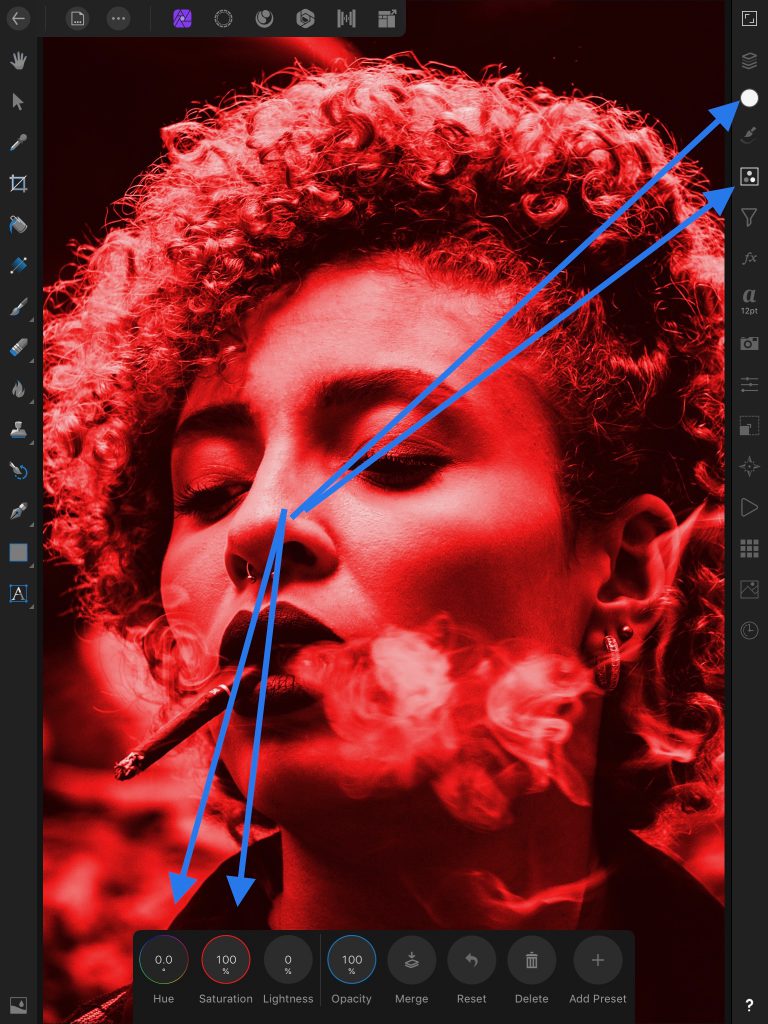
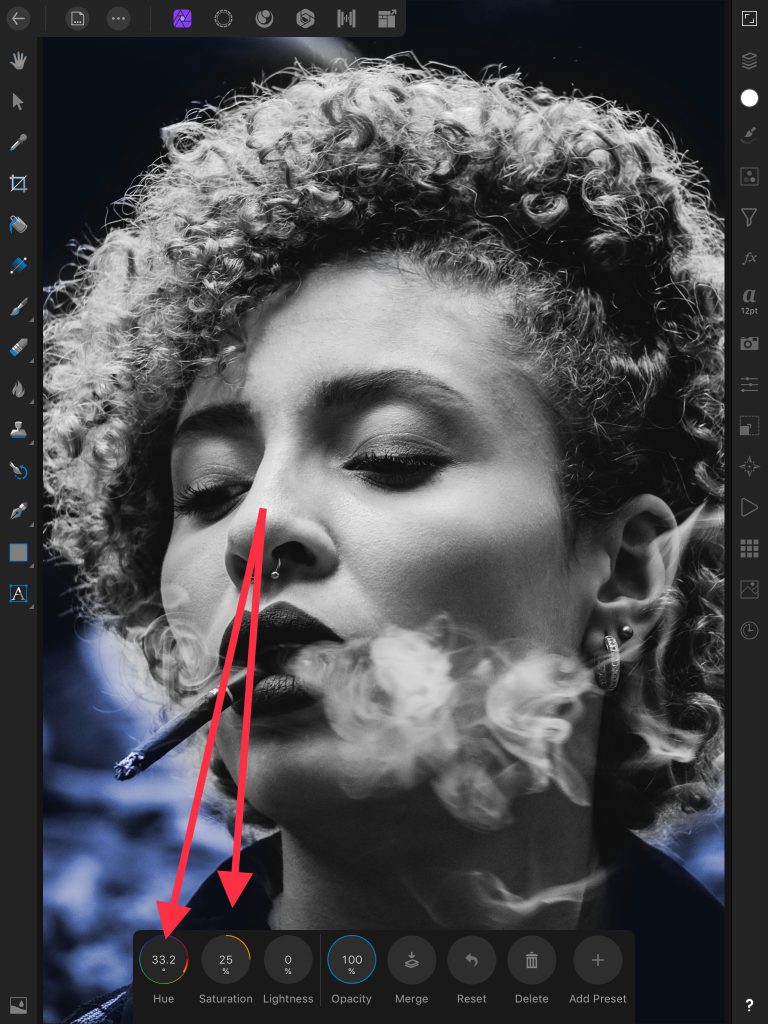
Notice the arrows. Pointing to the Colour Studio option, the Adjustment Studio, the Hue control, and the Saturation control.
The Hue and Saturation are how you control the working colour of your image.
The Colour Studio – the white dot at the top, is not used in this part.
The Adjustment Studio you do use.
Not yet highlighted with an arrow is the Layer Studio. You will use that.
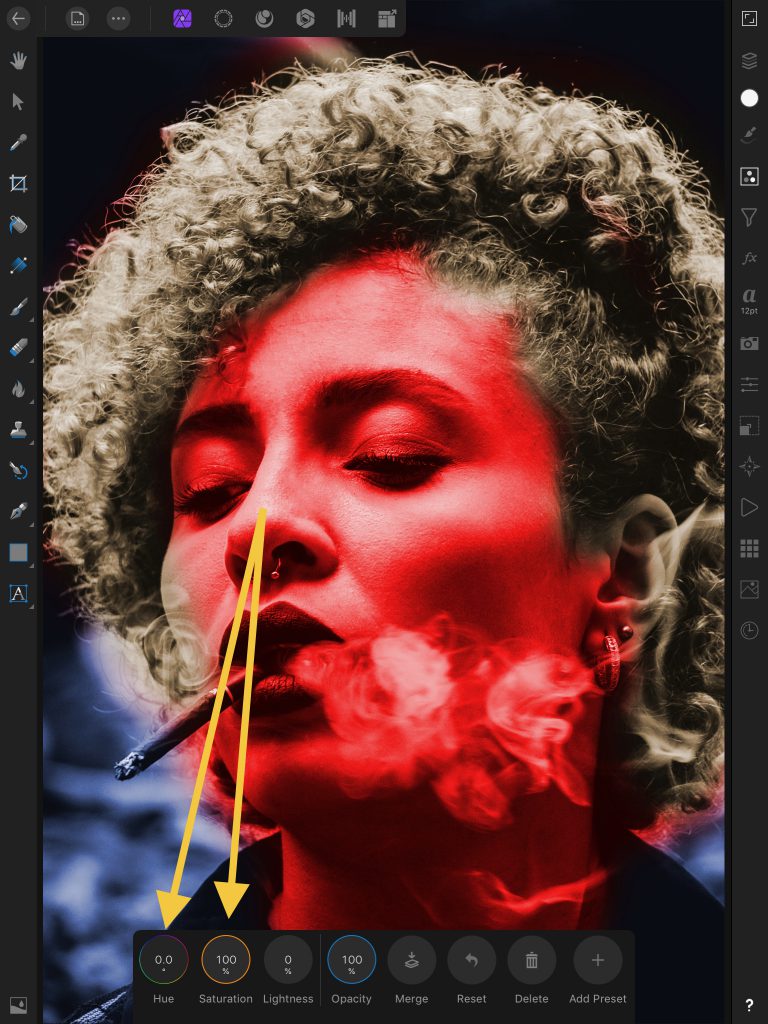
Now to set the Hue and Saturation.
You can set the Hue in two ways, either tap the Hue icon, and type a number into the little calculator type pop up, or better, scroll your finger or pen gently up or down within and near the Hue icon. Watching the Hue change as you do so.
Setting the Hue first.
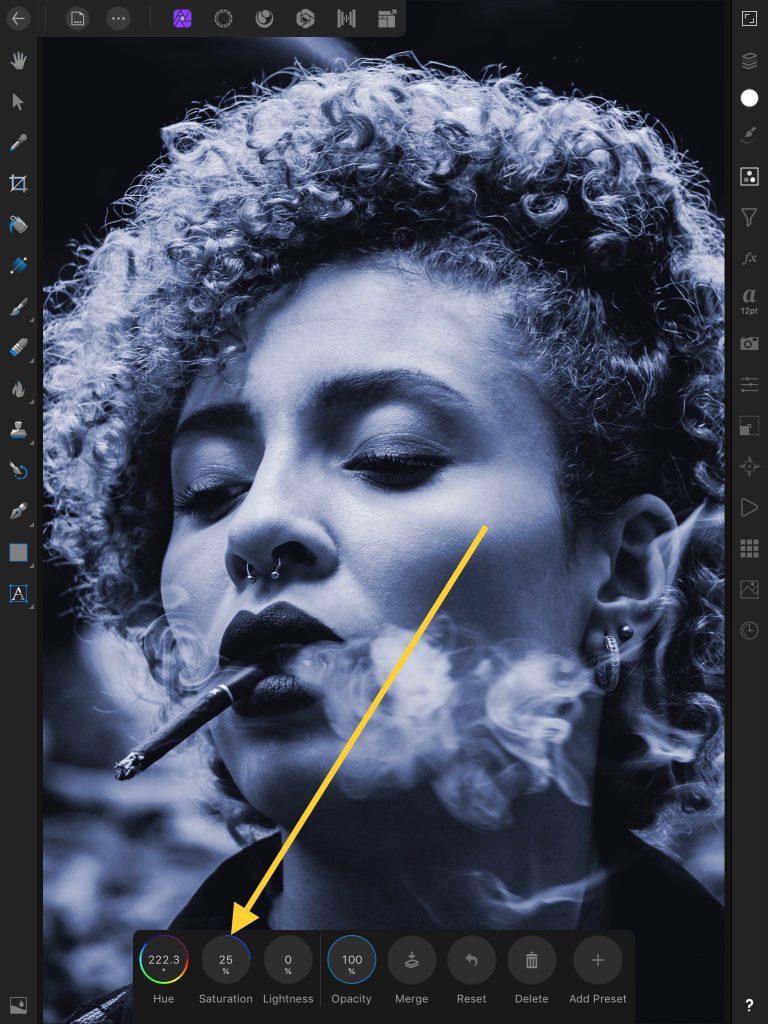
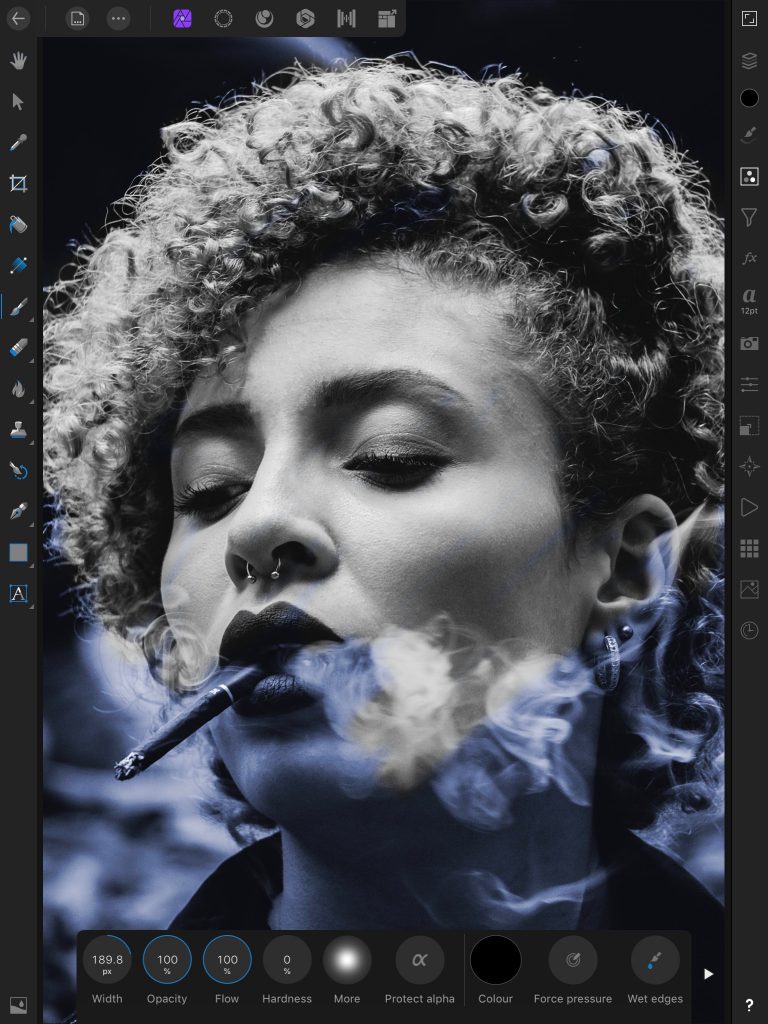
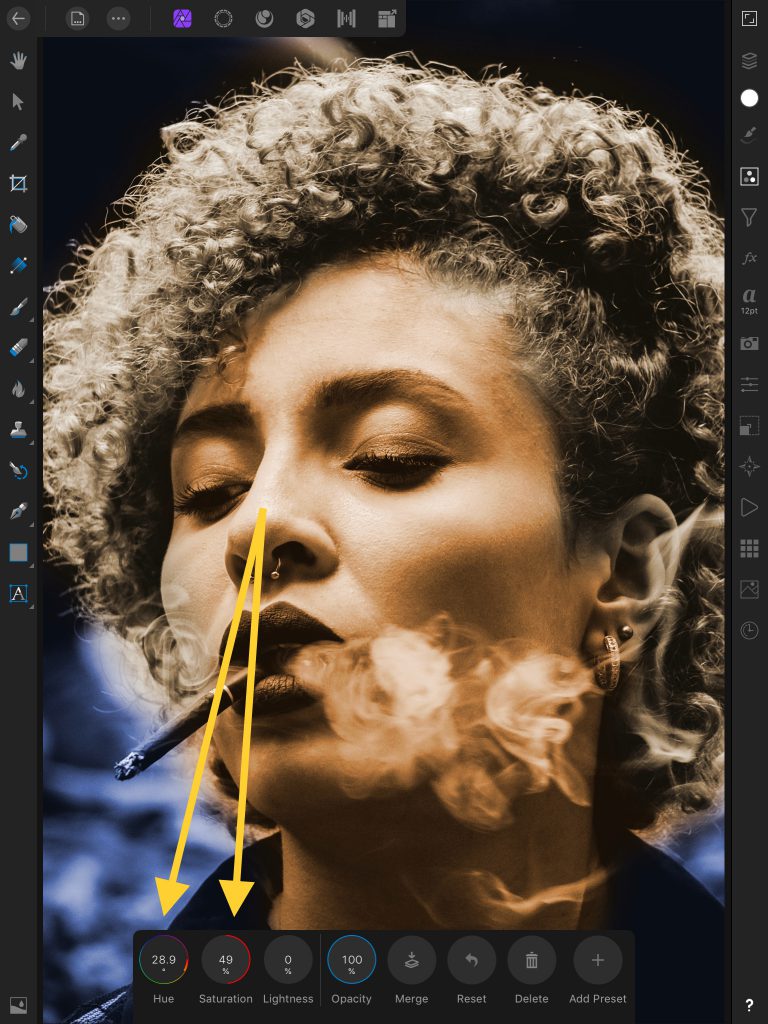
We don’t want the colour to be that saturated, as it’s really only the background colour in the end. So we need to desaturate it, using the same control method as we used for the Hue. applied to the background, not on top of the girl, so we’re going to select our brush, and then paint in black to remove this blue from the girl.
Set the Saturation to about 25. Again, you will see the overall image colour change as you scroll the circle control.
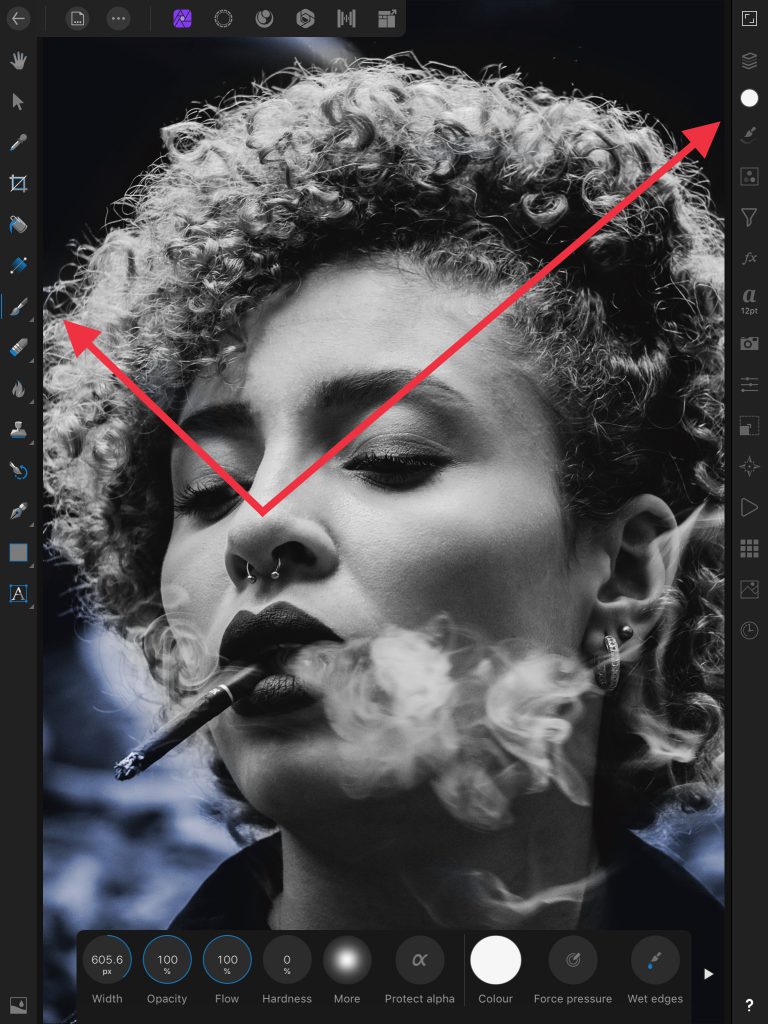
Next we want to colour the persons skin first.
Select the Paint Brush. With it selected, your color dot will change to black.
Now you can colour the person by swiping your finger or pen with a suitable size pen point over the person. Begin painting in black over her to remove the blue. Do not paint her lips or any otehr part you want to recolour differently.
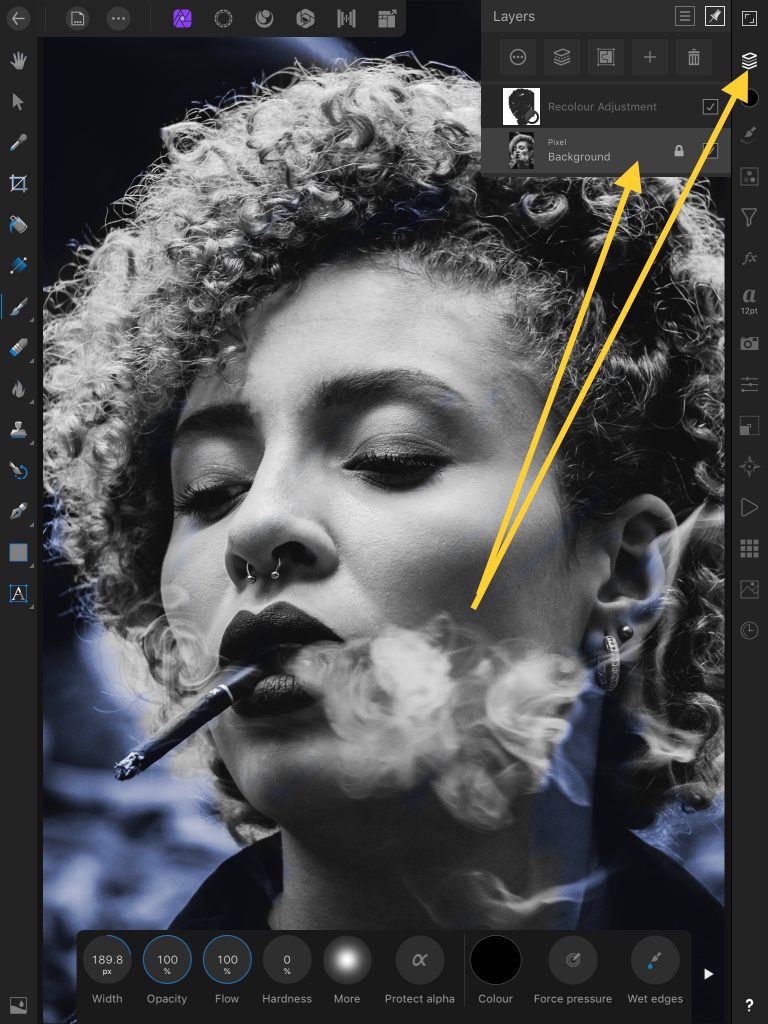
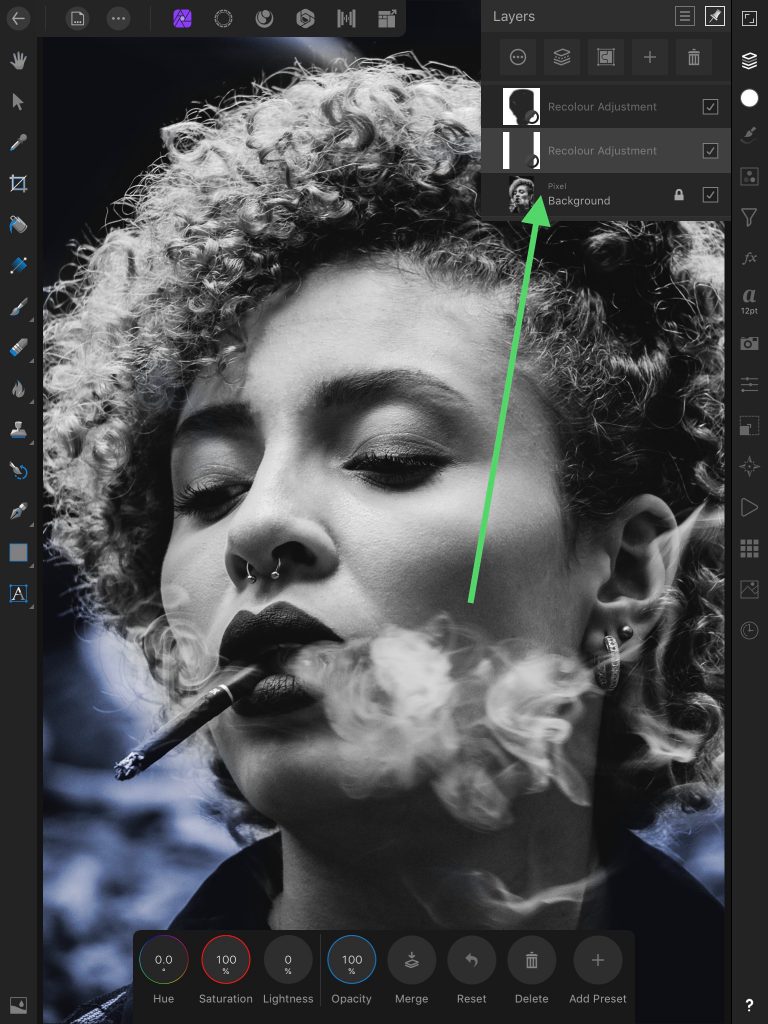
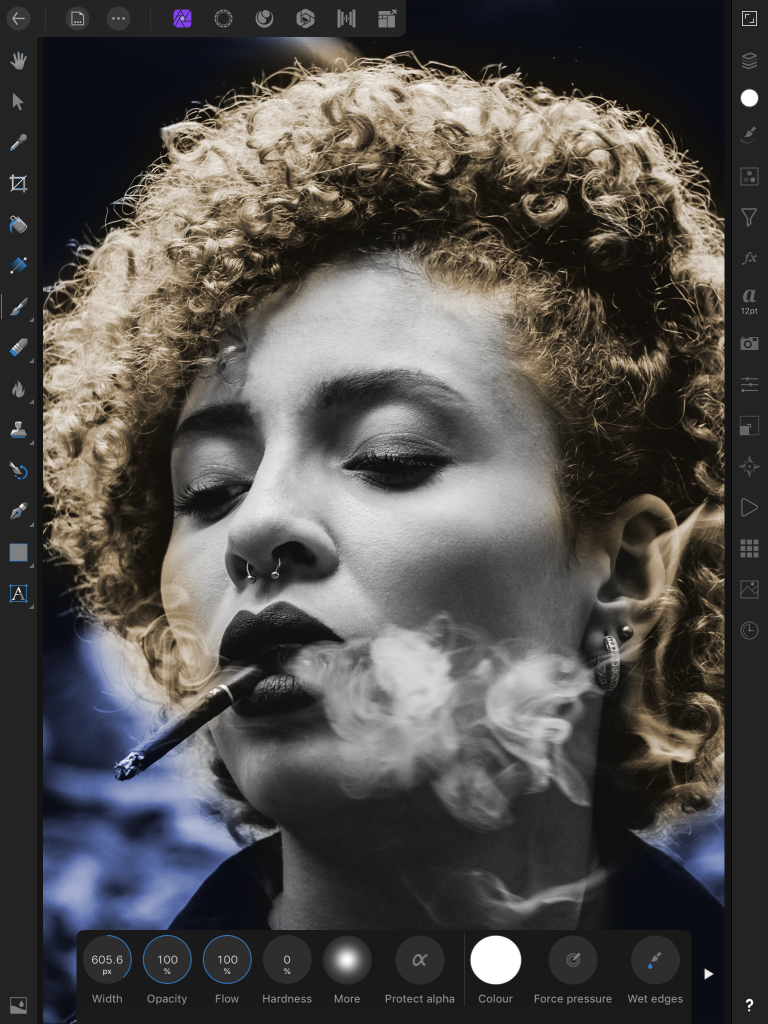
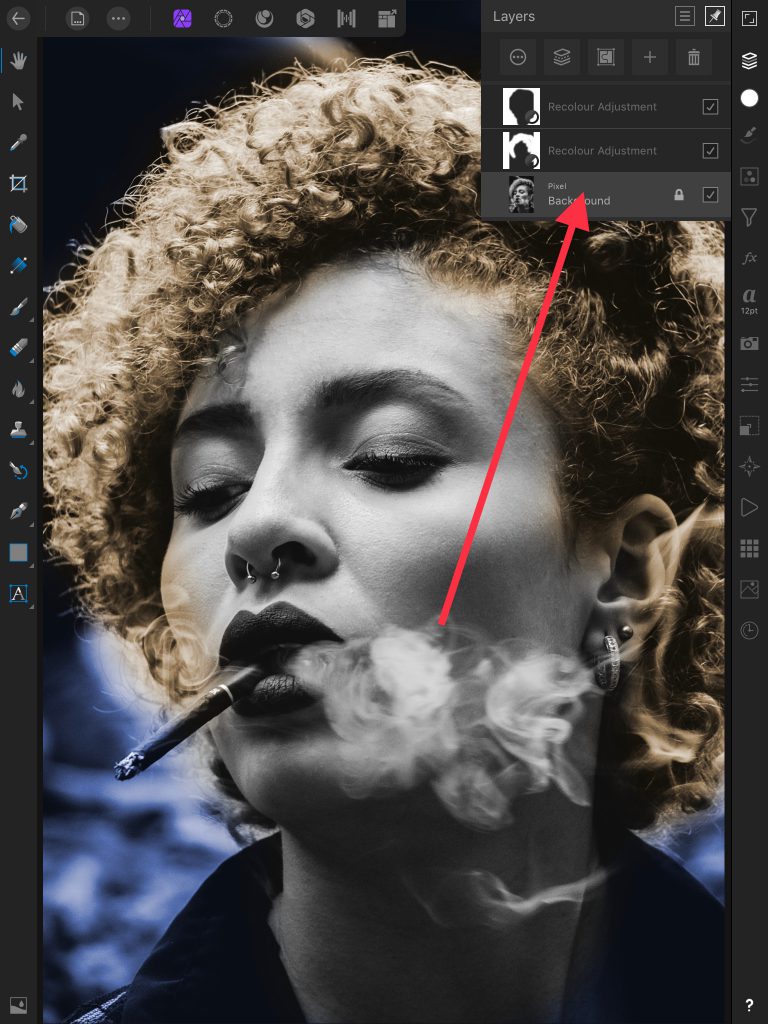
Now let’s bring some color back into her hair, so select the Layers and then the Background layer, so we can position the next Recolour layer correctly. You can see it here…
then go back to the Adjustment Studio and select another Recolor adjustment,
and only the face and hair now changes to the recolour colour.
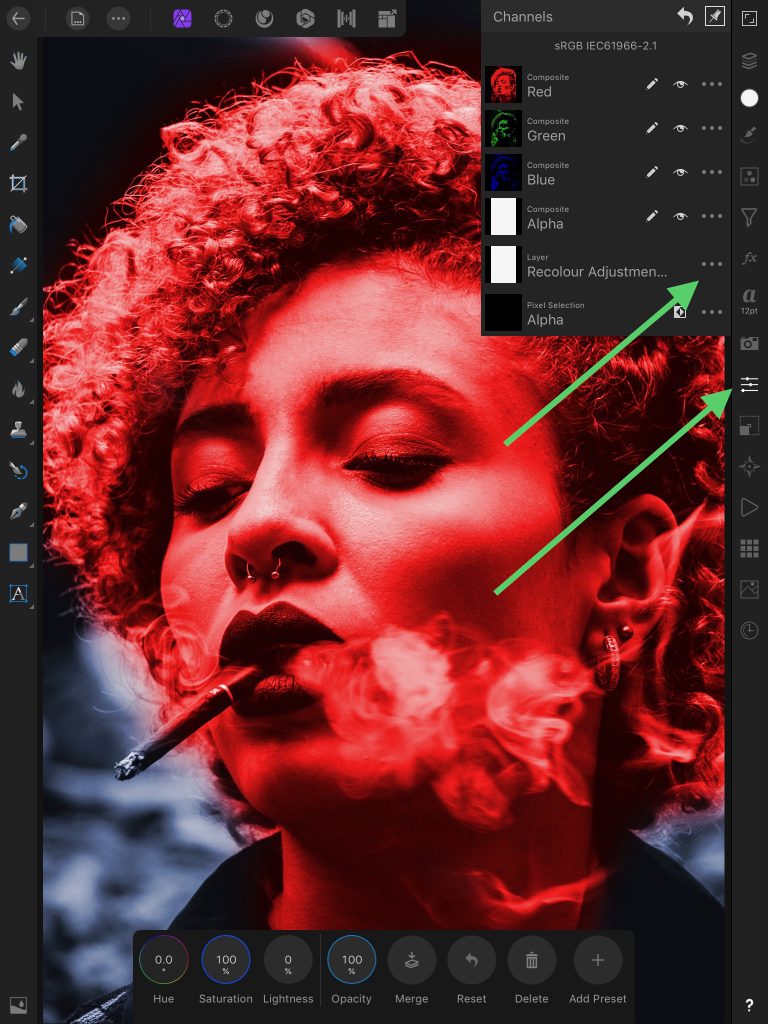
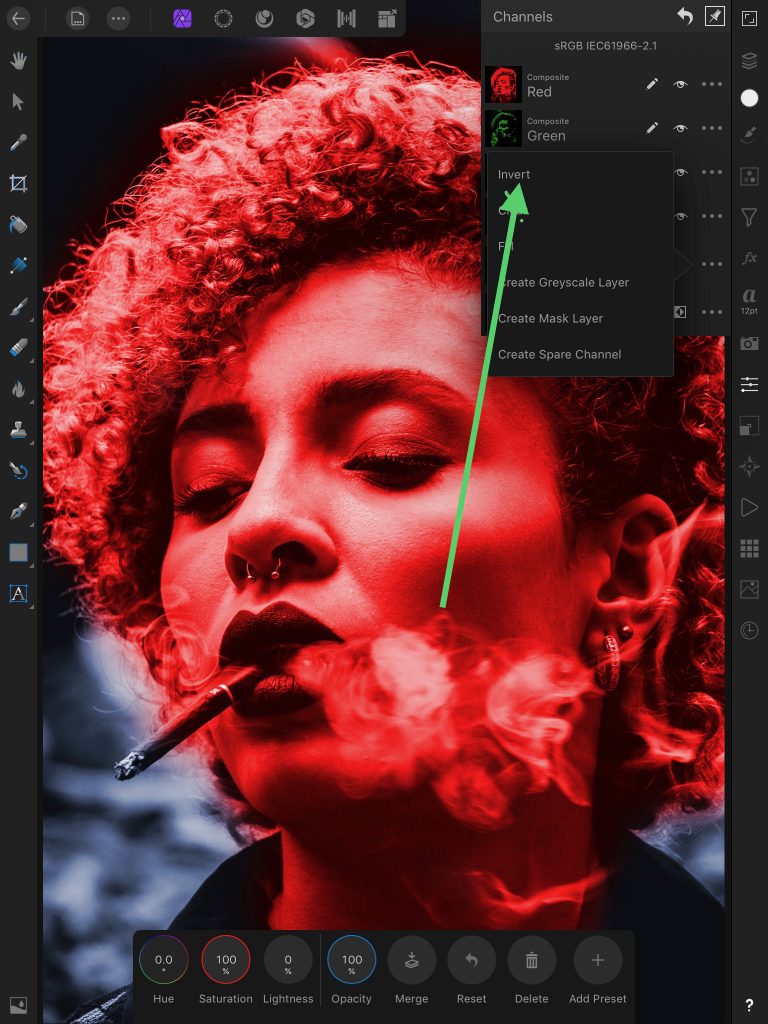
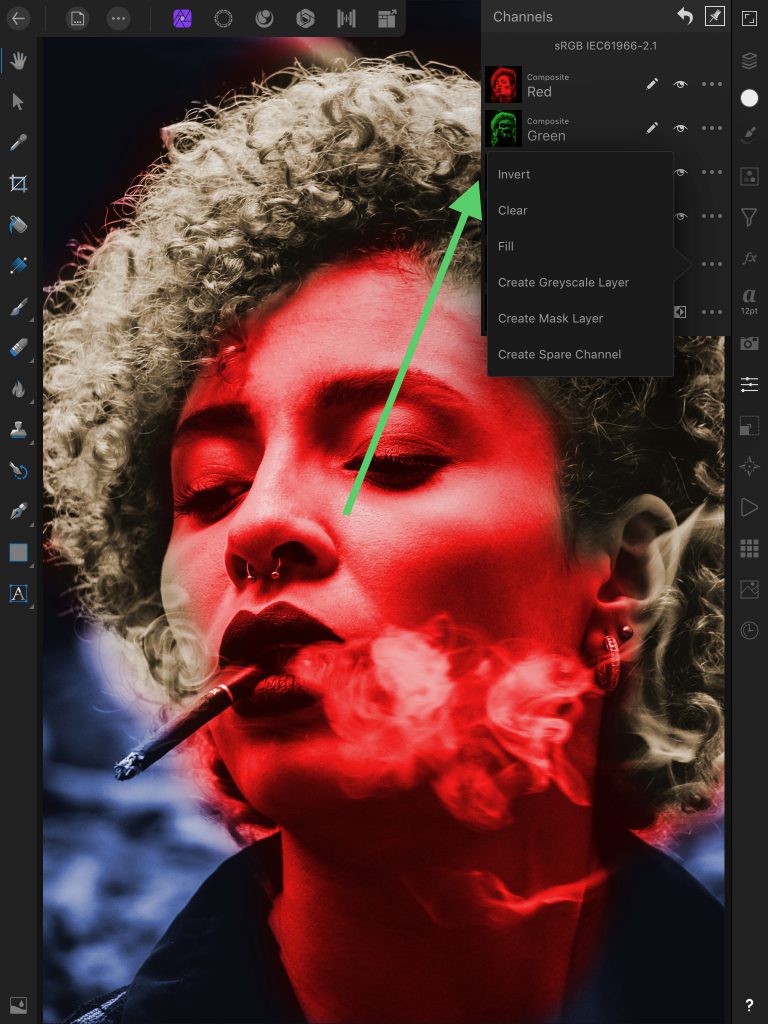
For this Recolour, make it some sort of a yellow or brown, somewhere around a nice hair color to suit your image, and a little less saturated, and then instead of a painting in black to remove it from all the rest of the picture, we’re going to invert our Mask, by firstly selecting the Channels Studio, and within the pop up, select the 3 dots next to the Recolour adjustment layer as shown below.
Then Invert the mask
And the image reverts to the original for that layer. You can see the two Recolour layers in the image below.
So the Recolour is applied to nothing right now, but if we paint in white, we can bring that color back in. So I’ll just flip these colors, black to white,
Check that you have set the Hue and Saturation correctly for the hair colour.
and we are going to paint in white over the top of her hair.
Select Brush then flip the black to white.
With White now selected, and Brush enabled we can paint. Ok, pretty rough, but you get the idea. I have the brush size set very large.
Select the Layers, and highlight the background
Select the Adjustment Studio, and apply a Recolour.
Invert your Recolour layer.
Set your Hue and Saturation
I’m making this a desaturated orangey-brown.
Then select Brush, and paint the skin tones. Still keeping the White colour dot.
If at any time, you want to change the colour just double-click on your Adjustment layer, and then you can change the colour.
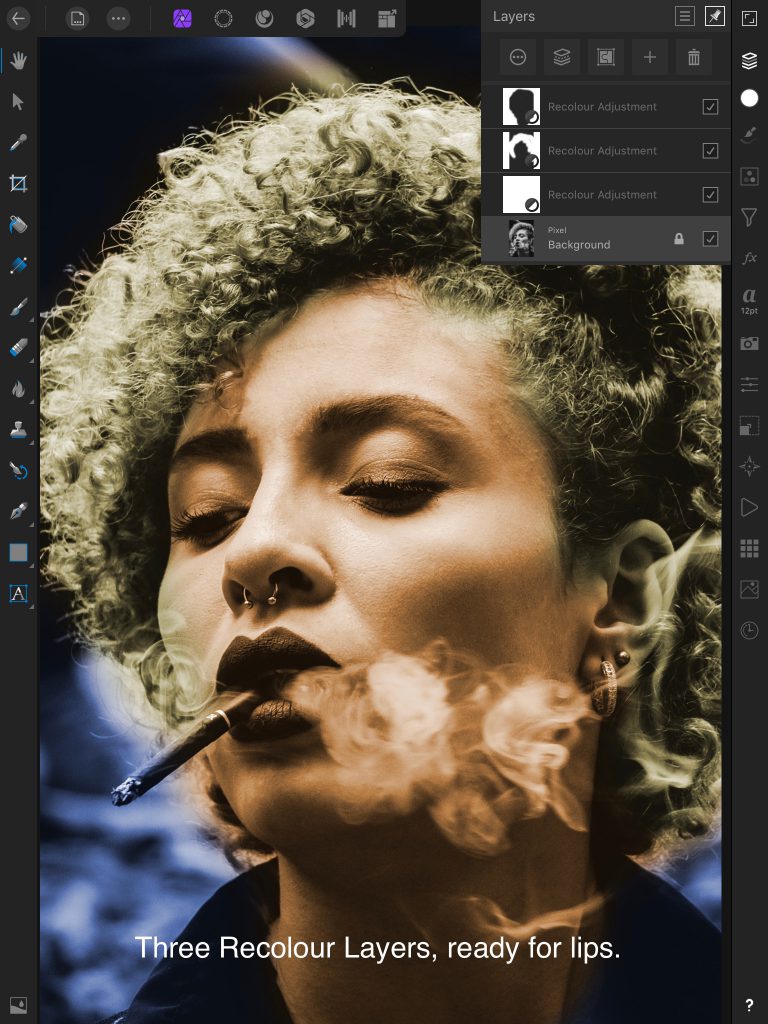
Now we’re going to bring the color back into her lips, so same thing. Adjustments, Recolor, and make it a skin/lip color.
I hope you didn’t colour the lips on the face colorizing step.
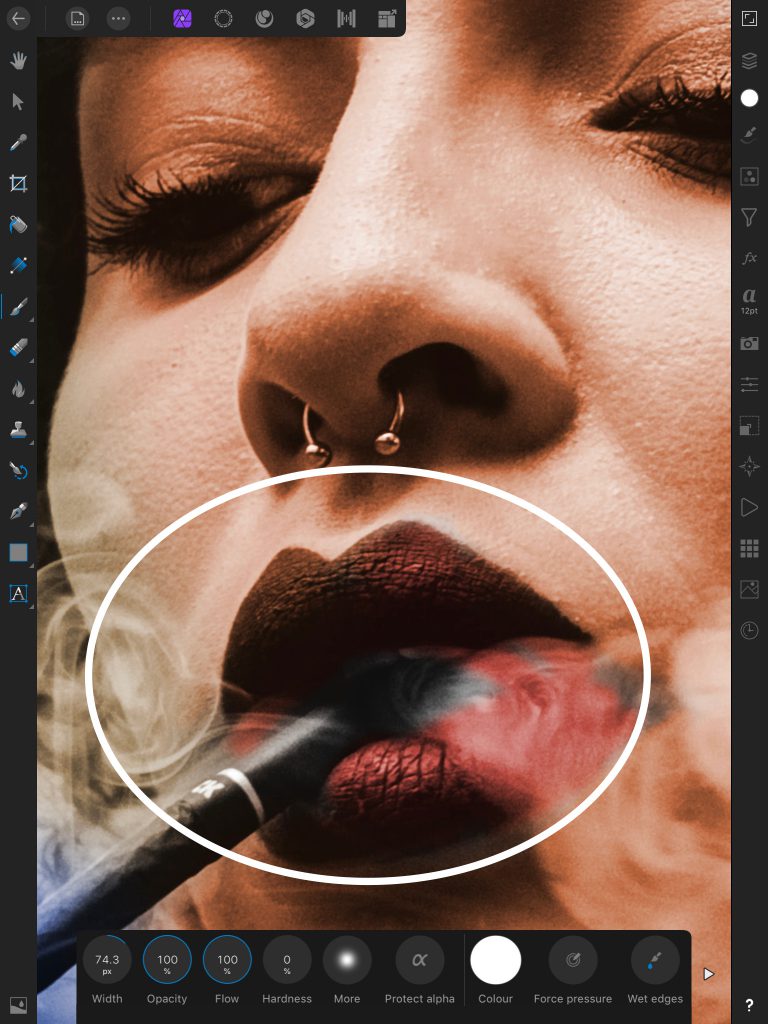
Here I’ve put a deep red shade onto the lips. Zoom in and use a small brush for the detail.
So it’s time for a note of caution. When you are colouring an object, a photograph, you must really be careful to only colour the part you want coloured for that step.
For example, if you coloured the lips in the previous steps with the face skin colour, you will not be able to Recolour them in this step. The same applies to eyes, objects, earrings, cigars, any component really of the image.
The finished image. I know this is a bit rough, but it’s the steps that I wanted to cover, not my skills as a retouch artist.