The Innamincka Affair: Love. Lies. Mortal Danger. A lot can happen with an affair at Innamincka. Rebecca Boucher is a respected junior partner in a London law firm. When she’s sent to Australia to meet with the owner of a vast cattle property, she’s expecting a straightforward legal matter. But what she finds is Cooper Read More ...
Marriage in a Cold Climate View it on the UK Amazon Store The stark beauty of the frozen wastes of Siberia, where the cold can snap steel rails, and the empty sweep of the tundra, alternately a snow-muffled wasteland and an unexpectedly safe trackside haven, are vividly evoked. Against this backdrop, Robert Chalmers weaves an Read More ...
The Dragons of Sara Sara Innocence and terror meet in a fast-paced evocation of a time far in the future. Set among momentous happenings, Robert Chalmers catches a society on the brink of a new age. View it on the UK Amazon Store In an age far ahead in time, two young people from very Read More ...
Calorie Counted Recipe Book View it on the UK Amazon Store Introducing the ultimate calorie-counted recipe book for pre-diabetics looking to improve their health and lose weight! Each recipe in this book is designed to keep your daily calorie intake under 800 calories, making it the perfect resource for those looking to watch their Read More ...
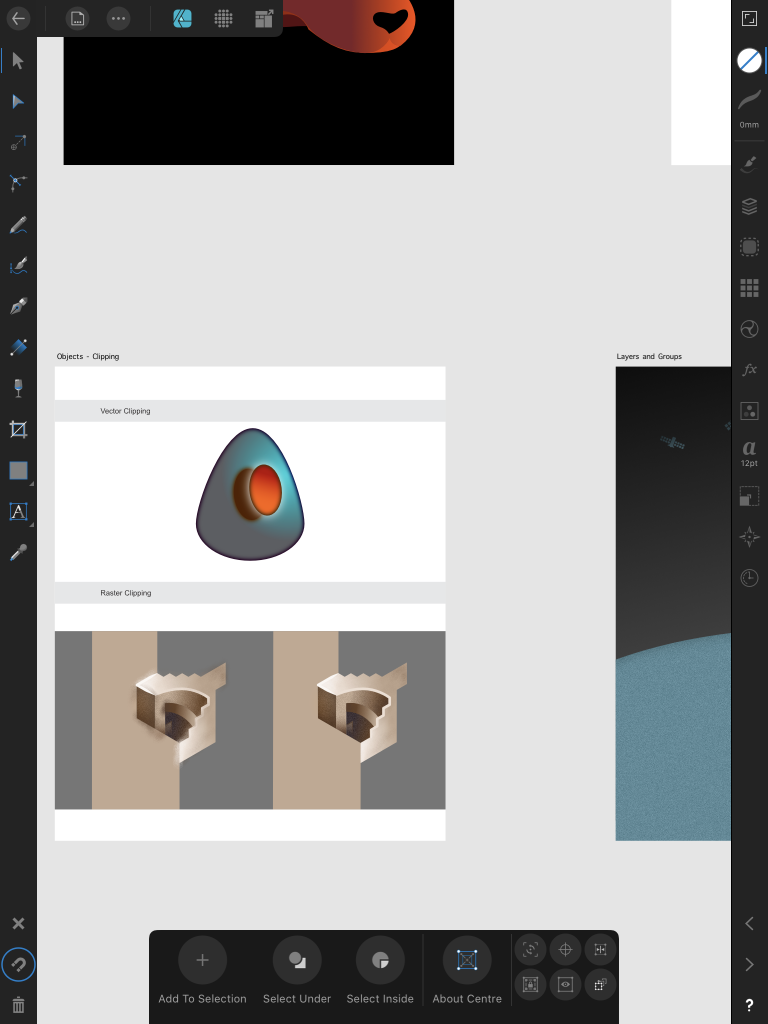
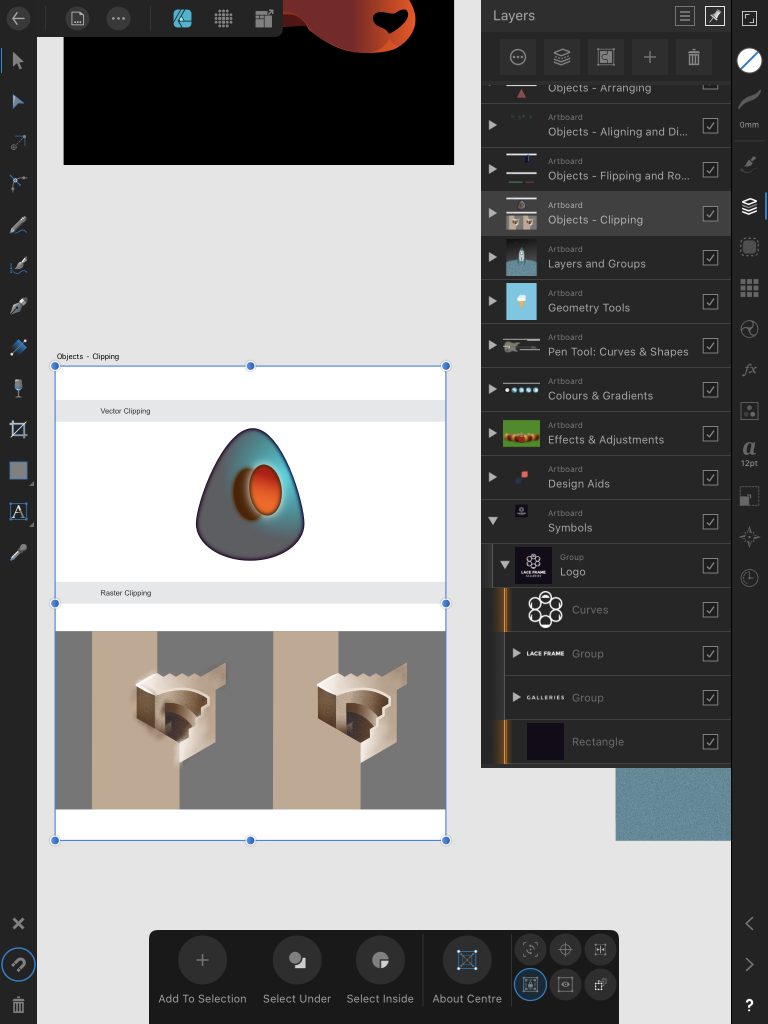
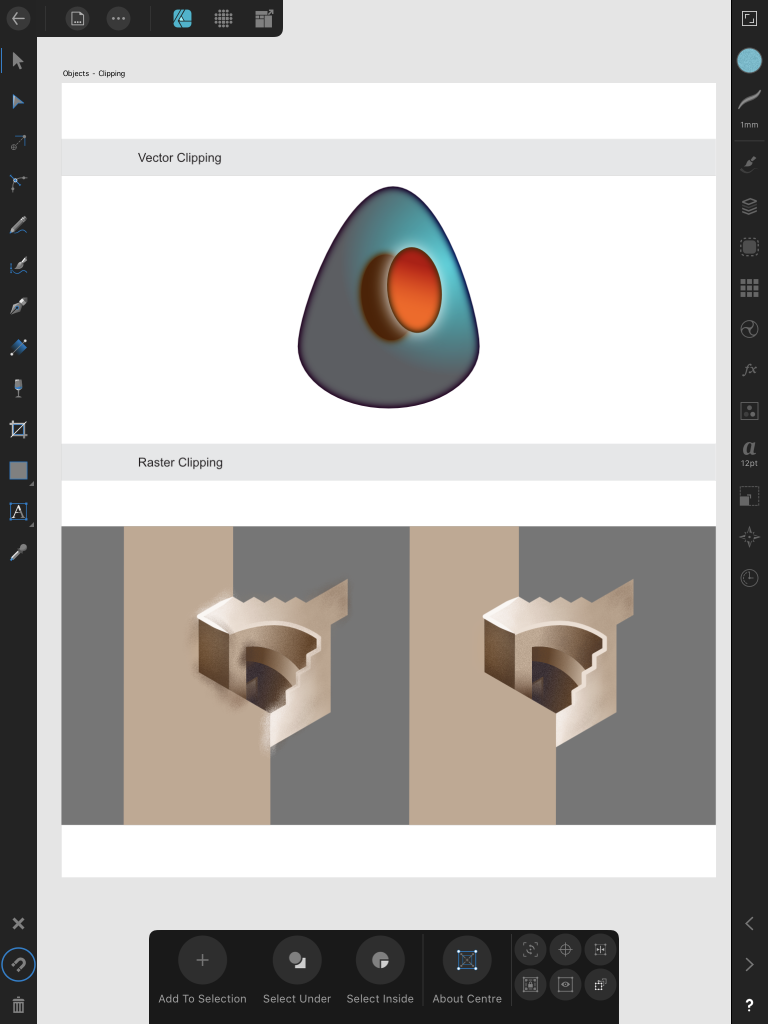
Affinity Designer Workbook on iPad Chapter 2.13 Core Skills Clipping Objects. A powerful feature of Affinity Designer is its clipping support. Clipping sounds technical and complicated but it simply means containing a ‘child’ object within the outline of another ‘partner’ object; the ‘partner’ object becomes the new boundaries for the ‘child’ object. Any areas of the child object which lie outside the parent’s outline will be masked (hidden).
Open the Artboard set. Objects – Clipping
Enlarge the section with the Clipping exercise objects.
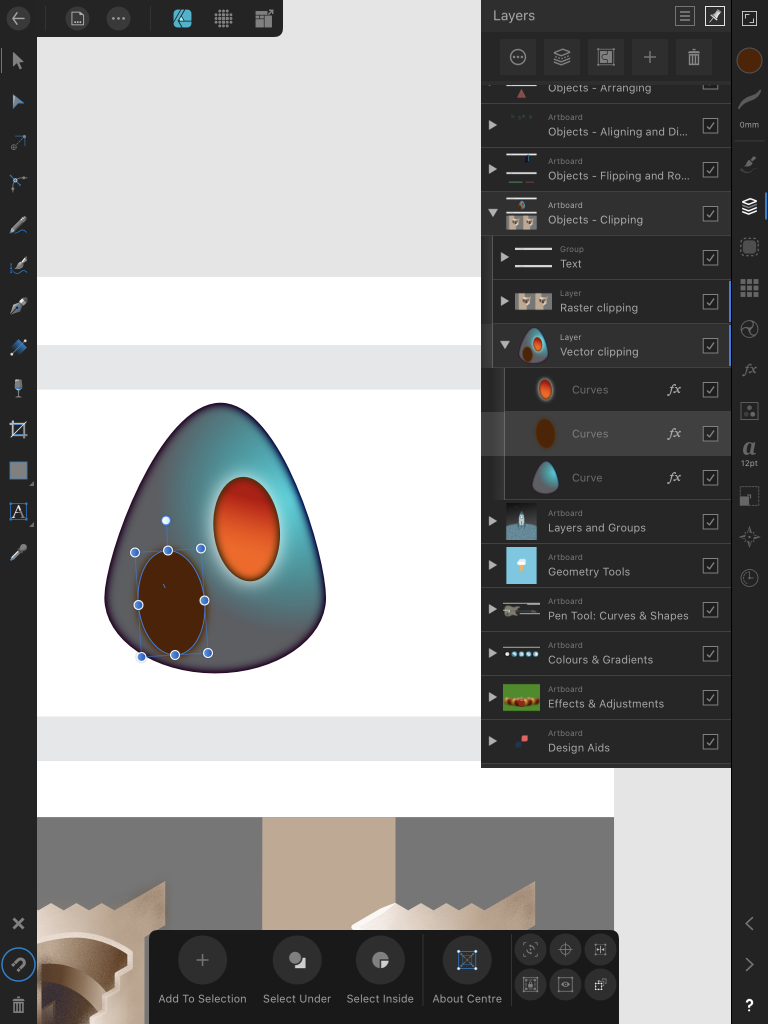
Select the Objects
Select the darker ellipse in the Layers panel
On the Layers Panel, drag the darker ellipse (the object to be clipped) from under the lighter orange ellipse, ensuring that the object is nested (i.e., indented).
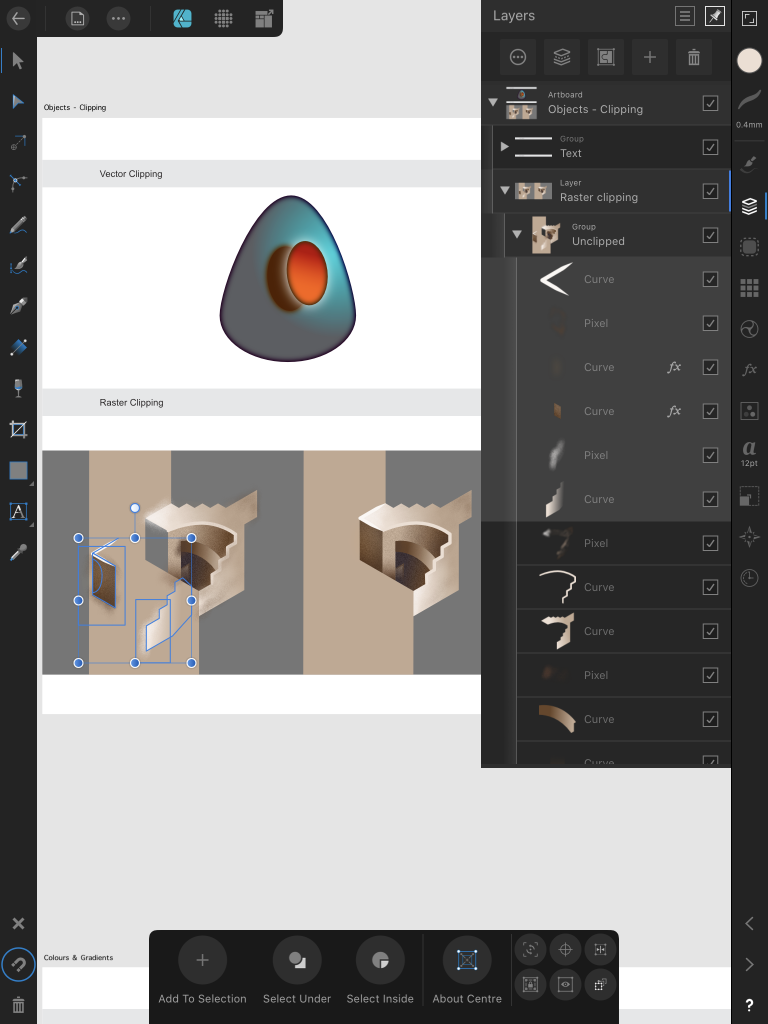
Replace it with the Undo button.
Then select the Raster Clipping object. Does it look a little like a staircase?
Select a number of the Layers as shown then you can drag them out from the drawing. This really is showing that the technique is identical to vector clipping but brushed raster textures created in Pixel Persona can be clipped to vector shapes.
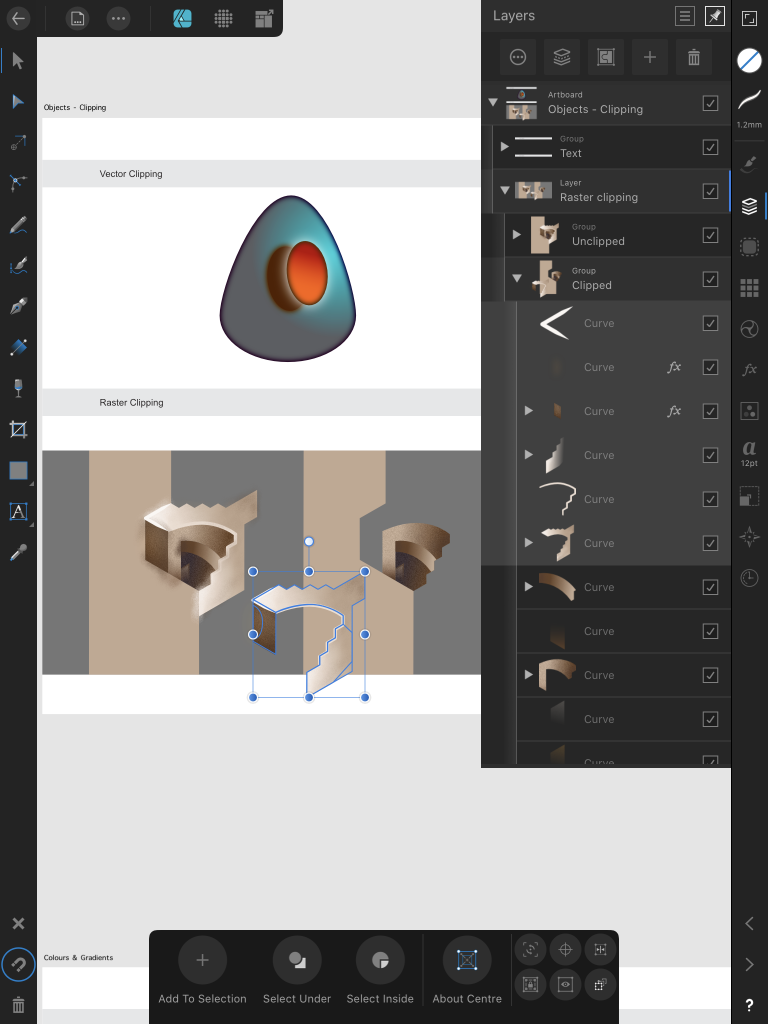
Reset the block to its original setup.
You can see the Video Tutorial on my YouTube channel here. Remember to Subscribe to the Channel. Thanks.